Всем привет! Сегодня мы рассмотрим новую версию среды программирования от компании Microsoft — Visual Studio 2019. Вы узнаете, что нового появилось в этой версии, в каких редакциях она выпускается, какие системные требования необходимо выполнить для ее установки, где скачать Visual Studio, а также мы подробно разберем процесс установки Visual Studio 2019 в редакции Community на операционную систему Windows 10, и даже создадим и запустим свой первый тестовый проект.
Содержание
- Обзор Visual Studio 2019
- Редакции Visual Studio 2019
- Системные требования Visual Studio 2019
- Что нового в Visual Studio 2019?
- Где скачать Visual Studio 2019 Community?
- Установка Visual Studio 2019 Community на Windows 10
- Шаг 1 – Запускаем установщик
- Шаг 2 – Выбор компонентов, настройка установки
- Шаг 3 – Процесс установки и его завершение
- Создание нового проекта в Visual Studio Community 2019, и запуск первой программы
- Видео-инструкция по установке Visual Studio 2019 Community
Visual Studio – это интегрированная среда разработки (IDE) от компании Microsoft.
С помощью Visual Studio можно разрабатывать:
- Классические приложения для компьютера под управлением операционной системы Windows;
- Мобильные приложения (Windows, iOS, Android);
- Web-приложения;
- Облачные приложения;
- Различные расширения для Office, SharePoint, а также создание собственных расширений для Visual Studio;
- Игры;
- Базы данных SQL Server и SQL Azure.
В Visual Studio Вы можете использовать следующие технологии и языки программирования: .NET, Node.js, C, C#, C++, Python, Visual Basic, F#, JavaScript.
Редакции Visual Studio 2019
Актуальной на текущий момент является версия Visual Studio 2019, выпускается она в следующих редакциях:
- Community – бесплатная версия среды разработки Visual Studio. Чтобы ее использовать, необходимо создать учетную запись Visual Studio, в противном случае она будет действовать 30 дней. Редакция имеет меньший функционал по сравнению с платными редакциями, однако она включает все необходимое для создания полноценных приложений. Походит для индивидуальных разработчиков и обучения;
- Professional – редакция содержит профессиональные инструменты для разработки приложений. Функционал в этой редакции все равно не полный, например, это заметно в части инструментов диагностики, отладки и тестирования. Подходит для небольших групп разработчиков;
- Enterprise – полнофункциональная версия Visual Studio. Комплексное решение для разработки приложений. Подходит для групп любого размера с высокими требованиями к качеству и масштабу.
Более детально посмотреть сравнение редакций Visual Studio 2019 Вы можете на следующей странице — https://visualstudio.microsoft.com/ru/vs/compare/
Системные требования Visual Studio 2019
Среду Visual Studio 2019 можно установить и работать в ней на следующих операционных системах (перечислены официально поддерживаемые версии):
- Windows 7 с Service Pack 1;
- Windows 8.1 (с обновлением 2919355);
- Windows 10 (1703 и выше);
- Windows Server 2012 R2 (с обновлением 2919355);
- Windows Server 2016 (Standard и Datacenter);
- Windows Server 2019 (Standard и Datacenter).
Минимальные требования к оборудованию:
- Процессор с тактовой частотой не ниже 1,8 ГГц. Рекомендуется использовать как минимум двухъядерный процессор;
- 2 ГБ оперативной памяти, рекомендуется 8 ГБ (если устанавливать на виртуальную машину, то минимум 2.5 ГБ);
- Свободного места на жестком диске от 800 мегабайт до 210 гигабайт, в зависимости от установленных компонентов. В большинстве случаев выделяйте как минимум 30 гигабайт, например, я устанавливал всего несколько компонентов, и у меня заняло более 20 ГБ места на жестком диске. Также Microsoft рекомендует устанавливать Visual Studio на SSD диск, я как раз устанавливал на SSD (на своем ноутбуке), скорость работы Visual Studio меня, конечно, порадовала;
- Видеоадаптер с минимальным разрешением 1280 на 720 пикселей (для оптимальной работы Visual Studio рекомендуется разрешение 1366 на 768 пикселей и более высокое).
Дополнительные важные моменты:
- Для установки Visual Studio 2019 требуются права администратора;
- Для работы Visual Studio 2019 требуется платформа .NET Framework 4.7.2, она будет установлена во время установки среды;
- Варианты «Основные серверные компоненты» и «Минимальный серверный интерфейс» не поддерживаются при запуске на Windows Server;
- Запуск Visual Studio 2019 (Professional, Community и Enterprise) в контейнерах Windows не поддерживается;
- Для интеграции Team Foundation Server 2019 с Office требуется Office 2016, Office 2013 или Office 2010;
- Для установки компоненты «Разработка мобильных приложений на C++, JavaScript или .NET» в ОС Windows 7 требуется PowerShell 3.0 или более поздняя версия;
- Visual Studio Community 2019 требуется активировать в течение 30 дней после установки, для этого необходимо создать учетную запись.
Заметка! Compiler Explorer интерактивный онлайн компилятор.
Что нового в Visual Studio 2019?
Новых возможностей в среде Visual Studio 2019 появилось очень много, я перечислю только небольшую часть:
- Новый интерфейс создания проектов;
- Новые возможности установки обновлений – теперь можно выбрать способ установки обновлений Visual Studio и полностью контролировать его («Сервис -> Параметры»), а также обновления Visual Studio загружаются в фоновом режиме, только когда компьютер бездействует;
- Доступна совместная работа с другими пользователями с помощью среды Visual Studio Live Share, которая устанавливается по умолчанию;
- Переработан интерфейс среды, в частности увеличено вертикальное пространство для кода;
- Добавлен вид расширения: «Бесплатное», «Платное» и «Пробная версия» – теперь гораздо легче распознать версию расширения, также добавлены соответствующие теги, для более удобного поиска;
- Система управления версиями – теперь можно временно сохранить изменения, чтобы работать над другими задачами, это возможно благодаря поддержке временного хранилища Git средствами Git в Team Explorer;
- Очистка кода одним щелчком – теперь отреагировать на предупреждения и рекомендации среды можно одним нажатием кнопки;
- Усовершенствованный поиск – теперь поиск выдает более точные результаты (а также поиск стал возможен в окнах отладки);
- Индикатор хода выполнения сборки – теперь мы можем наблюдать более подробные сведения о ходе выполнения сборки, полезно, если проект крупный и на его сборку затрачивается много времени.
Более подробно посмотреть все нововведения можете на официальной странице – Заметки о выпуске Visual Studio 2019.
Скачать Visual Studio 2019 в редакции Community можно с официального сайта со страницы загрузки – https://visualstudio.microsoft.com/ru/downloads/
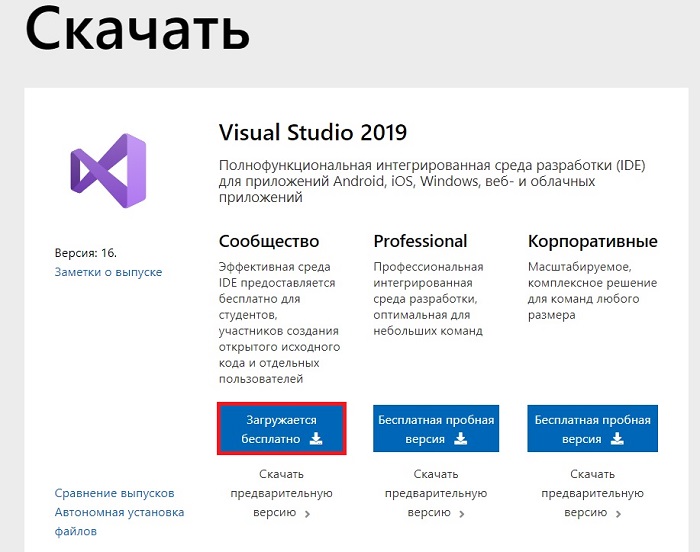
Также загрузить Visual Studio 2019 Community можно и с отдельной страницы, посвященной редакции Community, вот она – https://visualstudio.microsoft.com/ru/vs/community/
С главной страницы официального сайта также возможно загрузить Visual Studio 2019 Community, только в этом случае необходимо выбрать нужную редакцию.
Платные редакции Professional и Enterprise Вы также можете скачать для тестирования, т.е. они имеют 90-дневную пробную версию.
В результате у Вас должна загрузиться программа установщик vs_Community.exe.
Перед тем как переходить к установке Visual Studio 2019, хотелось бы еще раз отметить, что для того чтобы установить хотя бы пару компонентов (рабочих нагрузок), потребуется достаточно много места на жестком диске (10-20 гигабайт), а если установить больше 2-3 компонентов, то объем может достигать и сотни гигабайт, у меня установка Visual Studio 2019 заняла более 20 ГБ места на жестком диске.
Хорошо, что установщик в 2019 версии Visual Studio (который появился в 2017 версии, но в 2019 он улучшен) позволяет выбрать только те компоненты, которые нужны нам для создания нашего приложения, например, если нам нужно разработать web-приложения, устанавливать рабочие нагрузки для создания классических приложений не требуется, тем самым мы можем экономить место на жестком диске.
Также в случае необходимости мы всегда можем удалить ненужные нам компоненты.
Шаг 1 – Запускаем установщик
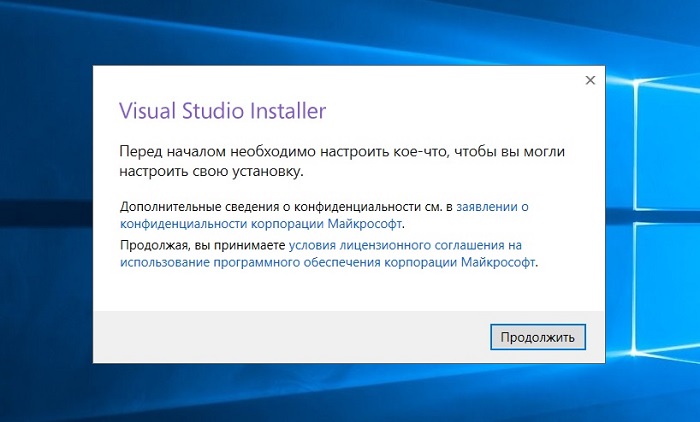
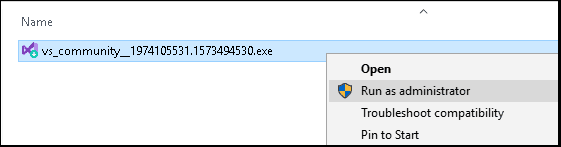
Запускаем скаченный установщик, т.е. файл vs_Community.exe.
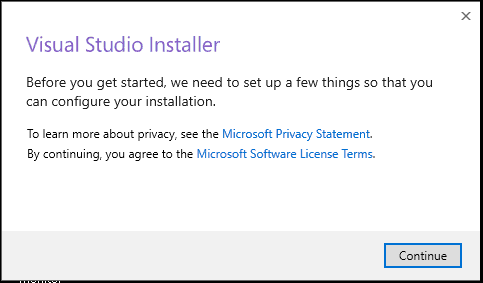
Сначала установщику необходимо выполнить подготовительные действия, нажимаем «Продолжить», тем самым мы также соглашаемся с условиями лицензионного соглашения.
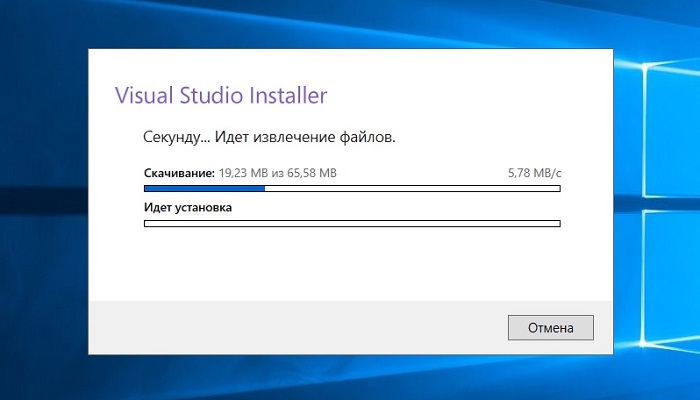
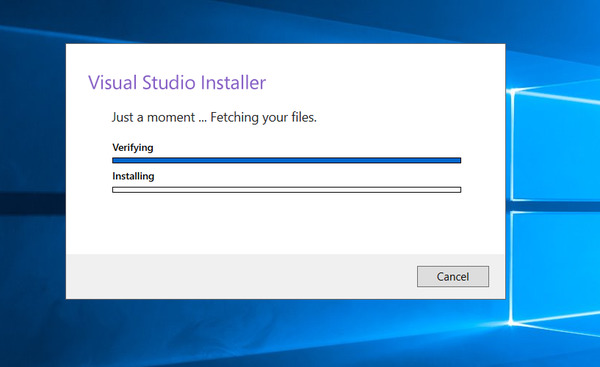
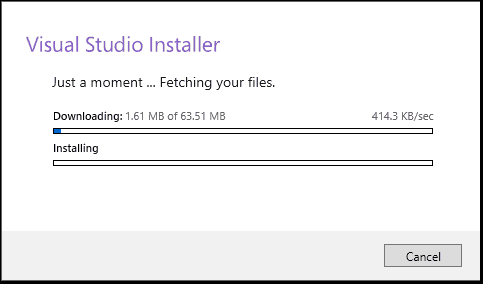
После чего загрузятся и установятся необходимые файлы установщика.
Шаг 2 – Выбор компонентов, настройка установки
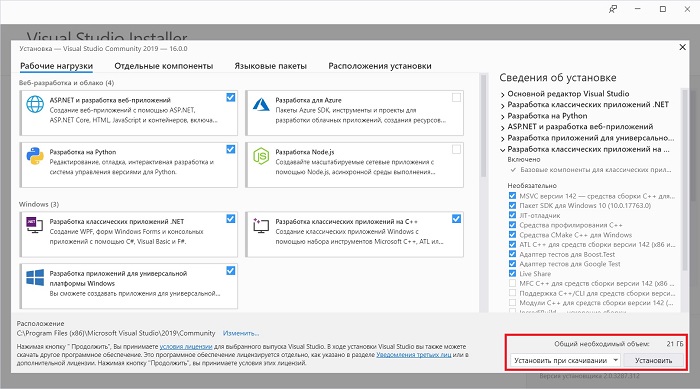
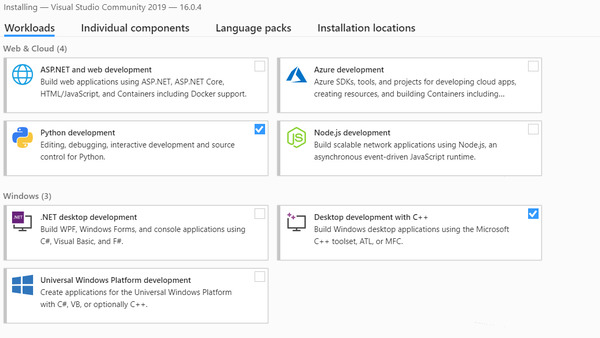
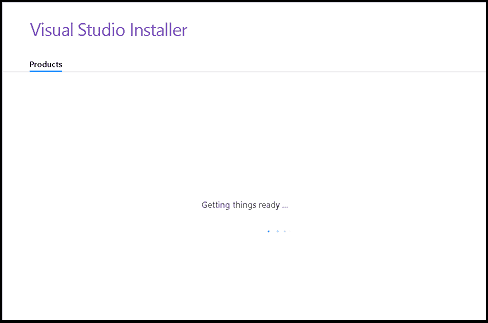
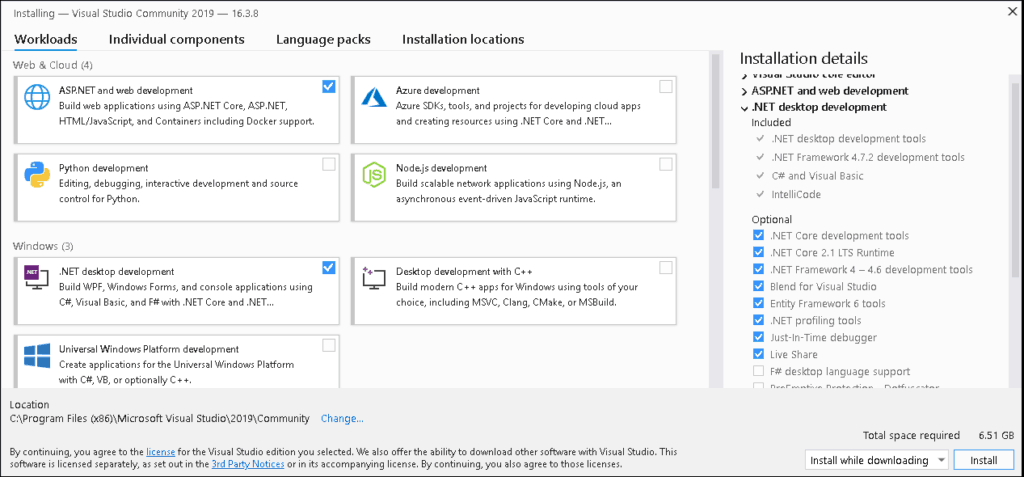
После того как установщик выполнит все необходимые предварительные мероприятия, он запустится. Теперь нам нужно выбрать «Рабочие нагрузки», т.е. что мы будем создавать с помощью Visual Studio 2019 Community, я выбрал разработку как классических приложений под компьютер, так и разработку Web-приложений.
В принципе после этого можно сразу нажимать «Установить», но в случае необходимости Вы можете более детально настроить установку, для этого есть дополнительные вкладки: «Отдельные компоненты», «Языковые пакеты» и «Расположения установки».
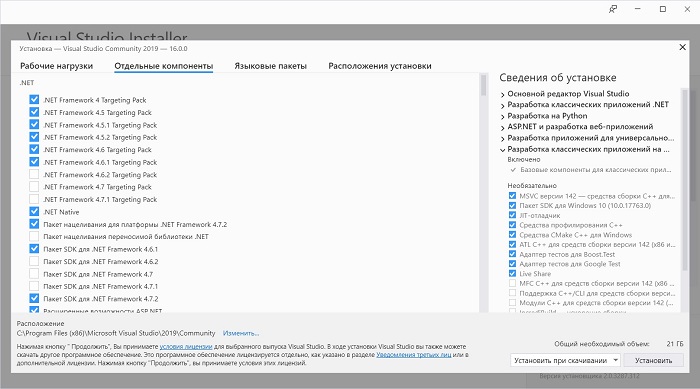
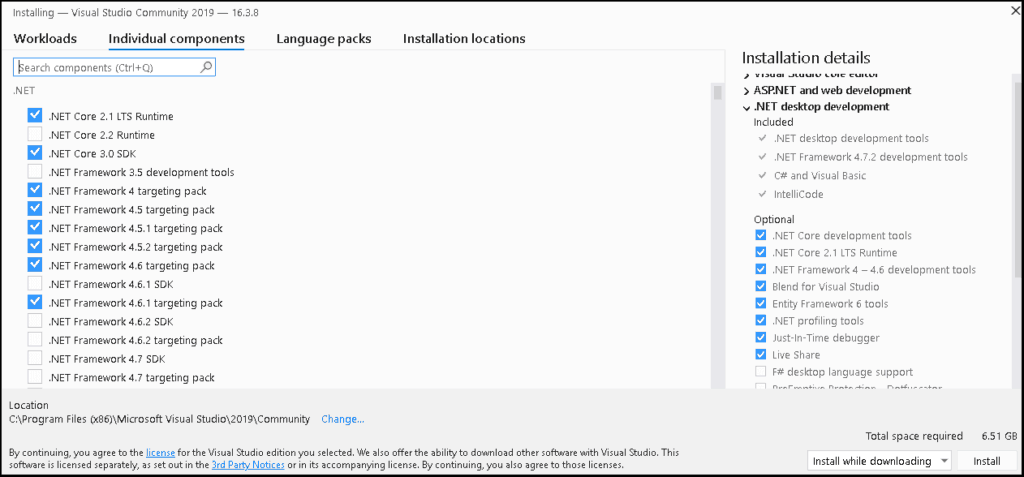
Вкладка «Отдельные компоненты» – если есть такая необходимость, Вы можете конкретизировать компоненты, которые необходимо установить, на этой вкладке.
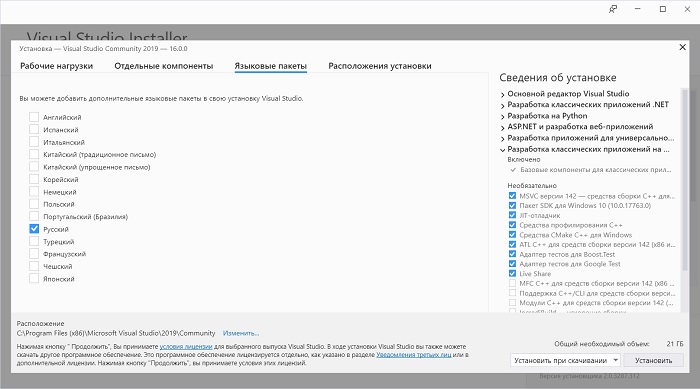
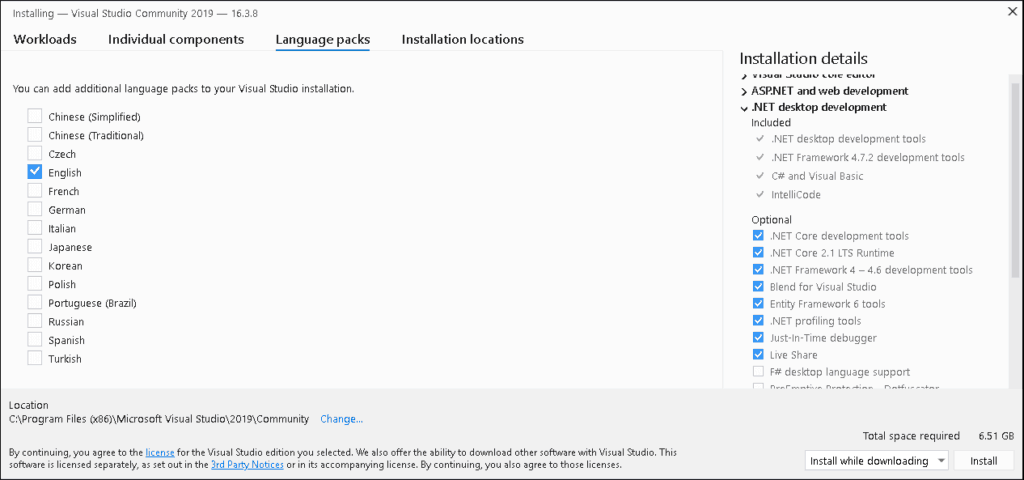
Вкладка «Языковые пакеты» – по умолчанию установлен язык, соответствующий языку системы, но, если Вам нужен другой, Вы можете изменить его на данной вкладке.
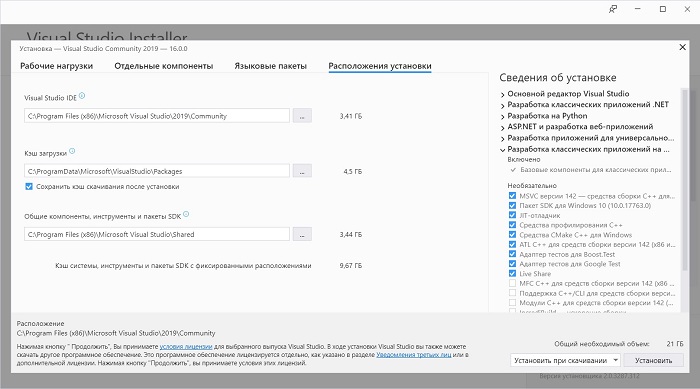
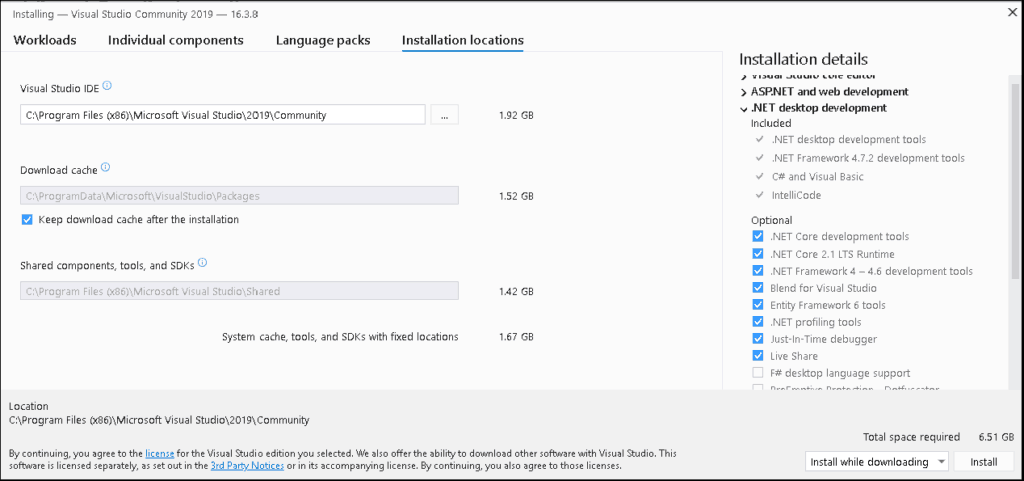
Вкладка «Расположения установки» – здесь Вы можете изменить каталог, в который будет установлена среда Visual Studio.
Шаг 3 – Процесс установки и его завершение
После того как Вы нажали кнопку установить, начнется процесс загрузки и установки всех выбранных компонентов. В зависимости от объема компонентов, скорости интернета и характеристик ПК продолжительность данного процесса будет различаться, специально я не засекал, но мне кажется, он у меня длился минут 20-30.

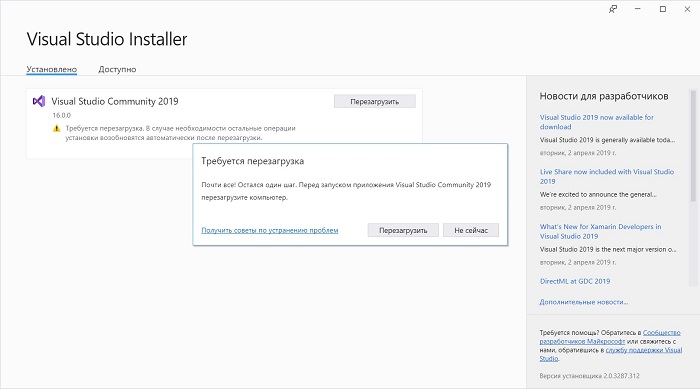
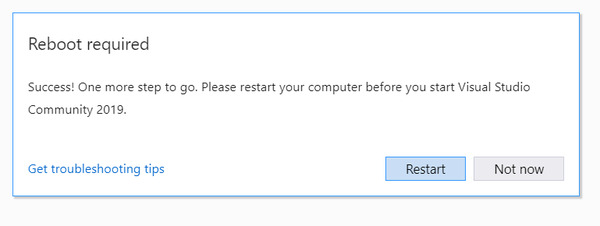
Когда появится следующее окно, установка будет завершена, нажимаем «Перезагрузить».
Заметка! О статическом анализе кода в теории и на практике.
Теперь я предлагаю запустить Visual Studio Community 2019, и посмотреть, как она выглядит, и для примера давайте даже создадим проект программы, и запустим его на выполнение.
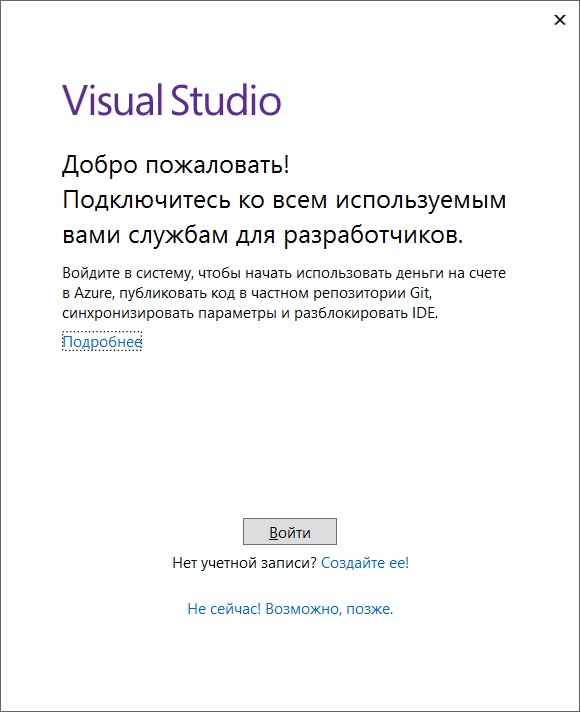
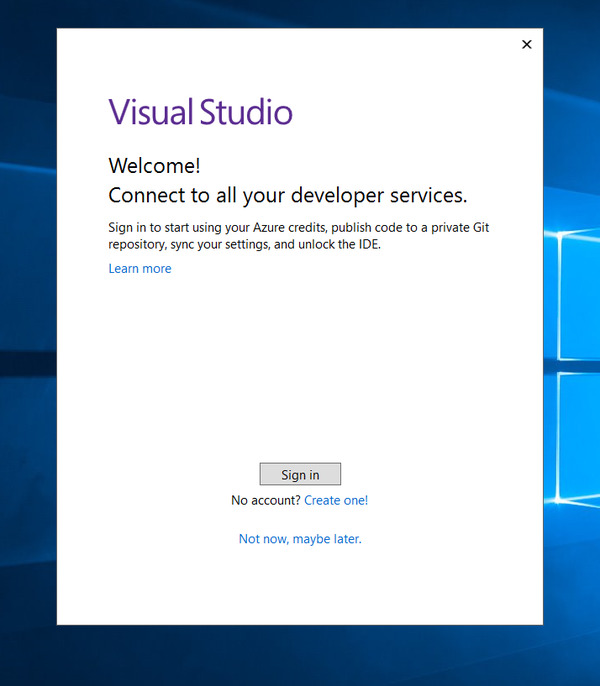
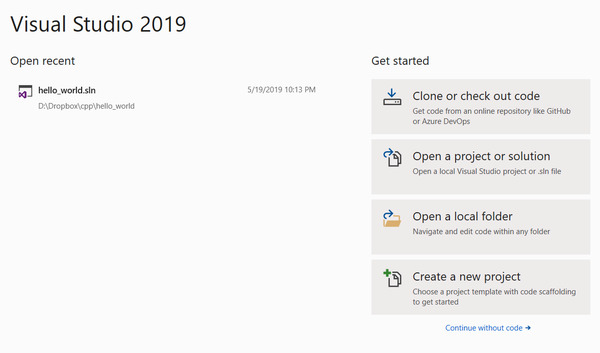
При первом запуске нам предлагают войти в учетную запись, если она есть, то входите, если нет, Вы можете ее создать прямо сейчас, также возможно отложить создание учетной записи, для этого просто нажимайте кнопку «Не сейчас! Возможно, позже.»
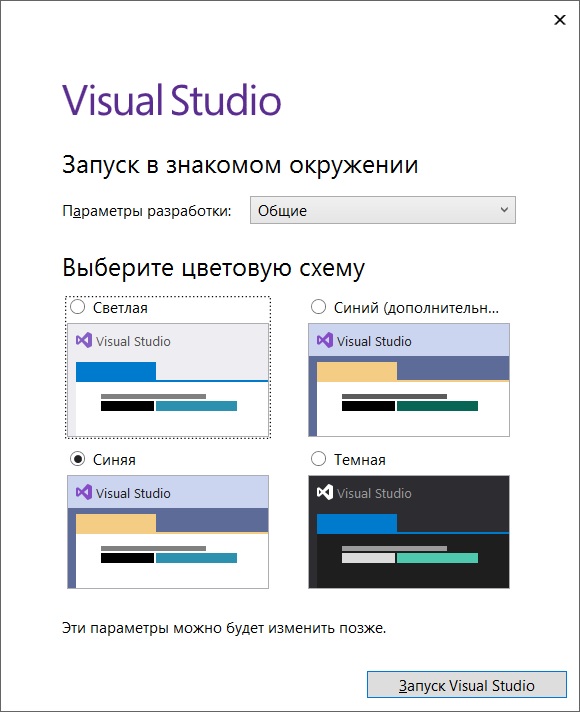
Затем выбирайте цветовую схему оформления среды Visual Studio и нажимайте «Запуск Visual Studio».
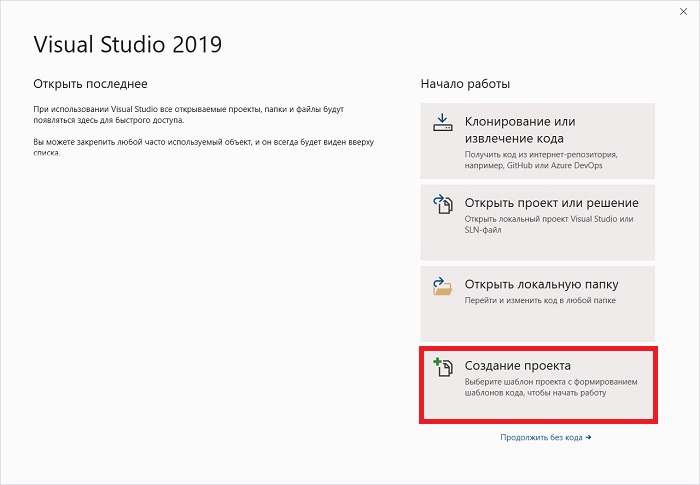
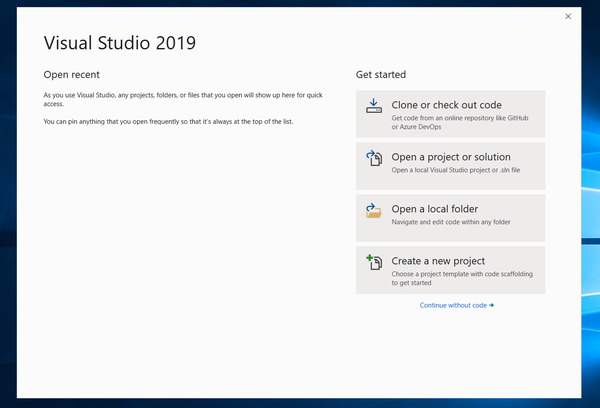
Далее, так как никаких проектов у нас еще нет, мы можем создать новый проект, или продолжить без кода и создать проект позднее.
Для примера я сразу создам проект.
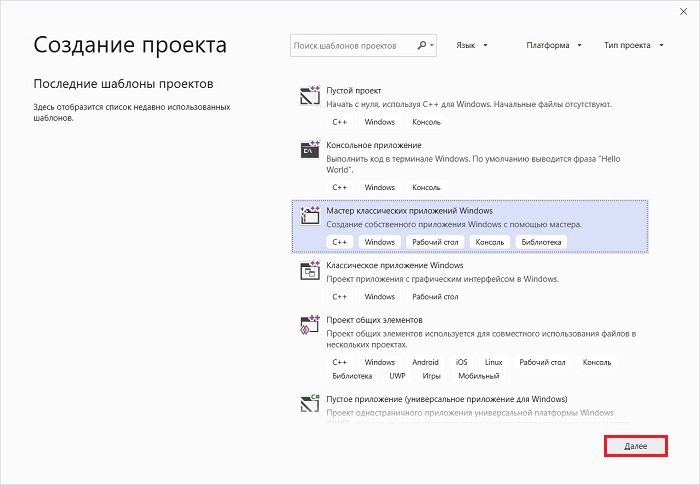
В качестве шаблона проекта я выберу «Мастер классических приложений Windows».
Нажимаем «Далее».
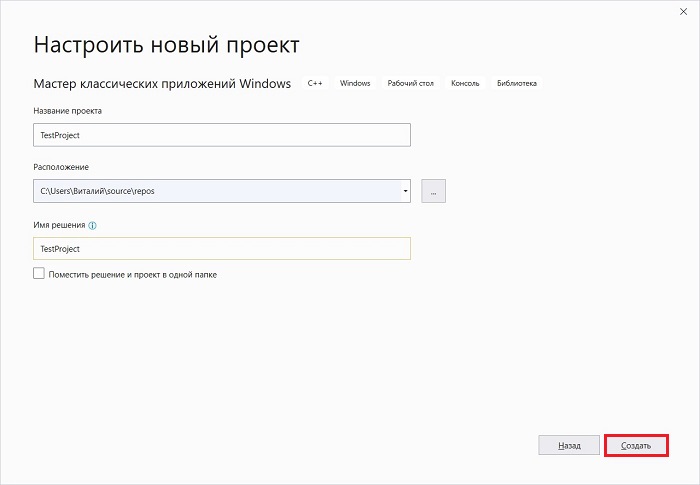
Затем указываем название проекта и расположение файлов этого проекта.
Нажимаем «Создать».
Заметка! Этапы разработки программы – как создаются и проектируются программы?
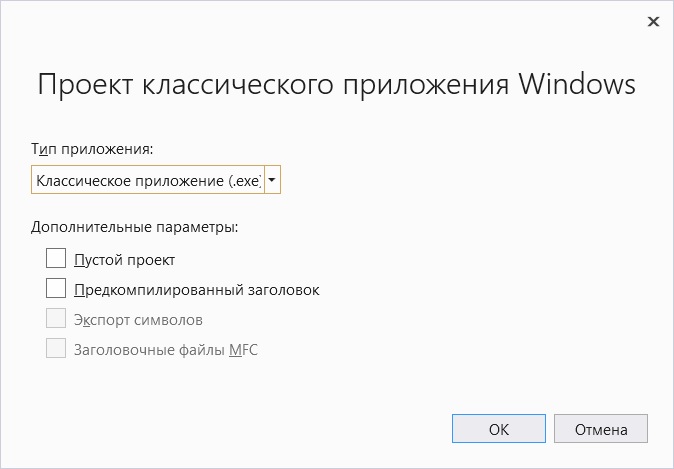
Потом выбираем тип приложения и дополнительные параметры, если требуется. Я выберу «Классическое приложение», параметры оставлю по умолчанию. Нажимаем «ОК».
В итоге будет создан шаблон программы, включая код, который, кстати, будет подробно прокомментирован на русском языке, и все необходимые ресурсы, т.е. по факту шаблонная программа уже будет создана, и чтобы запустить ее, можете сразу нажать на кнопку «Локальный отладчик Windows», на панели инструментов.

В результате запустится программа, в которой даже будет меню.
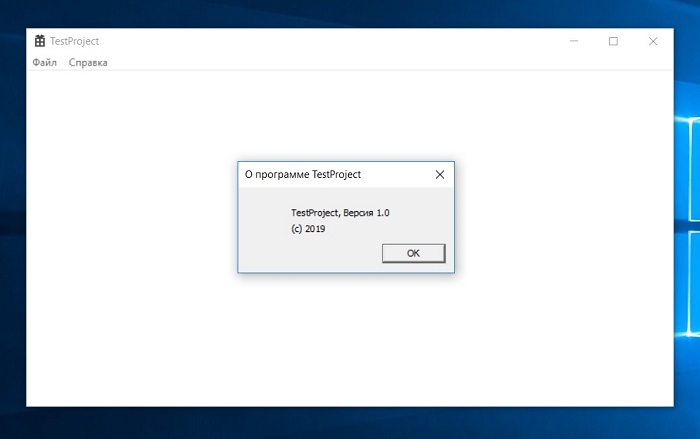
Таким образом, Visual Studio может за нас сделать огромную часть работы, а нам останется только разработать нужный нам функционал, и включить его в эту шаблонную программу (конечно же, если речь идет о простых программах).
Видео-инструкция по установке Visual Studio 2019 Community
Заметка! Как измерить сложность кода программы при программировании?
На этом мой обзор среды Visual Studio 2019 Community закончен, надеюсь, материал был Вам полезен, пока!
In this article, I will show you how to install Visual Studio 2019 Community on to your machine to kickstart your development journey. Here is why everyone prefers Visual Studio over other IDEs – It’s a product from Microsoft who has built the .NET Framework, so obviously they know how to cater to the needs of the developers who use their framework.
Before Installing Visual Studio.
- Make sure your Operating System is up to date with the latest patches from Windows. Visual Studio requires a minimum of Windows Service Pack 1 or newer. I believe everyone has Windows 10 by now, so you will be good to go!
- Reboot your system before the installation process so that you can ensure that there are no other pending installations or updates which would otherwise slow down or block the installation.
- Have enough free space on your storage. Visual Studio is quite a huge application. It could take up 40+ Gb with all the features installed. Also, make sure you have a pretty decent internet connection.
Community vs Professional vs Enterprise.
We all love free stuff, don’t we? Visual Studio comes in 3 different Editions, namely Community, Professional, and Enterprise. The FREE Edition is Visual Studio 2019 Community. It is the most suitable edition for individual developers who build small applications and contribute to the open-source community. The Community Edition gives you a lifetime free account that is just WOW!
Download the Visual Studio Installer
Let’s start the installation process by first downloading the Visual Studio Installer, which is about 80 Mb in file size. Navigate to https://visualstudio.microsoft.com/vs/ and click over Community 2019.

This will open a popup prompting you to select a download location. Select your desired location and hit on Save button.

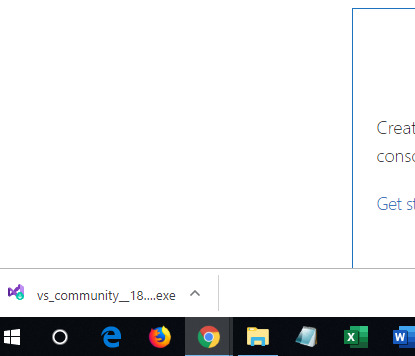
Once the download is complete, click on the arrow icon on Chrome and hit on the Show in Folder option or directly open up the downloaded file.

Right click on the downloaded file and click on Run as Administrator. Note : This is not a mandatory step, but just in case.

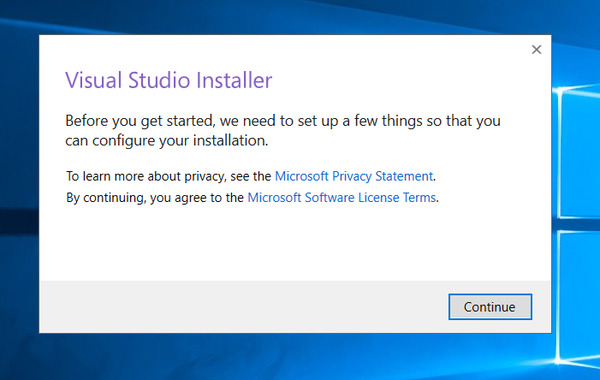
Click on Continue. This will start downloading the actual setup files, which is somewhat around 80-100 Mb.


Select the Required Workloads
What are workloads? Basically there are the environments that you will need for developing platform-specific applications. I recommend you to go through each option and select the required ones. I would install ASP.NET, .NET Desktop Development, Data storage and processing, and finally .NET core cross-platform development (Very Important!). These Selections would take up around 9Gb on my storage.

Select the Language Packs – Optional
By default Visual Studio Installer tries to match the language of your operating system. You are also free to choose the language packs of your preference.

Select an Installation Location – Optional
By default, Visual Studio Community 2019 gets installed on your Operating System’s default Drive in the Programs Folder. If you do not have enough space on your C drive, you would want to re-allocate the location to another drive with sufficient storage space.

Start Installation
Once you are happy with your selections, Hit the Install button. Visual Studio will start getting downloaded on to your machine. This would take around 20 – 40 minutes depending on your machine and internet connection.

Starting Visual Studio 2019 Community for the first time.
You will be welcomed with such a splash screen.

When you open Visual Studio for the first time, it would take about 15-30 seconds for its initial internal setup. You will be asked to sign in for the first time. The sign-in step is optional so it can be skipped. But, DO NOT SKIP THIS! Sign in with your Hotmail / Microsoft account so that you can activate Visual Studio and get a lifetime license for FREE!

Once done, you will be asked to choose the Development Settings and color theme.

After selecting the required options, click on Start Visual Studio option. You will be presented with the Quick Launch Options of Visual Studio. Here you can see your recent Projects (It would be empty in your case), and some quick menus.

Creating your First Project
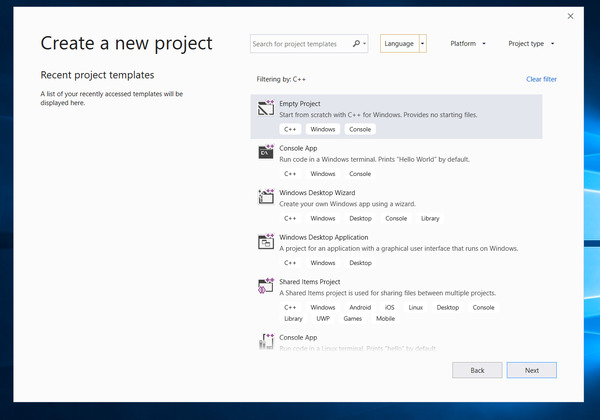
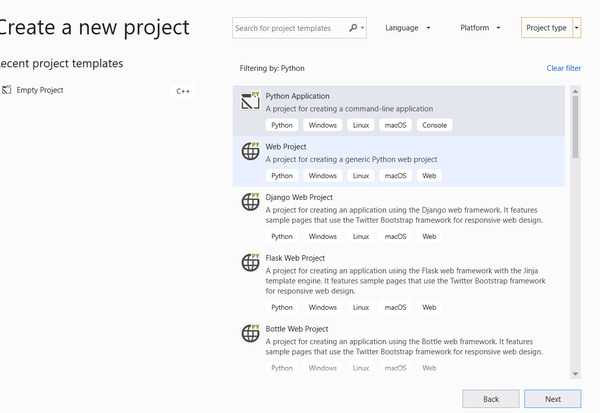
Click on Create a new Project. Here you get to choose the various Project Templates that are available in your Visual Studio Installation. For now, Let’s go Simple! Search for Console App (.NET Core), make sure it is in C#, not something else,and click Next.

Let’s give your new project a name. What is a Project? What is a Solution? This is something very very important to understand. The solution is something that can have multiple projects in it. A Project is a basic entity. Let’s say we are building an eCommerce Website. We will essentially have 2 parts in the application, ie, the Customer Site and the site for the Admins. Thus we will have 2 Projects.
It is always a good practice to make Solutions as modular as possible and not put everything into one project. We will learn a lot more about this later in the course. For now, let’s give a name for your project and choose a location to save the Solution. I have named my Project as MyFirstApp and left the location to the default value.

Once you are done, hit Create. Visual Studio will start building the project for you and generate some default files into your project so that you are not lost when you start. This is one great feature of Visual Studio.
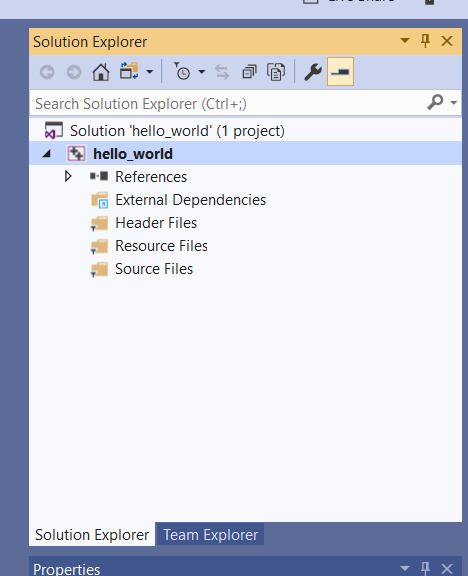
The studio has finished creating my required files and now opens up the IDE itself. To the right, you have the solution explorer where you get to see the files and folders in your project. To the Left Pane, is the area where you start making magic.

We will not touch the code in this tutorial, let’s save it for the next session.
Frequently Asked Questions
Is Visual Studio 2019 Free?
Yes, Completely. Visual Studio 2019 has 3 Variants, namely Professional, Enterprise, and Community. The Community version is completely free. You can check it out at https://visualstudio.microsoft.com/downloads/
How to create a Visual Studio account?
Just sign-up for a Microsoft account with your email address. You can use this to login to Visual Studio.
What is the size of Visual Studio 2019 Community?
It actually depends on the payloads you select while installing the IDE. If you are a C# Desktop & Web developer, it would take up around 8 gigs of your storage.
Did I miss out something? Are you using Visual Studio 2019 Community as your go-to IDE for C#? What is your experience with it? Are there any alternate preferences? Let me know in the comments section below.
In this post, I’ll show you how to set up Visual Studio Community 2019 for Windows 10. This IDE will help us build C++ and Python programs. Our goal is to create a simple “Hello World” program in C++ and in Python.
Requirements
Here are the requirements:
- Set up Visual Studio Community 2019 for Windows 10.
- Create a simple “Hello World” program in C++ and in Python
Directions
Installation of Visual Studio Community 2019
Open a web browser.
Type “download visual studio community” into your favorite search engine.
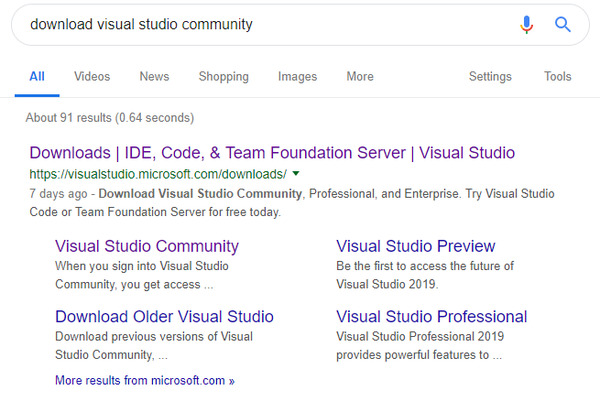
Click on the first result.
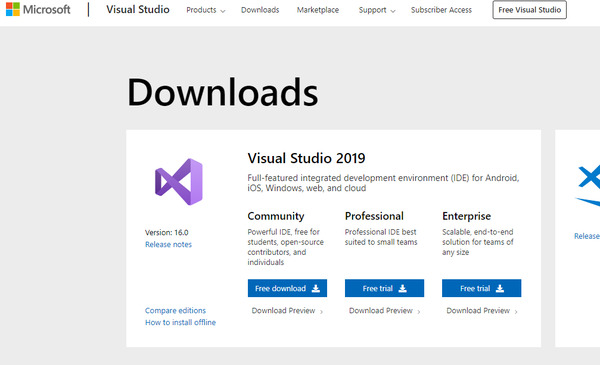
Click to download Visual Studio Community.
Click the up arrow (^) and then click “Show in folder.”
Right click on the file and click “Run as administrator.”
Click Yes.
Acknowledge the terms and conditions by clicking “Continue”.
Wait for the Visual Studio Installer to do its thing.
Select “Desktop Development with C++”. This is all you need to build C++ programs.
Select “Python development”. This is all you need to build Python programs.
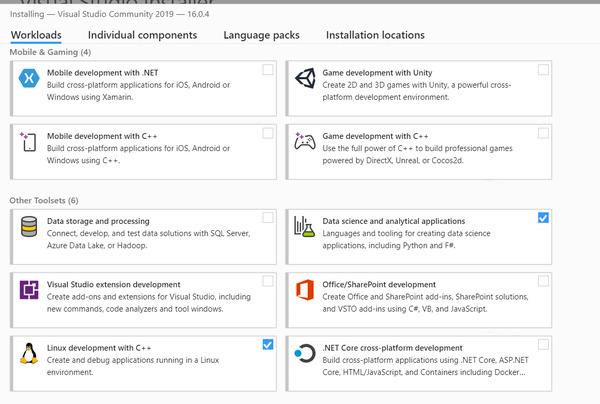
I also plan to develop for Raspberry Pi and do some data science, so I installed some extra workloads. This is optional if all you want to do is develop programs in C++ and Python:
- Linux development with C++
- Data science and analytical applications
Choose the individual components that you want to install. It is OK to keep the default. Here is what else I selected:
- Git for Windows
- GitHub extension for Visual Studio
- Class Designer (under Code Tools)
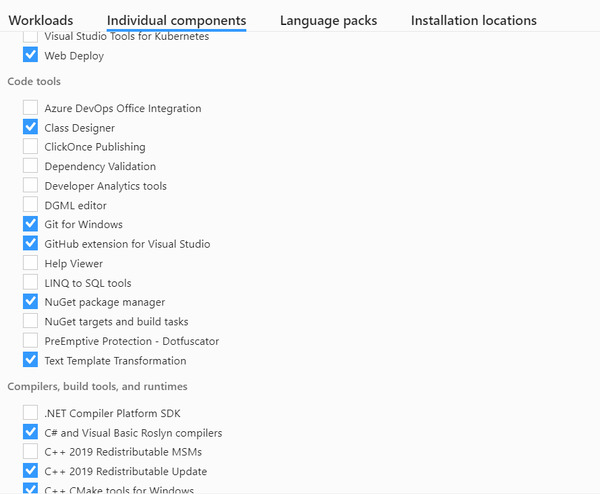
You don’t need any of the .Net stuff.
Click “Install”. Go get a bite to eat or take a break. This will take a while.

Once the install is complete, reboot your computer.
Search for the program “Visual Studio 2019” on your computer, and then create a Desktop shortcut for it so that it is easier to find the next time around.
On the sign-in screen, sign in using your Microsoft account (or create one).
Select “General”.
Creating the “Hello World!” Program in C++
Click “Create a new project”.
Click “Empty Project” to start a new project.
Configure your new project.
Right click on the project under the Solution Explorer. Go to Add -> New Item.
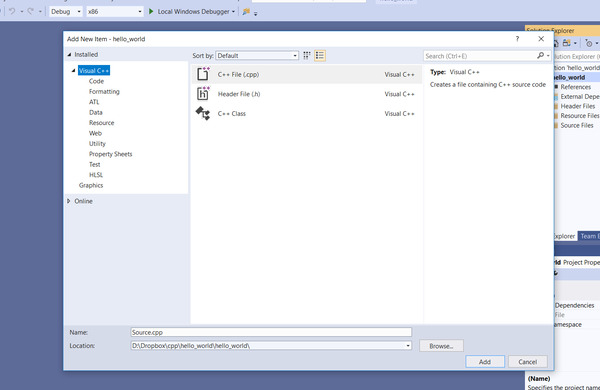
Select C++ File (.cpp), and give the source code a name. Then click “Add”.
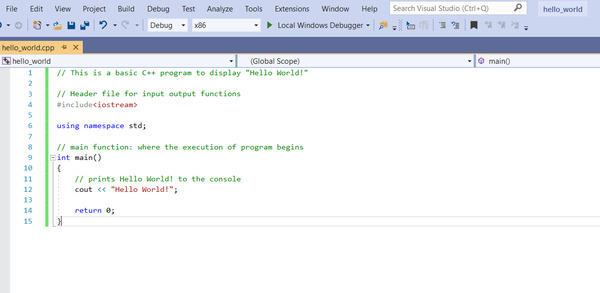
Type in the code for your “Hello World!” program:
// This is a basic C++ program to display "Hello World!"

// Header file for input output functions
#include<iostream>

using namespace std;

// main function: where the execution of program begins
int main()
{
	// prints Hello World! to the console
	cout << "Hello World!";

	return 0;
}
Click the green button (Local Windows Debugger) to compile and run.
You can also go to Build -> Build Solution. Then go to Debug -> Start Without Debugging.
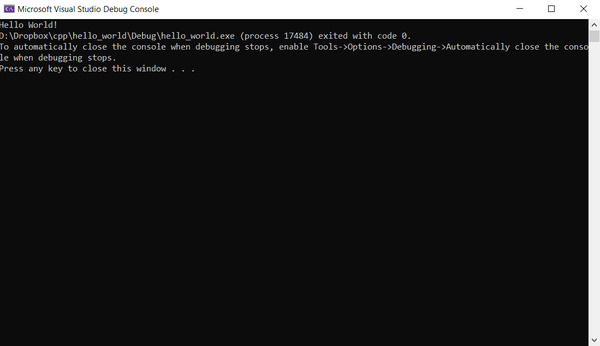
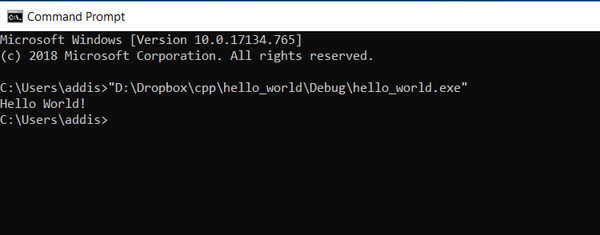
That’s it! You should see the Hello World! message pop up.
Running a Program in a Command Window
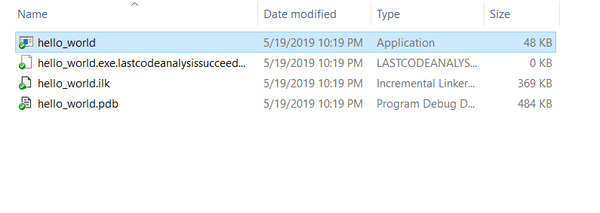
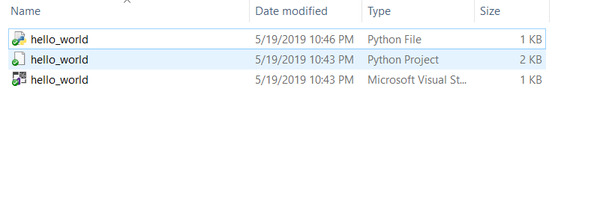
Solution Explorer (Right click the project name) -> Open Folder in File Explorer
Open the Debug folder.

Select the hello_world.exe application.
Hold down the Shift Key and right click to open a menu
Choose “Copy as path”.
Press Windows + R to open a command prompt window.
Type cmd.exe in the box.
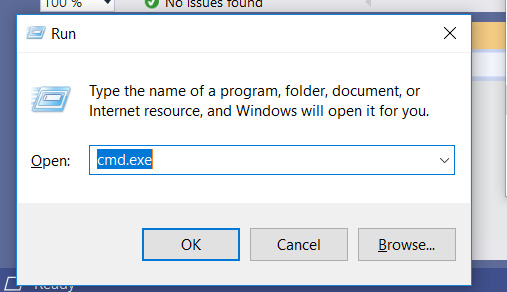
Click OK.
Right click to paste in the path.
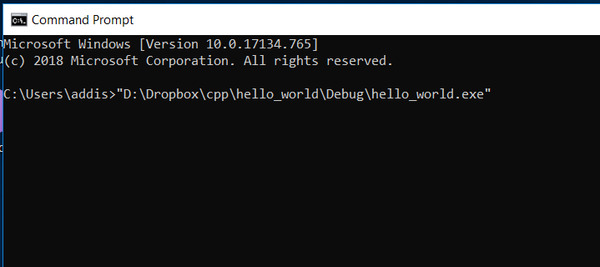
Press Enter to run.
Creating the “Hello World!” Program in Python
Click “Create a new project”.
Under “Language” select Python.
Select “Python Application”.
Configure your new project. This time I checked “Place solution and project in the same directory”.
Click “Create”.
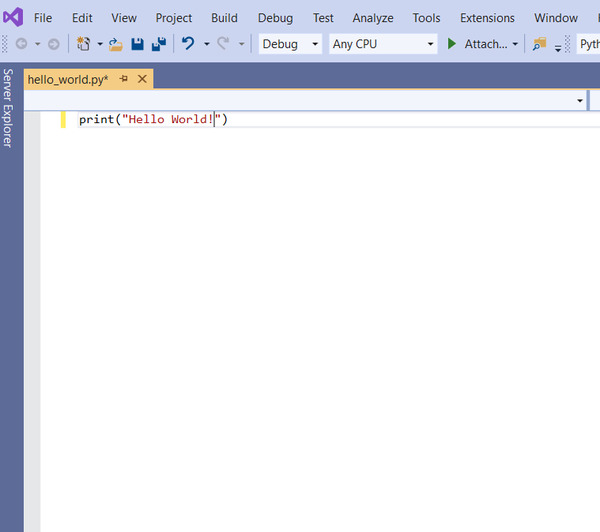
Type in the code for your “Hello World!” program:
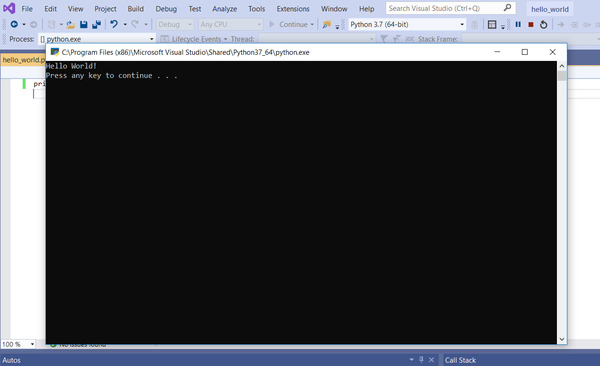
Click the green button (“Attach”) to run.
That’s it! You should see the message pop up.
To run via command line, go to the project folder and find the python file (hello_world.py in this case).
Hold down the Shift Key and right click to open a menu.
Choose “Copy as path”.
Press Windows + R to open a command prompt window.
Right click to paste in the path.
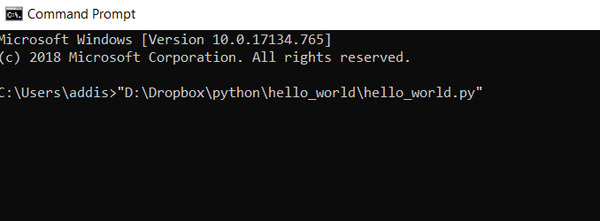
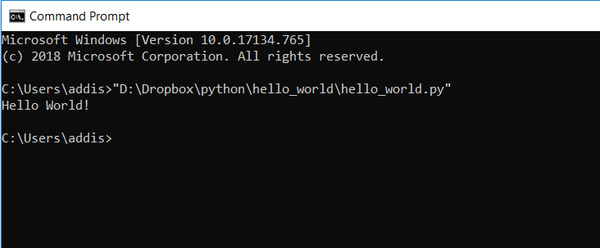
Press Enter to run. You might have to select the Python application you want to use to execute the file. You’ll only have to do this once.
The message should print to the terminal window. Congratulations! You are now ready to build C++ and Python programs!
Visual Studio 2019 Community edition offers an array of features tailored for individual developers and small teams. Whether you’re building web applications, mobile apps, or games, this IDE has what you need. Let’s get started on how you can download and install this essential tool to elevate your coding projects.
System Requirements
Before you proceed with the download and installation of Visual Studio 2019 Community edition, it’s essential to check the system requirements to ensure a smooth experience. Knowing these prerequisites beforehand will save you time and potential headaches later on.
Operating System
For Windows users, you’ll need to have Windows 10 version 1703 or higher. macOS users need to have macOS Sierra 10.12 or later.
Processor And Memory
You’ll require a 1.8 GHz or faster processor. Dual-core processors are recommended. A minimum of 2 GB of RAM is required, but 8 GB is recommended for optimum performance.
Disk Space
A fresh install will take up approximately 20–50 GB of disk space, depending on the features and workloads you choose during installation. Make sure you have adequate free space.
Additional Components
You might need .NET Framework 4.5 or later, and you may have to enable Windows Features like WCF HTTP Activation if they’re not already activated.
Here’s a quick example of how to check your system’s RAM and processor speed on a Windows system using PowerShell:
# Check available RAM
Get-CimInstance -ClassName CIM_PhysicalMemory | Select-Object Capacity

# Check processor speed
Get-CimInstance -ClassName CIM_Processor | Select-Object MaxClockSpeed
📌
The first command retrieves the system’s RAM size. The second command shows the maximum clock speed of the processor.
By running these commands, you can verify whether your system meets the required specifications for Visual Studio 2019 Community edition.
Download Steps
To kick off your experience with Visual Studio 2019 Community edition, the first step is to download the installer. Head to the official Microsoft website to grab the setup file.
Select The Edition
On the download page, you’ll find multiple editions. Make sure to choose the Community edition for individual use or smaller teams.
Download The Installer
Once you’ve made your selection, click the Download button. The installer will be downloaded as an .exe file for Windows users or a .pkg file for macOS users.
Check Download Integrity
It’s a good practice to verify the hash value of your downloaded file to ensure it hasn’t been tampered with. You can do this via the command line.
For example, on a Windows machine, you can verify the SHA256 hash of the downloaded installer like so:
# Calculate the SHA256 hash of the downloaded file
Get-FileHash -Path "path-to-downloaded-file.exe" -Algorithm SHA256
📌
Replace "path-to-downloaded-file.exe" with the actual path to your downloaded installer.
The output hash should match the one listed on the Microsoft website to confirm the file’s integrity.
Temporary Disable Antivirus
Before running the installer, you might want to disable your antivirus temporarily. Some antivirus software can interfere with the installation process.
Run as Administrator
Finally, navigate to the downloaded installer and right-click to choose Run as administrator. This ensures that the installer has the necessary permissions to make changes to your system.
🧐
Now you are all set to proceed with the installation. Follow the on-screen instructions, and you’ll be coding away in no time.
How To Use Visual Studio Community For Your Projects
Visual Studio Community is a robust IDE tailored for developers. This article delves into its features, from setting up to integrating plugins, offering practical insights for efficient coding. Whether you’re new or familiar with it, there’s something here for everyone.
 Oleh Akhmetov

Installation Process
Now that you have the installer downloaded, it’s time to move on to the installation process. You’ve already run the installer as an administrator; now, let’s take a closer look at what comes next.
Choose Workloads
During installation, you will be prompted to select specific workloads. These are essentially the types of projects you’ll be working on. Choices include Web Development, Mobile Development, and more.
Select Components
Additionally, you’ll be able to pick individual components to install, such as different languages or databases. Make your selections based on the projects you anticipate working on.
Set Installation Path
The installer will suggest a default installation path. While you can use this location, you also have the option to choose a different directory if you prefer.
Start Installation
After confirming your selections, click the Install button. A progress bar will appear, providing updates as the installation proceeds.
Check Installation
Once the installation is complete, you can verify the installed features using the Visual Studio Installer. Here’s how to list the installed components via the command line:
# List all installed components
vs_installer --list-components
📌
Open PowerShell and navigate to the directory containing vs_installer. Run the command to display a list of installed components.
Post-Installation Tweaks
You might want to customize the IDE after the installation. This could involve changing the color theme or installing additional extensions to boost your productivity.
📌
With these steps completed, your Visual Studio 2019 Community edition should be up and running. Now, you’re ready to start building your next big project.
First-Time Setup
After completing the installation process, it’s time to configure Visual Studio 2019 Community edition for your specific needs. The first-time setup can influence your development workflow significantly.
Choose Development Settings
When you first launch the IDE, you’ll be prompted to select your development settings. Choices typically include languages like C#, C++, and more. Choose based on your primary development language.
Pick A Theme
The IDE also allows you to select a color theme. Options usually include light, dark, and blue. Choose one that’s easy on your eyes to make those long coding sessions more comfortable.
Sign In Or Create An Account
You’ll be prompted to sign in with a Microsoft account. This enables features like syncing your settings across multiple devices. If you don’t have an account, you can create one during this step.
Configure GIT
If you use Git for version control, you can set up your Git credentials within the IDE. Navigate to View > Team Explorer and enter your Git username and email.
For example, in the Team Explorer window, to set Git credentials, you might do:
# Set username and email
git config --global user.name "Your Name"
git config --global user.email "your.email@example.com"
📌
Replace "Your Name" and "your.email@example.com" with your own details. This sets your global Git credentials within Visual Studio.
Workspace Customization
Finally, you might want to customize your workspace. You can add or remove tool windows, set up keyboard shortcuts, and more via Tools > Options.
🧐
By following these steps, your IDE will be tailored to your preferences and ready for use. Now you can start your coding journey with Visual Studio 2019 Community edition fully configured.
Key Features
Visual Studio 2019 Community edition is packed with a variety of key features that enhance your coding experience. Knowing these features can drastically improve your productivity and code quality.
IntelliSense
One of the standout features is IntelliSense, which offers smart completions based on variable types, function definitions, and imported modules. It’s not just autocomplete; it’s an intelligent code completion tool.
Debugging Tools
The robust debugging tools provide features like step-through debugging, conditional breakpoints, and real-time variable inspection. These tools significantly aid in identifying and fixing issues.
Version Control
Built-in version control makes managing your codebase simpler. It supports Git and other VCS out of the box, so you can clone, commit, and push without ever leaving the IDE.
For example, to clone a Git repository, navigate to Team Explorer and use:
# Clone a Git repository
git clone https://github.com/your-username/your-repo.git
📌
Replace https://github.com/your-username/your-repo.git with the actual repository URL. This clones the repository directly within the IDE.
Extensions And Plugins
Extend the IDE’s functionality through extensions and plugins. The Visual Studio Marketplace offers countless extensions to streamline your workflow.
💡
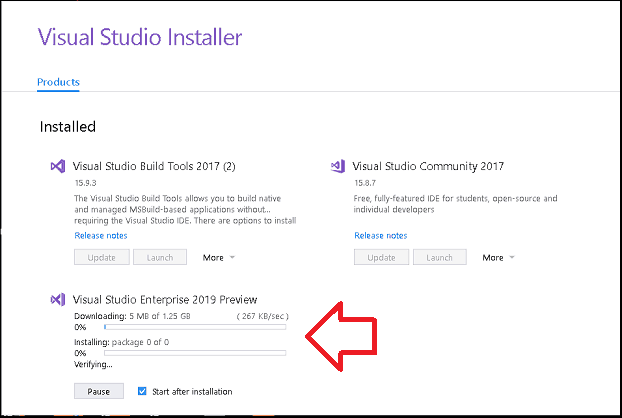
Case Study: Issues with Extension Installation in Visual Studio 2019
A developer faced an issue while attempting to download and install an extension within the Visual Studio 2019 IDE.
Although the download appeared successful and prompted the message «changes will be scheduled and the installs will begin when I close all windows,» the extension did not install after closing all open windows in the IDE.
Even after restarting the IDE, the extension was nowhere to be found.
🚩
Solutions:
One recommended solution was to exit the IDE by navigating to File menu => Exit rather than clicking the ‘X’ button on the top-right corner. The idea was that this action might trigger the extension installation as intended.
Another workaround was to manually download the extension from the Visual Studio Marketplace. Once downloaded, the user could double-click the .vsix file to initiate the installation process manually.
If the popup for installation didn’t appear, the .vsix file could also be found in the %USERPROFILE%\AppData\Local\Temp folder. Running the file from this location was also suggested to initiate the installation.
🧐
Conclusion:
While the issue was not replicated on all machines, these workarounds and additional recommendations provided several avenues for resolving the troublesome extension installation in Visual Studio 2019.
This case highlights the importance of not only having a deep understanding of IDE functionalities but also knowing how to troubleshoot effectively when faced with unexpected issues.
Live Share
A novel feature is Live Share, enabling real-time collaboration. You can code collaboratively with team members, irrespective of the language or platform you are using.
Unit Testing
Support for unit testing is another crucial feature. You can write, run, and debug tests within the IDE, making it easier to maintain a high-quality codebase.
Built-In Terminal
The built-in terminal allows you to run shell commands, Git operations, and scripts without leaving the IDE, offering a seamless coding experience.
To open the terminal, you can use the shortcut Ctrl+ or navigate toView > Terminal`.
🧐
With these features at your disposal, you are better equipped to tackle any development challenge that comes your way.
Common Issues And Solutions
As robust as it is, Visual Studio 2019 Community edition is not without its quirks. In this section, we’ll address some common issues and solutions that could save you valuable debugging time.
Installation Errors
One frequent hiccup occurs during installation. If you encounter a failed installation, check your system’s event logs to diagnose the issue. The logs often contain clues about what went wrong.
IntelliSense Not Working
Sometimes, IntelliSense might stop functioning as expected. The solution often involves clearing the IntelliSense cache. Navigate to Edit > IntelliSense > Refresh Local Cache to solve this problem.
Slow Performance
If you’re experiencing slow performance, disabling certain extensions can help. Navigate to Extensions > Manage Extensions to disable or uninstall extensions that are not essential.
Debugger Issues
Issues with the debugger can be a hassle. When the debugger won’t attach, try restarting Visual Studio or rebooting your machine to resolve the issue.
Git Authentication Failure
If you experience a Git authentication failure, you might need to update your credentials. Navigate to Team Explorer > Settings > Git > Update Credentials.
For example, to manually update Git credentials through the command line, use:
# Update Git credentials
git credential reject https://github.com
git credential approve https://github.com
📌
The first command removes existing credentials. The second command prompts you to enter new credentials.
Package Restore Errors
NuGet package restore errors can usually be resolved by navigating to Tools > Options > NuGet Package Manager and selecting Clear All NuGet Cache(s).
🧐
Each of these solutions is geared towards resolving issues quickly and getting you back to coding as efficiently as possible.
If you encounter other issues, the Visual Studio forums and community are good places to seek further help.
Frequently Asked Questions
What Are the System Requirements for Visual Studio 2019 Community?
The basic system requirements include a 1.8 GHz or faster processor, a minimum of 2 GB of RAM (8 GB recommended), and approximately 20–50 GB of free disk space.
Does Visual Studio 2019 Community Support macOS?
Yes, Visual Studio 2019 for Mac is available and supports macOS Sierra 10.12 or later.
How Do I Update Visual Studio 2019 Community to the Latest Version?
You can update the IDE via the Visual Studio Installer. Open it, select your Visual Studio version, and click on the ‘Update’ button if an update is available.
Is Git Integrated with Visual Studio 2019 Community?
Yes, Git is tightly integrated into Visual Studio 2019. You can clone repositories, commit changes, and manage branches directly within the IDE.
What Languages Does Visual Studio 2019 Community Support?
Visual Studio 2019 Community supports a wide range of programming languages such as C#, C++, VB.NET, Python, JavaScript, TypeScript, and many more.
Let’s test your knowledge!
In this step-by-step tutorial, Learn how to Download and Install Visual Studio 2019. First, we will look at the System Requirement for Visual Studio 2019. Next, we will show you how to download Visual Studio 2019 & Finally we will learn how to install Visual Studio 2019.
You can download it from https://visualstudio.microsoft.com/downloads/
Table of Contents
- Edition of Visual Studio 2019
- Important Links
- System Requirement for Visual Studio 2019
- Supported OS
- Hardware
- Other Requirements
- Download Visual Studio 2019
- Install Visual Studio 2019
- 1. Installing the prerequisites
- 2. Download Visual Studio 2019
- 3. Starting Installation of Visual Studio 2019
- 4. Software License Terms
- 5. Installer Downloads the required files
- 6. Choose what to install
- 7. Installing
- Registration
- Summary
Edition of Visual Studio 2019
The Visual Studio 2019 comes in three editions. The Community, Professional & Enterprise
The download and installation process is very simple and similar to the download and installation of Visual Studio 2017. You can run both 2017 and Visual Studio 2019 side by side.
Important Links
- Click here to find out Visual Studio 2019 Release Notes
- Visual Studio 2019 Roadmap
System Requirement for Visual Studio 2019
Supported OS
Windows 10
- Minimum Version 1703
- Editions Supported Home, Professional, Education & Enterprise
- (LTSC and S are not supported)
Windows 8.1
- Install the update: 2919355
- Editions Supported: Core, Professional, and Enterprise
Windows 7 SP1
- Editions Supported: Home Premium, Professional, Enterprise, Ultimate
Windows Server 2016
- Editions Supported: Standard & Data Center
Windows Server 2019
- Editions Supported: Standard & Data Center
Windows Server 2012 R2
- Install the update: 2919355
- Supported Editions: Essentials, Standard, Datacenter
Hardware
These are the minimum hardware requirements to run Visual Studio 2019
- You need a 1.8 GHz or faster processor.
- A Quad-core processor or better
- Minimum 2 GB of RAM. But 8 GB of RAM recommended (12.5 if you are running on a Virtual PC)
- Minimum 800MB of space for basic installation. Complete Installation takes around 210 GB of Hard disk space.
- For HDD Speed & Performance, Install Visual Studio 2019 & Windows OS on SSD Drive
- The minimum display resolution of 720p (1280 by 720). Display resolution of WXGA (1366 by 768) or higher is recommended.
Other Requirements
- Dot net Framework 4.5: Download link.
- Administrator rights are required to install Visual Studio
- Internet Explorer 11 or Edge is required for internet-related scenarios
- If you are intended to use please refer to our article on How to download and install .NET Core
You can download it from the following direct download links
- Visual Studio 2019 Community Edition Download
- Visual Studio 2019 Professional Edition Download (90 days Free trial)
- Visual Studio 2019 Enterprise Edition Download (90 days Free trial)
Else you can download it from the link Visual Studio 2019 Downloads
Install Visual Studio 2019
1. Installing the prerequisites
Before beginning installation, install the following prerequisites
Make sure you have dotnet framework 4.5 is installed You can download it from the following link
If you are on Windows 8.1 or Windows Server 2012 R2, you need to install the update 2919355
2. Download Visual Studio 2019
Download the Visual Studio 2019 Community Edition.
3. Starting Installation of Visual Studio 2019
Right-click and select the Run as administrator on the downloaded file to begin the installation
You will be asked for permission to continue. Click on Yes to continue with the installation.
4. Software License Terms
Next, you will be asked to accept the software License terms and Privacy Statement. Click on continue to go ahead with the installation.
5. Installer Downloads the required files
The Installer fetches the required files to install the Visual Studio 2017. This process will take few minutes
6. Choose what to install
The Installer will ask for the features you wish to install. You have four options here
- Workloads
- Individual Components
- Language Packs
- Installation Location
Select Workloads
The first option is to select workloads.
A workload is a group of individual components based on the project type. For Example, if you are developing using ASP.NET for web development then you can choose ASP.NET and web development workload which will install the following components for you
- C# and Visual Basic
- .Net Framework 4.6
- ASP.NET and web development tools
- Entity Framework tools
- Typescript SDK
- IIS Express
- NuGet Package Manager
Click here to see the complete list of workloads in Visual Studio 2019
Select the required Workload. I have chosen .NET Desktop development & ASP.NET and web development.
Select individual components (Optional)
The Second Option gives an exhaustive list of components that you can install. Choosing the workloads automatically selects the components that are part of that workload. You can further customize what you want to install from this option.
Select the required components
Select language packs (Optional)
The language is automatically picked up from the language configured from the operating system. You can change it from this Tab.
Select Installation Location
The final tab is the installation location. Change the location if you wish to
7. Installing
Now, click on the Install button to begin the installation of Visual Studio 2019.
The installer will now download each component from the internet and starts the installation. This will take a while depending on your internet speed.
Once the installation is complete, you will be presented with the Installation succeeded message along with the option to register
If you are installing Visual Studio for the first time you will be asked to sign in
Registration
Next, Sign in window appears, you can Sign in or click on Sign up to create a new account. In case if you wish to continue without Signing in click on “Not now, maybe later” and proceed. You can sign in later from the option Help -> Register Product.
Note that Community edition will expire after 30 days if you do not register your copy
Summary
We learned how to download & Install Visual Studio 2019. We learned what are the system requirements and the prerequisites required to install the