IIS, short for Internet Information Services, is a Microsoft version of a web server.
To operate any kind of server like FTP, ASP.NET or local and remote management on your Windows 10, you need to keep the IIS feature enabled on your OS.
Do you want to know how to do that? Then, tag along. Here I will explain three different methods to enable Internet Information Services in Windows 10. Let’s begin.
The interesting fact about IIS is that it’s pre-installed with Windows and is deactivated by default. That’s why it is available for free with Windows Server. Since it’s a user-friendly GUI, many prefer IIS over Apache or NGINX and take full advantage of Microsoft Stack.
The process of turning IIS on is very simple and straightforward. These methods work not only on Windows 10 but also on other operating systems like Windows 8, Windows 8.1, and Windows 11. Let’s see how it’s done.
Follow our guide to fix cFosSpeed driver preventing Windows 11 installation.
Here are the steps to turn on IIS in Windows 10:
From Windows Feature
From Command Prompt
The installation will be finished once the PC reboot. See our most recent article if you want to change the command prompt’s color and font.
From Windows PowerShell
After the restart, you can use Internet Information Services(IIS) Manager without any trouble.
Read more on should you re-install Windows with a new CPU?
FAQs
How do I know if IIS is installed?
To know whether IIS is installed or not, go to the search icon and type Internet Information Services(IIS) Manager there. If the application shows there, it means the IIS has successfully been installed on your PC.
Where is IIS in Windows 10?
To locate IIS in Windows 10, type Administrative Tools on the Windows search bar. There you will see the Internet Information Services(IIS) Manager application.
Is IIS included with Windows 10?
Yes, the latest version of IIS 10.0 is included with Windows 10. It is also added in the Windows Server 2016.
Conclusion
Using the IIS, you can effortlessly make your own website. But before you start using Internet Information Services, ensure it runs properly. If you face any trouble, uninstall the IIS completely and reinstall the application by following any of the three methods.
Hope you have installed IIS on your Windows 10 and are using it without any complications. Don’t hesitate to ask any questions in the comment section. I will gladly answer them.
Peace!
Steven Arends
Steven Arends is a computer science graduate and tech enthusiast with over 10 years of experience in the field. He has a vast collection of computer hardware and loves exploring the latest advancements. As a contributing author to 10Scopes, Steven shares his expertise to make the world of technology more accessible and easier to understand for all readers.
Служба IIS (Internet Information Services) необходима для работы ASP.NET серверной части СпрутМонитор.
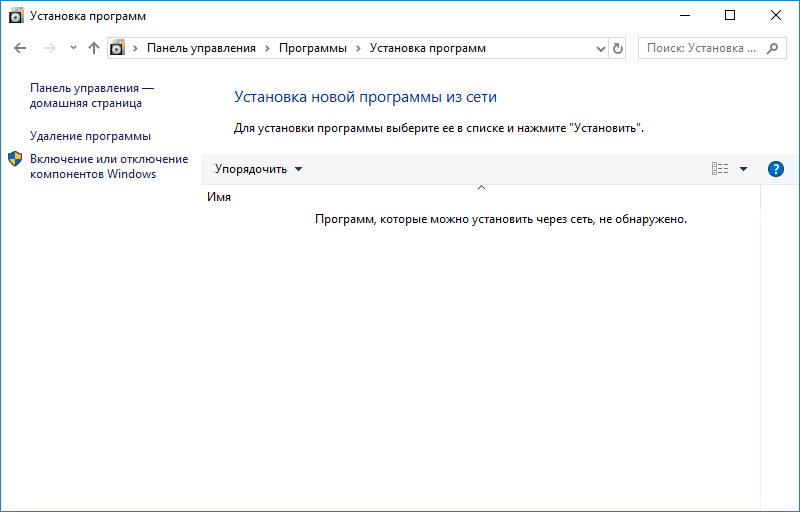
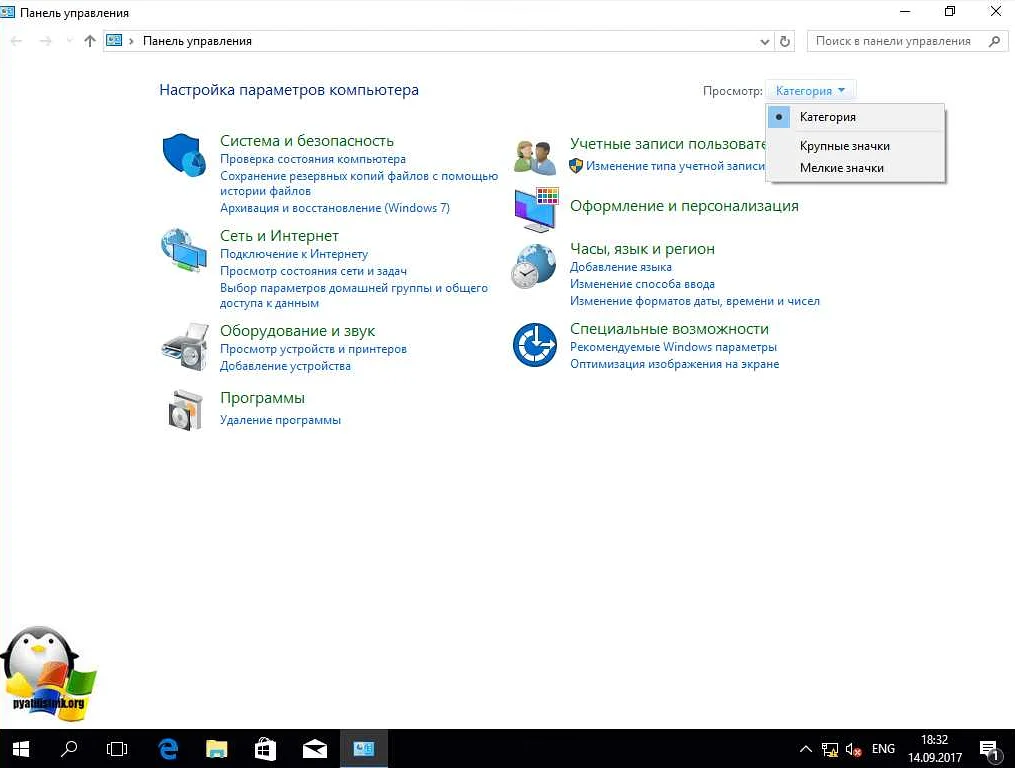
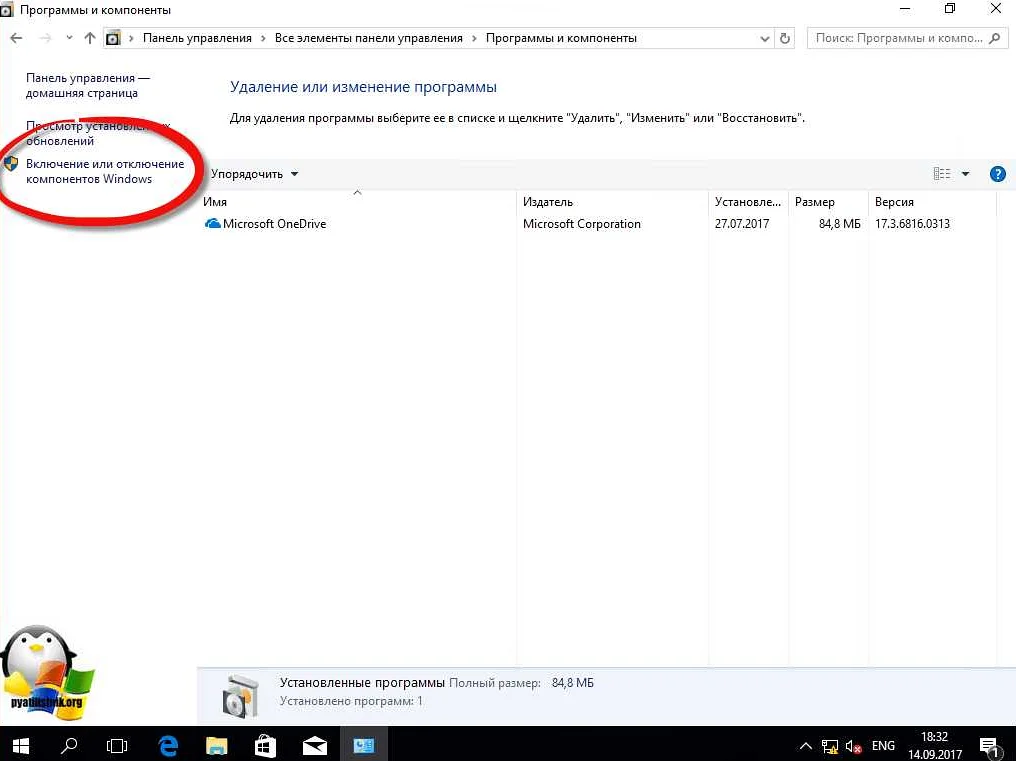
1. Перейдите в Панель Управления -> Программы -> Установка программ. Щелкните на пункт меню (слева) Включение и отключение компонентов Windows.
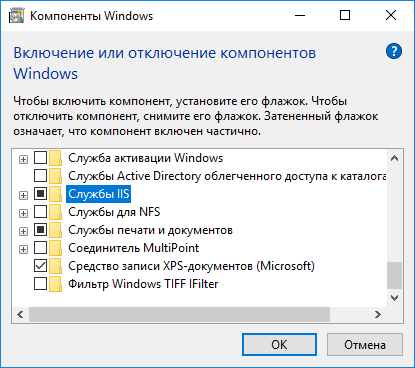
2. Отметьте пункт Службы IIS, и нажмите кнопку ОК:
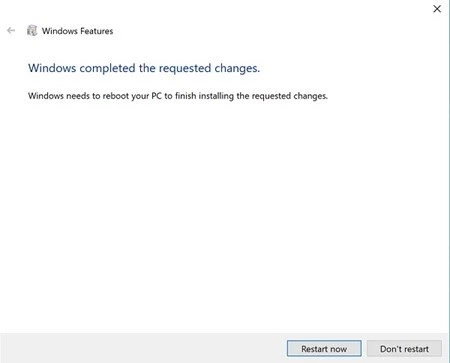
3. Дождитесь окончания установки всех необходимых компонентов:
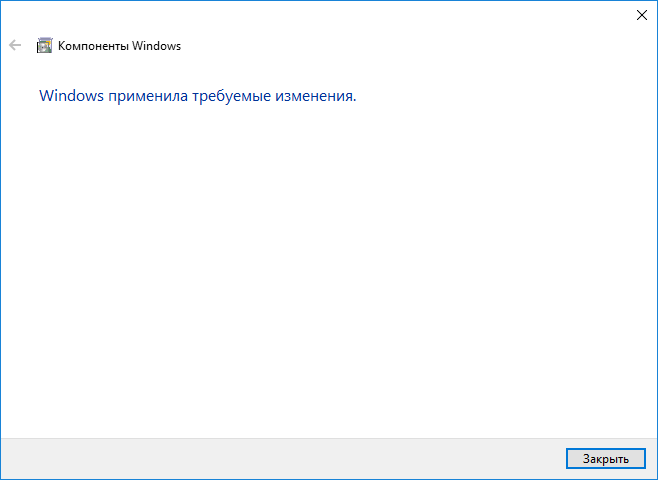
4. После завершения установки, рекомендуется перезагрузить компьютер.
5. Запустите браузер и перейдите по адресу http://localhost/. Если открылась тестовая страница IIS, значит установка произведена успешно.
См. также: Установка серверной версии СпрутМонитор.
No matter which version of Windows you’re using, this article gives you a complete and step-by-step guideline on how to install IIS on Windows 10 and other platforms such as Windows server 2019, 2012, and 2012.
Microsoft has hit the tech market with its excellent IIS service, which has topped all the rivals and been the most popular web server for Windows. You can make sure of your web application and website’s high performance after installing IIS on your Windows server. As the name gives us a hint, IIS works best on Windows OS. However, you could use it on other platforms like Linux, but it won’t give you reliable performance.
What is IIS?
Internet Information Services (IIS) is a flexible and standard web server from Microsoft that runs on Windows systems to serve the requested pages or HTML files. The IIS server runs on the Microsoft .NET platform on Windows OS.
Also Read: Install and Update .NET Framework on Windows 10
The IIS server receives requests from remote computers and, in return, responds with the correct response. That allows web servers to share and transmit data to all local and online networks.
Information sent to users is displayed in many ways, such as static web pages, through file exchanges such as downloads and uploads, and text, images, and more.
Windows 10 VPS Hosting
Get yourself an efficient Windows 10 VPS for remote desktop, at the cheapest price out there. FREE Windows 10 running on NVMe SSD storage and high-speed internet.
Check Out Windows 10 VPS Plans
How Does IIS Work?
IIS operates with the help of standard protocols and programming languages. For things like text, buttons, image insertion, direct link/character, and hyperlinks, IIS uses HTML. HTTP is used to exchange information between a web server and a user.
HTTPS – HTTP over Secure Sockets Layer (SSL) uses Transport Layer Security or SSL to encrypt additional data security communications. File Transfer Protocol (FTP), or its secure alternative, FTPS, can transfer files. Additional supported agreements include Simple Mail Transfer Protocol (SMTP), sending and receiving email. The processes mentioned above and other languages and conventions together form an appropriate IIS package.
Also Read: Best Windows 10 VPS
How To Install IIS on Windows 10?
If you are using virtual machines such as Windows VPS, you must connect to Windows via Remote Desktop. The following steps are also helpful if you’re looking for how to install IIS on Windows 8, or Windows 8.1.
Step 1: open the launch section
Press the Windows + R key to open the launch section.
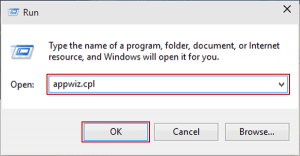
Step 2: Type appwiz.cpl
Now type appwiz.cpl in that section and hit Enter. That opens Programs and Features in Windows 10.
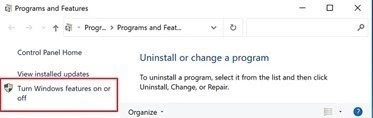
Step 3: Turn off Windows features
On the Apps and Features page, click Close or turn off Windows features.
Step 4: Check the IIS services
In the list of features, search the Internet Information Service (IIS), check the IIS services according to your needs, and press OK.
Step 5: Restart the computer
After the installation, restart your computer to complete the installation.
You can now access IIS in your browser by entering the 127.0.01 address on the local network. Moreover, you can have access to your IIS web server remotely by entering your server’s IP address in your browser. It looks like this: 185.156.x.x
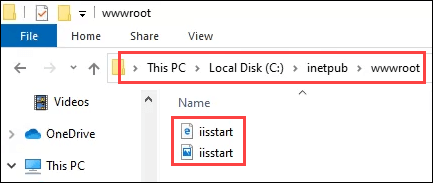
Please note: Your IIS directory on your device is: C: \ inetpub \ wwwroot. You can copy this directory and have access to your website files or other files via an IIS web server using your browser.
Note: These steps are almost the same if you’re looking for how to install IIS on Windows 7.
Unquestionable Stability
Get a free Windows 7 operating system on a Windows 7 VPS plan from Cloudzy — equipped with the latest hardware, including NVMe storage.
Get a Windows 7 VPS
How To Install IIS on Windows Server 2012
The process is almost the same for other versions of the Windows server. The following steps are also helpful if you’re looking for how to install iis on Windows Server 2016.
Also Read: How to install Linux Bash on Windows 10?
Step 1: open the launch section
To install IIS on Windows Server, press the Windows + R keys to open Run.
Step 2: open the launch section
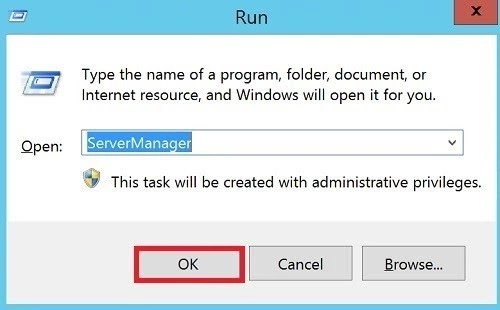
Type ServerManager in the launch box and click OK. That opens the Programs and Features box on Windows Server 2012. [ or any other version you’re using.]
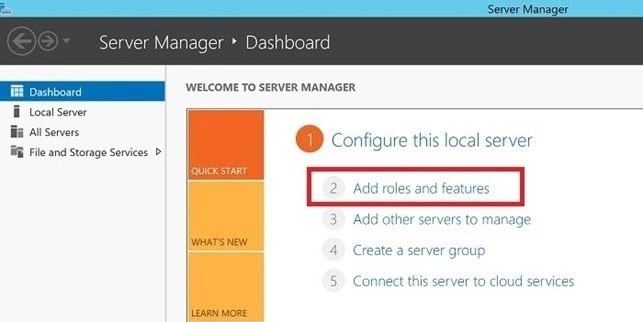
Step 3: Add roles and features
Click on the “Add roles and features” in the newly opened window.
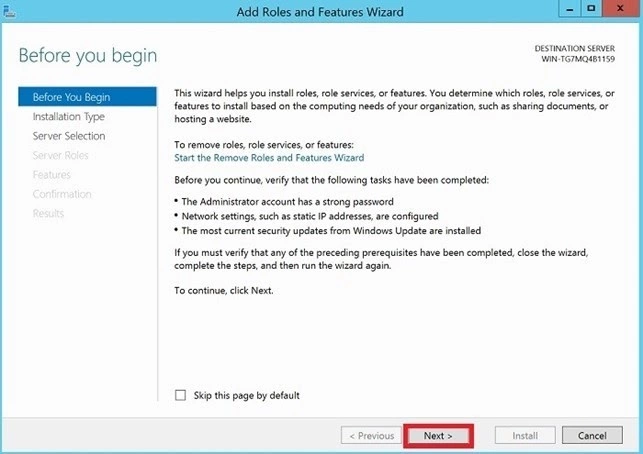
Step 4: Installation Wizard
Now, the Installation Wizard will appear Click Next.
Step 5: Select role-based
Look for roles based on a role or based on a feature and click Next.

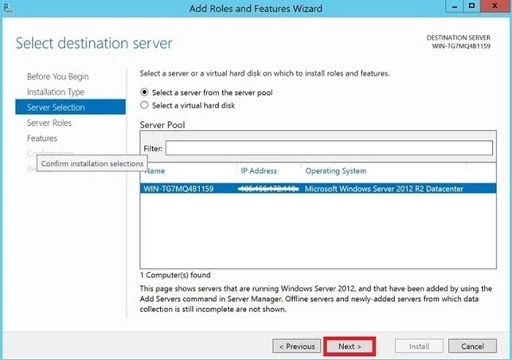
Step 6: Select a server from the server pool
Now, click on the “Select a server from the server pool” from the window, then select Server and click Next.
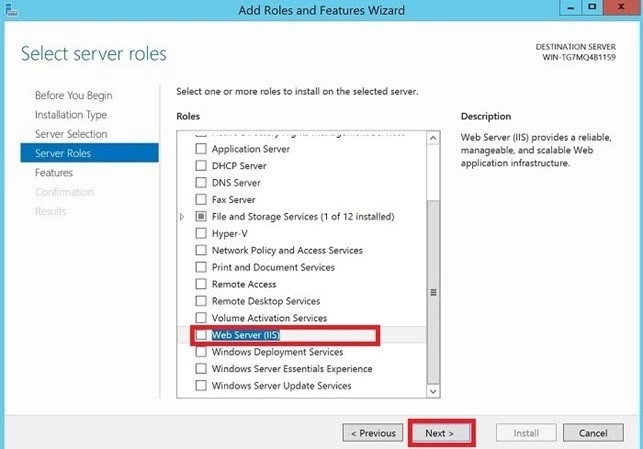
Step 7: Check the Web Server (IIS) section
When you get to the Series Roles section, scroll down to the list, then check the Web Server (IIS) section and hit Next.
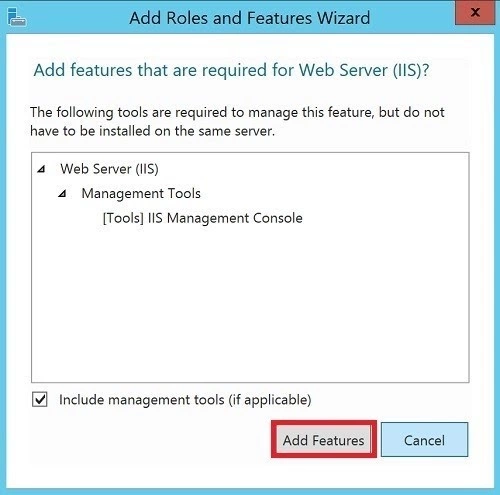
Step 8: Click on Add Features
Click on Add Features, do not forget that the checkbox click “Install management tool (if available)”
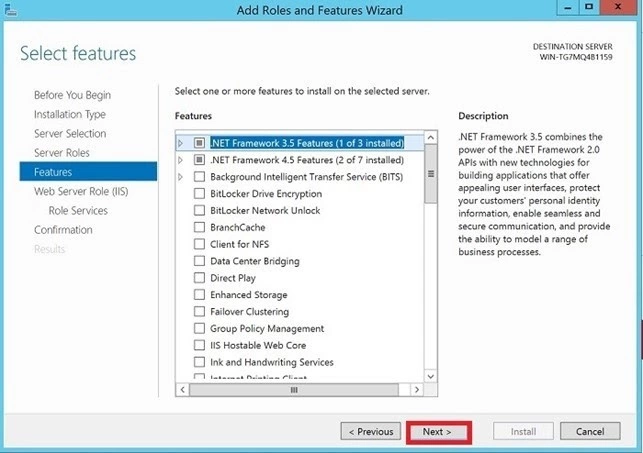
Step 9: Click on the Next
Keep the default features as they already are, then click on the Next.
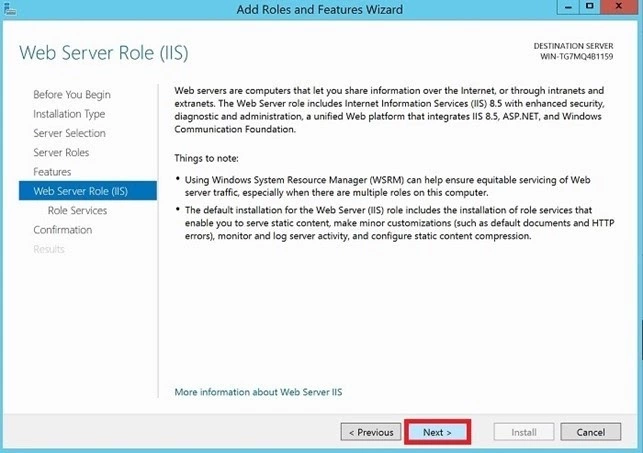
Step 10: Click on the Next
Click on the “Next” when you’re done with the Web Server Roles (IIS) text.
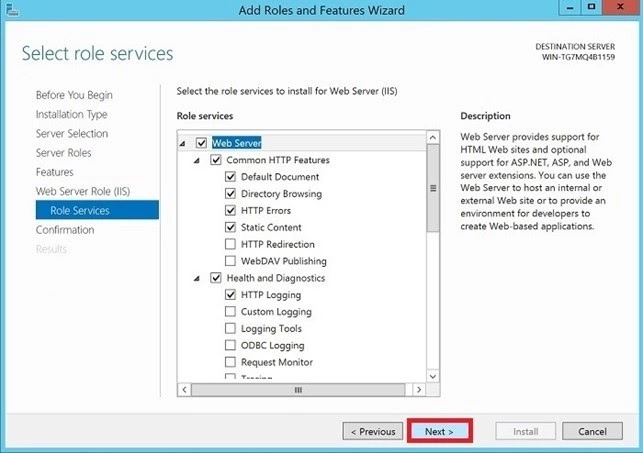
Step 11: Select web Server roles and Click Next
Click on the “Next” after selecting the Web Server roles as shown in the following image.
Step 12: Install selections
Click on the “Install.”

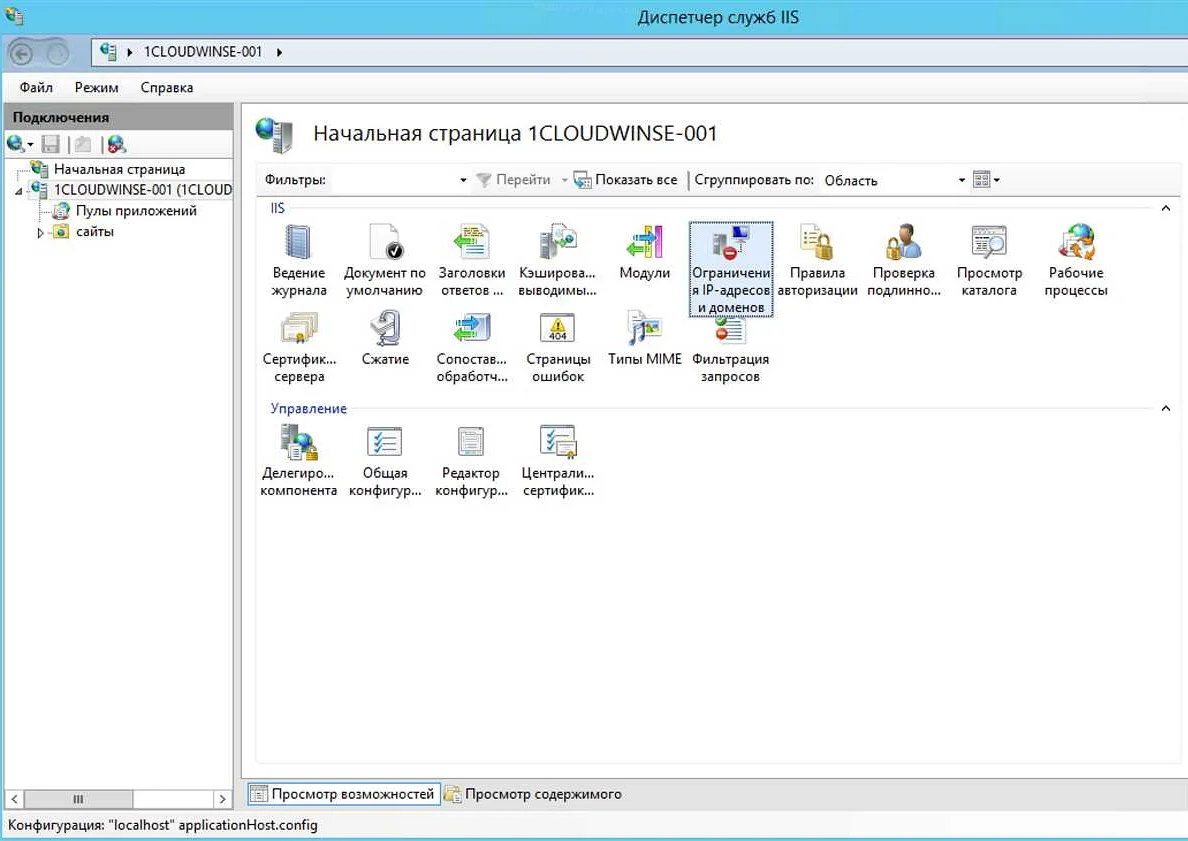
When the installation is finished, close the installation wizard. You will see the main Internet Information Services (IIS) interface similar to the one shown below.
Please note: Your IIS directory on your device is C: \ inetpub \ wwwroot. Now you can copy and access your website files or other files via an IIS web server using your browser.
Note: All the procedures mentioned above will also help you on how to install IIS on Windows Server 2019.
Windows 10 VPS Hosting
Get yourself an efficient Windows 10 VPS for remote desktop, at the cheapest price out there. FREE Windows 10 running on NVMe SSD storage and high-speed internet.
Check Out Windows 10 VPS Plans
Conclusion
You just did it! Now that article has helped you on how to install IIS on Windows 10 and it’s running nice and smooth on your server; it’s time to ensure that your website is 100% functioning correctly, you’ll need a secure and cost-effective server.
Cloudzy proudly offers you its top-performing and budget-friendly cheap Windows Virtual Private Server and Remote desktop VPS services to help you have a 100% safe, smooth and reliable online presence.
If you start working with Cloudzy today, you’ll join a big club of happy customers who enjoyed having budget-friendly VPS servers with cutting-edge technology, worldwide locations, and 24/7 committed customer support. If you need more info on our service or no-obligation quotes, we’re just one simple call away!
If you want to learn more about web design and development, installing Internet Information Services (IIS) on your Windows 10 computer is a good method. IIS is a free Windows Feature included in Windows 10, so why not use it?
IIS is a full-featured web and FTP server with some powerful admin tools, strong security features, and can be used to host ASP.NET and PHP applications on the same server. You can even host WordPress sites on IIS.
There are three ways to install and set up a website in IIS on Windows 10; using the Graphical User Interface (GUI), PowerShell, or Windows CMD. We’ll be using each method to do a basic installation of IIS.
Install IIS Using The GUI
This is the point-and-click method to set up a website in IIS. It’s the ideal method if you haven’t learned PowerShell or Windows commands.
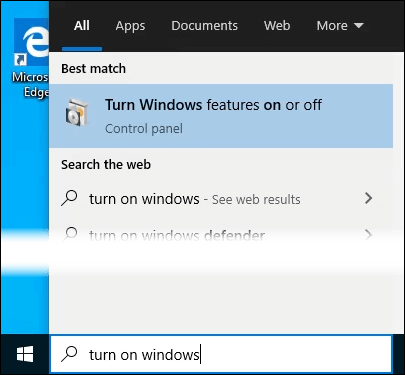
- Start typing “turn on windows” in the Search bar. The Turn Windows features on or off utility will show as a result. Click on it.
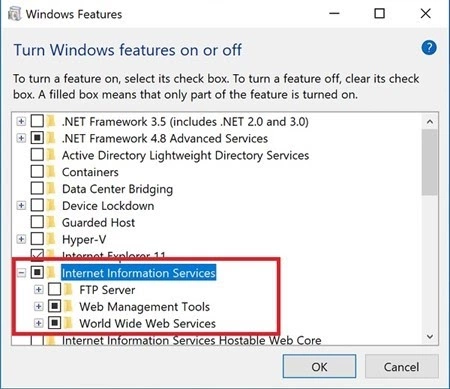
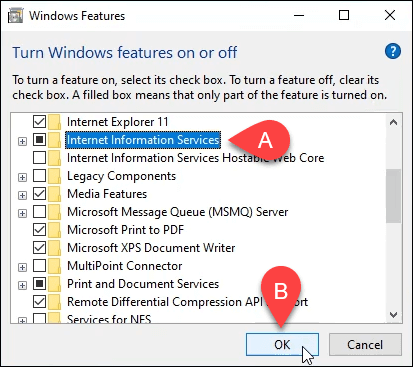
- The Windows Features window will open. It may take a bit for the different features to load. Once it does, click on the checkbox next to Internet Information Services and then click the OK button.
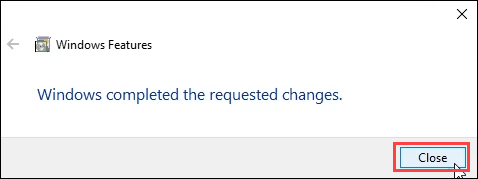
- The installation will begin and can take several minutes. Once it’s completed, click on the Close button.
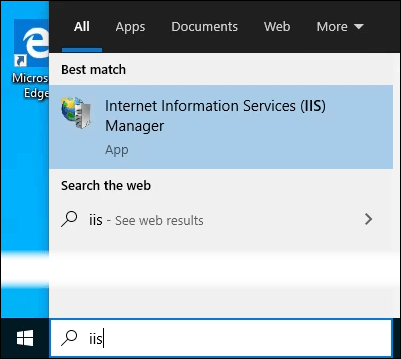
- To ensure that IIS is installed and working, type IIS in the Search bar near the Start button. You’ll see the Internet Information Services Manager as a result. Click on that to open it.
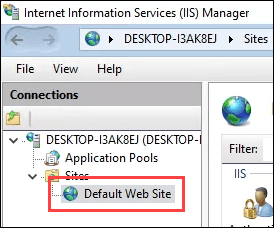
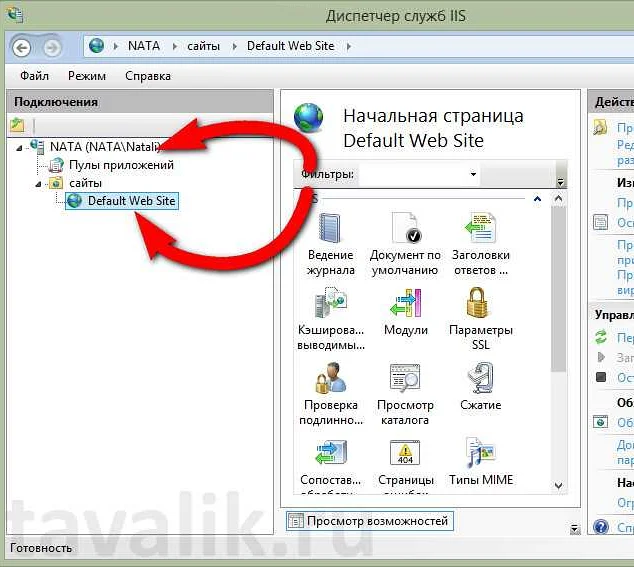
- When IIS Manager opens, look in the left pane of the window under Connections. Expand the tree menu until you see Default Web Site. That’s a placeholder site that is installed with IIS. Click on it to select it.
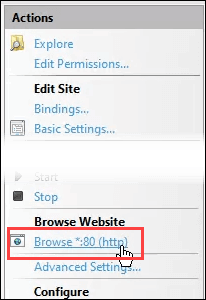
- On the right side of the IIS Manager look under the Browse Website section. Click on Browse *:80 (http). That will open the default web site in your default web browser.
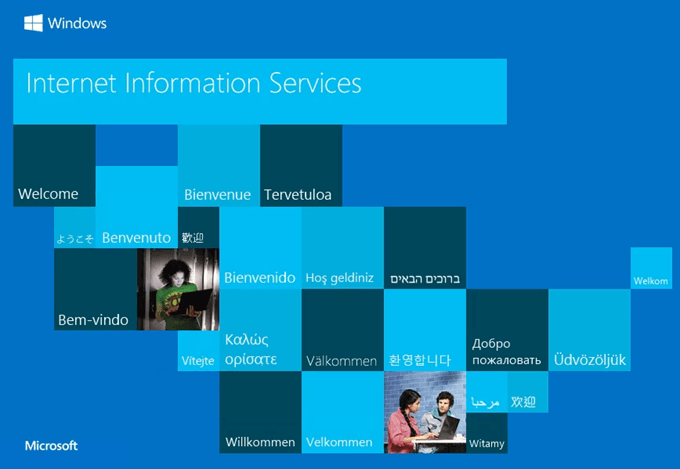
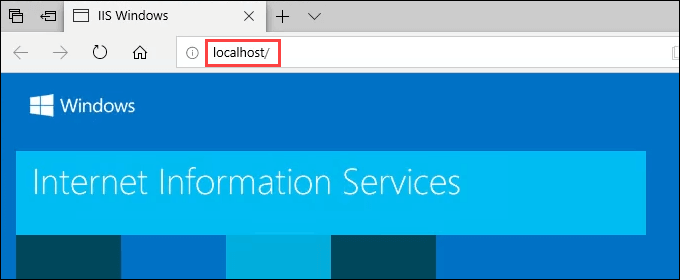
- You’ll see a web page like the following. Notice in the address bar that it says localhost. That’s the address to type in to go to your new website.
Create Your First Web Page for IIS
Before we go into the other two methods of installing IIS, let’s see where the files that make your website are stored. We’ll also make a very basic web page. Once you know how to do this, you’ll know the basics to jump into learning web design and development.
- After IIS is installed, open File Explorer. Navigate to C:\intepub\wwwroot. That’s where the files that make up the website need to be stored. You’ll see the default IIS web page file, iisstart.html, and the image shown on the page, iisstart.png. This is where you’ll save your first web page.
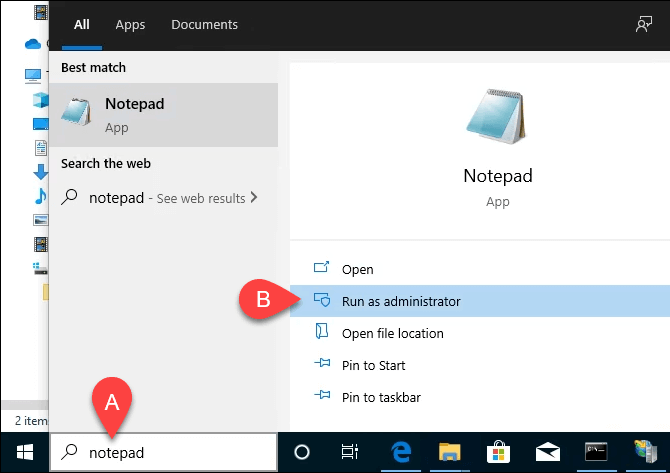
- Open Notepad as administrator. To save to the wwwroot location, you must be an administrator.
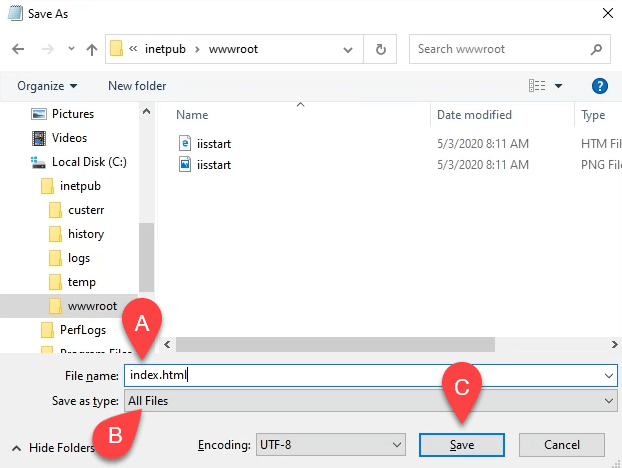
- Save the file to the wwwroot location. Name it index.html and change the Save as type: to All Files. Then click the Save button.
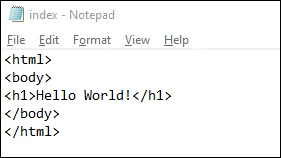
- Now that it’s saved as the right filetype, let’s put some content in it. Enter the following HTML code for a very basic web page and save it:
<html>
<body>
<h1>Hello World!</h1>
</body>
</html>
- Go back to the web browser that has the default IIS web page. Click on the refresh button. You will now see your first web page.
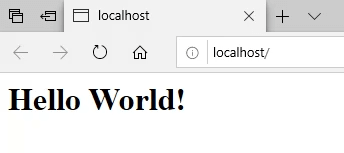
That’s it! You’ve just created and published your first website on IIS.
Install IIS Using Windows Commands
We can reduce the process of installing IIS to a one-line command. It can be done in either Windows Command Prompt or using PowerShell. We’ll show you how to do it with Windows command first, but learning PowerShell would be of great benefit in the future.
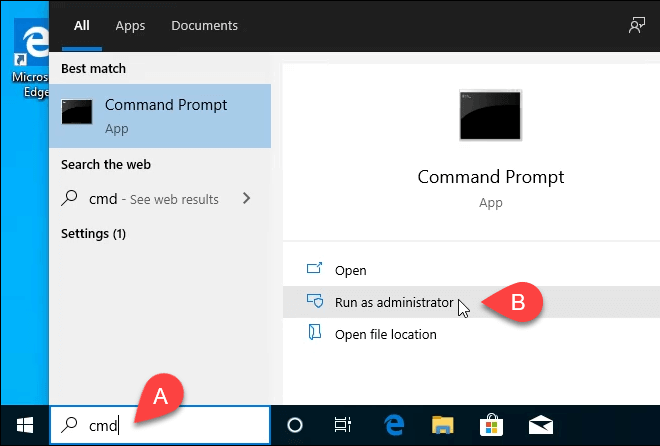
- Type cmd in the search bar and the top result should be Command Prompt. Click on Run as administrator.
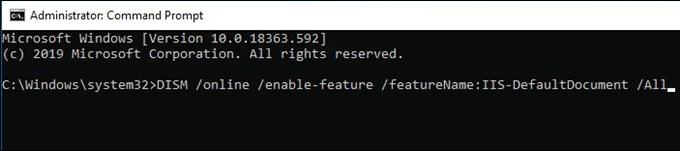
- Type in the command DISM /online /enable-feature /featureName:IIS-DefaultDocument /All and press Enter.
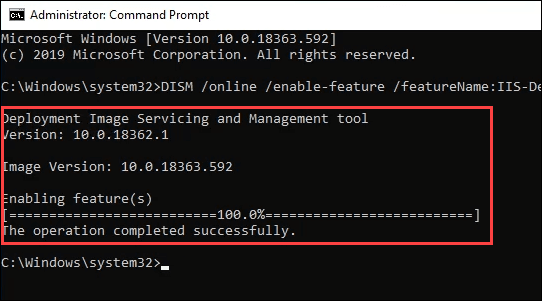
- You’ll see a progress bar appear. Once it reaches 100.0% and you see the message, “The operation completed successfully.” you can close the Command Prompt. IIS is installed.
- Check to ensure you can open the IIS Manager and that the installation worked, using steps 4-7 from the Install IIS Using The GUI section.
Install IIS Using PowerShell
Learning to do things like installing IIS in PowerShell is a huge benefit for two reasons. One, it’s the easiest and fastest way to do most administrative tasks in Windows. Two, you can save your PowerShell commands, known as cmdlets, as a script and run them anytime on any Windows computer or server.
- Type powershell in the search bar and one of the results should be PowerShell ISE. Click on Run as administrator.

- Type the cmdlet Enable-WindowsOptionalFeature -Online -FeatureName IIS-WebServerRole -NoRestart and run it. You’ll see a progress bar start. Once it’s complete, check to make sure IIS is installed and working.
- This step is optional, but you can save this as a PowerShell script and then run it anytime. Work with the script and add different parameters. Eventually, you’ll have an IIS install script that sets things up exactly as you want it, every time, with a single click.
You’re The Web Now!
This is just the beginning of what you can do with making your own website in IIS. Look into using IIS for FTP file transfer or media hosting as well. Also, look into Microsoft’s Web Platform Installer for simplified ways to install and learn things like WordPress, PHP, Python, and more.
Содержимое
- 1 Как открыть диспетчер служб IIS в Windows 10: пошаговая инструкция
- 1.1 Как открыть диспетчер служб IIS в Windows 10
- 1.2 Почему важно знать, как открыть диспетчер служб IIS в Windows 10
- 1.3 Шаг 1: Начало
- 1.4 Шаг 2: Использование меню «Пуск»
- 1.5 Шаг 3: Использование поиска Windows
- 1.6 Шаг 4: Использование командной строки
- 1.7 Шаг 5: Проверка доступности IIS
- 1.8 Вопрос-ответ:
-
- 1.8.0.1 Как найти диспетчер служб IIS в Windows 10?
- 1.8.0.2 Как открыть диспетчер служб IIS в Windows 10?
- 1.8.0.3 Как включить IIS на Windows 10?
- 1.8.0.4 Как настроить сайт в IIS?
- 1.8.0.5 Как настроить аутентификацию в IIS?
- 1.8.0.6 Как управлять сервисами в IIS?
- 1.8.0.7 Как настроить SSL-сертификат в IIS?
-
- 1.9 Видео по теме:
Подробная инструкция, как открыть диспетчер служб IIS в Windows 10. Узнайте, как управлять веб-сервером и запускать приложения на своем компьютере.
Диспетчер служб IIS (Internet Information Services) – это компонент Microsoft Windows, который предназначен для управления веб-сервером. Он позволяет создавать и настраивать веб-сайты, включать и выключать службы и просматривать журналы событий.
Чтобы открыть диспетчер служб IIS в Windows 10, необходимо выполнить несколько простых шагов. В данной статье мы подробно рассмотрим, как это сделать.
Если вы не знакомы с работой веб-сервера IIS и не знаете, как именно он может быть полезен вам, то рекомендуем ознакомиться с этим инструментом подробнее. Но если вы уже знакомы с IIS и хотите настроить свой сервер, то диспетчер служб IIS станет для вас незаменимым инструментом.
Как открыть диспетчер служб IIS в Windows 10
Для открытия диспетчера служб IIS в Windows 10 необходимо выполнить несколько простых действий:
- Нажмите сочетание клавиш Win + R на клавиатуре, чтобы открыть окно «Выполнить».
- Напечатайте в поле ввода: inetmgr и нажмите Enter.
- Откроется окно диспетчера служб IIS, где вы можете управлять веб-сервером и настраивать параметры связанные с его работой.
Также можно открыть диспетчер служб IIS через меню «Пуск». Для этого нужно выполнить следующие действия:
- Откройте меню «Пуск», нажав на иконку Windows в левом нижнем углу экрана.
- Найдите папку «Windows Administrative Tools» в списке программ и кликните на нее.
- Нажмите на папку «Internet Information Services (IIS) Manager», чтобы открыть диспетчер служб IIS.
Описанные выше методы могут помочь открыть диспетчер служб IIS в Windows 10. Не забудьте сохранить все настройки после внесения изменений, чтобы избежать возможных ошибок в работе веб-сервера.
Почему важно знать, как открыть диспетчер служб IIS в Windows 10

Диспетчер служб IIS (Internet Information Services) представляет собой удобное и мощное средство, которое позволяет администрировать серверы веб-приложений, осуществлять их конфигурацию, а также управлять и контролировать работу веб-сайтов.
Если вы занимаетесь разработкой веб-приложений или администрируете веб-сайты, то знание, как открыть диспетчер служб IIS в Windows 10, является ключевым для эффективной работы. Диспетчер служб IIS позволяет быстро выполнять необходимые настройки и контролировать работу сервера, что в свою очередь обеспечивает более быструю и стабильную работу веб-приложений и веб-сайтов.
Кроме того, настройка и управление диспетчером служб IIS может потребоваться при работе с определенными программами и приложениями, которые используют этот инструмент для своей работы.
В целом, знание, как открыть диспетчер служб IIS в Windows 10, является необходимым для всех, кто работает с веб-приложениями и веб-сайтами, а также для тех, кто хочет расширить свои знания в области администрирования серверов.
Шаг 1: Начало
Открытие диспетчера служб IIS в Windows 10 может показаться сложным заданием для неопытного пользователя. Но не беспокойтесь, мы проведем вас через все этапы этого процесса пошагово.
Прежде всего, убедитесь, что у вас есть доступ к учетной записи администратора Windows на вашем компьютере. Это необходимо для доступа к диспетчеру служб IIS.
Если вы уверены, что у вас есть права администратора, то вы можете начинать определенные действия, которые мы расскажем в следующих шагах.
Шаг 2: Использование меню «Пуск»
Если вы предпочитаете использовать меню «Пуск», чтобы найти необходимые инструменты в Windows 10, эта инструкция будет полезна для вас. Для открытия диспетчера служб IIS с помощью меню «Пуск» следуйте простым шагам ниже:
- Откройте меню «Пуск». Кликните на значок «Пуск» в левом нижнем углу экрана или нажмите клавишу «Windows».
- Начните вводить «IIS». В поисковой строке меню «Пуск» наберите «IIS».
- Нажмите на иконку «Диспетчер служб IIS». В результате поиска появится список приложений. Найдите и кликните на иконку «Диспетчер служб IIS».
После выполнения этих шагов диспетчер служб IIS будет открыт, и вы сможете настраивать и управлять службами, связанными с веб-сервером IIS, в операционной системе Windows 10.
Шаг 3: Использование поиска Windows
Если вы не можете найти Диспетчер служб IIS на Панели управления, можно воспользоваться встроенным поиском операционной системы.
Для этого нужно:
- Кликнуть на кнопку «Пуск» в нижнем левом углу экрана;
- Написать в поисковой строке «Службы IIS»;
- Выбрать из поисковых результатов «Службы IIS (Интернет-информационные службы)»;
- Дважды кликнуть по найденному результату;
- Откроется окно с Диспетчером служб IIS, где можно управлять установленными службами.
Вы также можете использовать комбинацию клавиш Win + S, чтобы открыть поиск Windows и совершить поиск «Службы IIS».
Шаг 4: Использование командной строки

Если вы предпочитаете работать с командной строкой, то можно воспользоваться ее возможностями для управления службами IIS. Для этого нужно открыть командную строку от имени администратора.
Чтобы открыть командную строку, нажмите на кнопку «Пуск», введите в поисковую строку команду «cmd», затем справой кнопкой мыши нажмите на результат поиска и выберите пункт «Запустить от имени администратора».
После этого можно использовать следующие команды для управления службами IIS:
— Для запуска службы: net start название службы
— Для остановки службы: net stop название службы
— Для перезапуска службы: net restart название службы
Если у вас несколько служб IIS, то можно использовать команду net start w3svc, чтобы запустить все службы одновременно.
Также можно использовать команду iisreset, чтобы перезапустить все службы IIS.
Но не забывайте, что неправильное использование командных строк может привести к сбоям в работе системы. Поэтому, если вы не уверены в том, что делаете, лучше воздержитесь от использования командной строки и воспользуйтесь более удобным визуальным интерфейсом диспетчера служб IIS.
Шаг 5: Проверка доступности IIS
После того, как вы открыли диспетчер служб IIS, необходимо проверить доступность IIS. Для этого вы можете использовать браузер и открыть стандартную страницу IIS, которая располагается на адресе http://localhost. Если при попытке открытия страницы вы увидите сообщение об ошибке, это может быть связано с тем, что IIS не настроен на работу с обычными страницами. В таком случае вы можете попробовать открыть страницу по адресу http://localhost/iisstart.htm.
Другой вариант проверки доступности IIS — запустить командную строку и выполнить команду ping localhost. Если вы получили ответы от локального хоста, это означает, что IIS доступен для работы.
Как только вы удостоверитесь в доступности IIS, вы можете начинать настройку веб-сайта и добавление новых приложений.
Вопрос-ответ:
Как найти диспетчер служб IIS в Windows 10?
Диспетчер служб IIS находится в панели управления Windows. Его можно найти, нажав правой кнопкой мыши на кнопку «Пуск», затем выбрав «Панель управления». В окне «Панель управления» выберите «Программы», затем «Включение и отключение компонентов Windows». Искать диспетчер служб IIS следует в разделе «Интернет информационные службы».
Как открыть диспетчер служб IIS в Windows 10?
Чтобы открыть диспетчер служб IIS, нужно зайти в панель управления Windows и выбрать раздел «Административные инструменты». Там будет доступен диспетчер служб IIS, который можно открыть двойным щелчком.
Как включить IIS на Windows 10?
Чтобы включить IIS на Windows 10, нужно зайти в панель управления Windows, выбрать раздел «Программы» и затем «Включение и отключение компонентов Windows». В появившемся окне установите галочку напротив «Интернет информационные службы». Нажмите «ОК» и подождите, пока произойдет установка. После этого вы сможете открыть диспетчер служб IIS и управлять сервисами.
Как настроить сайт в IIS?
Чтобы настроить сайт в IIS, нужно открыть диспетчер служб IIS, нажать на раздел «Сайты» и выбрать «Добавить веб-сайт». В открывшемся окне нужно указать имя сайта, его физический путь и протокол. Затем нужно настроить параметры доступа и авторизации. После этого сайт будет доступен через IIS.
Как настроить аутентификацию в IIS?
Чтобы настроить аутентификацию в IIS, нужно открыть диспетчер служб IIS, нажать на раздел «Аутентификация» и выбрать нужный метод аутентификации. Для каждого метода аутентификации можно настроить соответствующие параметры, такие как логины и пароли, сертификаты и токены. После этого пользователи смогут успешно авторизовываться на сайте через IIS.
Как управлять сервисами в IIS?
Чтобы управлять сервисами в IIS, нужно открыть диспетчер служб IIS, нажать на раздел «Сервисы» и выбрать нужный сервис. Для каждого сервиса можно настроить различные параметры, такие как порты и протоколы, настройки безопасности и логирования. После этого можно запустить, остановить или перезапустить сервис по необходимости.
Как настроить SSL-сертификат в IIS?
Чтобы настроить SSL-сертификат в IIS, нужно открыть диспетчер служб IIS, нажать на нужный сайт и выбрать раздел «Сертификаты». Затем нужно выбрать «Добавить» и выбрать тип сертификата (обычно это «Самоподписанный»). После этого нужно указать имя и даты действия сертификата, а также настроить его параметры. После этого SSL-сертификат будет доступен на сайте через IIS.