Wi-Fi-роутер дома — воистину гениальная штука. Можно сразу же подключить десятки устройств к интернету и удовлетворить потребности всей семьи. Но иногда случается так, что сигнал из одной комнаты совершенно не хочет приниматься в другой. Причин может быть много, свою роль могут сыграть даже толстые стены. Но не сносить же их теперь?
Есть что сказать? Обсуждайте важные новости в группе «А теперь внимание!» в Одноклассниках.
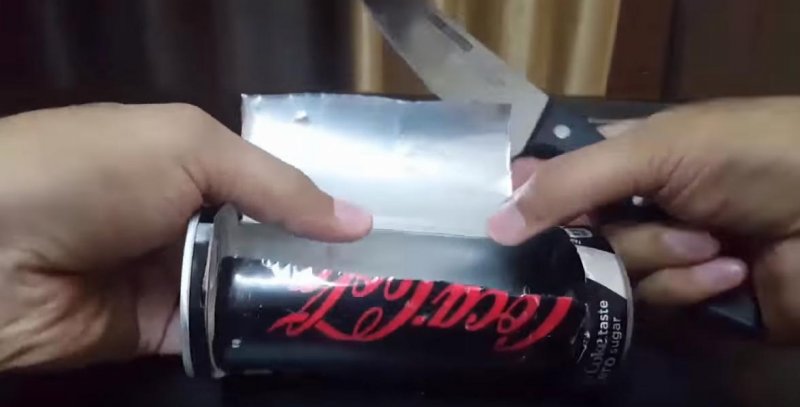
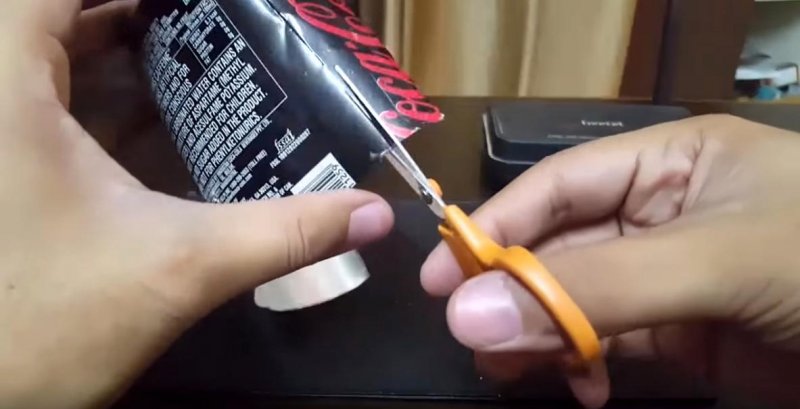
Есть простое решение проблемы. Возьмите обыкновенную алюминиевую банку, например, из-под колы, и отрежьте ее дно канцелярским ножом. Сам цилиндр стоит разрезать ножницами.
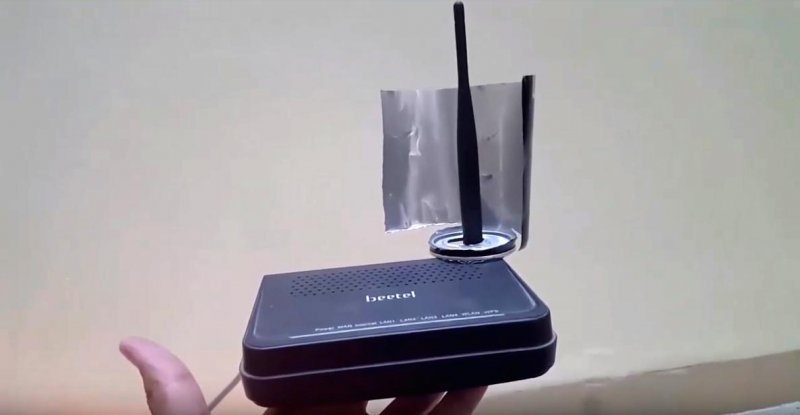
Далее отнесите получившуюся конструкцию в ту комнату, где у вас стоит роутер, и нацепите банку на одну из его антенн. За счет металлического покрытия банки сигнал будет распространяться куда лучше обычного — пройдет даже через толстые стены, показывает автор YouTube-канала «Бери и делай».
Ранее называлось расстояние до роутера, на котором безопасно находиться.
Фото: youtube.com/БЕРИ И ДЕЛАЙ – Дети
Это 100% рабочий и самый наипростейший способ сделать радиус приема Wi-Fi сигнала больше. Суть его заключается в том, чтобы добавить к существующей антенне рефлектор, который будет концентрировать сигнал в одном направлении, подобно отражателю у фонарика. Все что нам потребуется это алюминиевая банка из под колы, нож или ножницы и 5 минут вашего времени.
Изготовление рефлектора
Берем алюминиевую банку от колы. Объем не имеет значения — 0,25 или 0,33 мл.
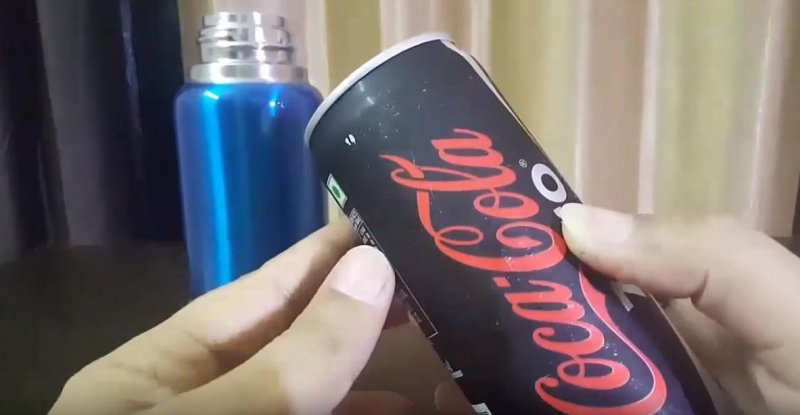
Выпиваем или выливаем напиток.

Делаем два надреза в банке сверху и снизу банки. Примерно половина банки в длину.
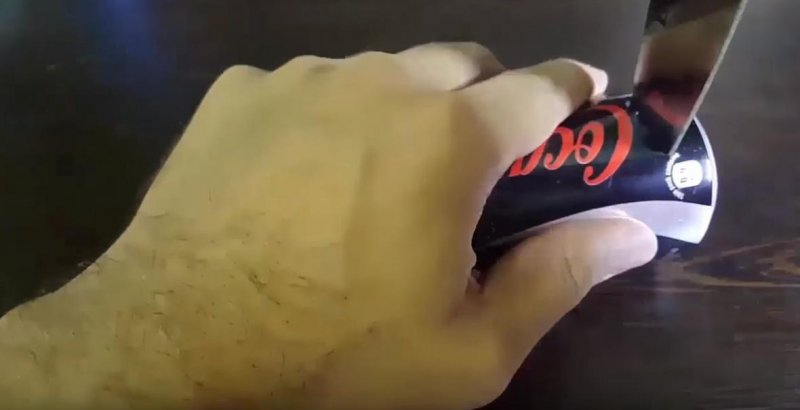
Далее делаем разрез ножом вдоль по середине во всю длину.
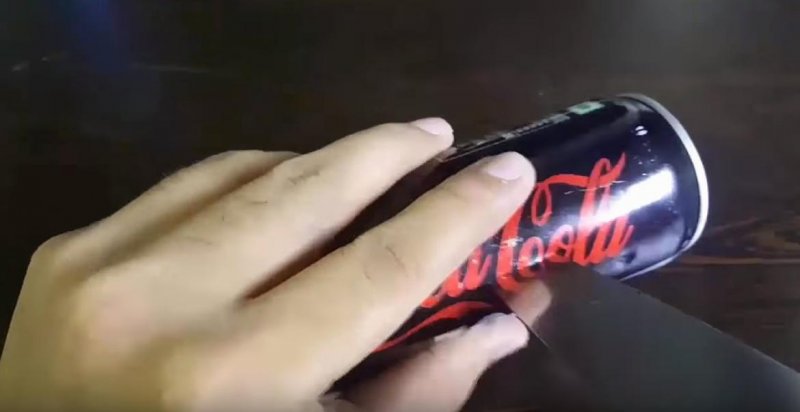
Отгибаем получившиеся лепестки или крылья.
Отрезаема лишнее, если крылья слишком длинный и мешается. Делать их длинными нет большого смысла, да и мешаться будут.
Одеваем отверстием для открывания на антенну Wi-Fi роутера и направляем на абонентов приема. Все просто, не правда ли ?
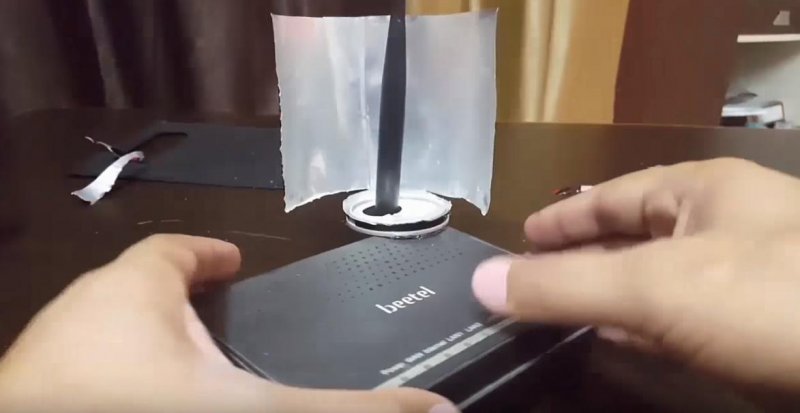
Можно приклеить горячим клеем для надежности к роутеру, но это не критично.

Проверяем сигнал.
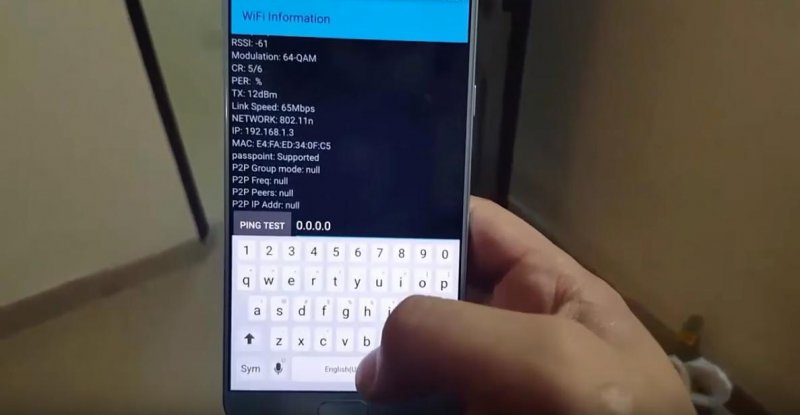
Вот такая, по сути копеечная поделка может увеличить мощность сигнала Wi-Fi процентов на 20-30. А потребуется всего нечего — использованная банка из под напитка.
И так, друзья, делайте свой отражатель сигнала, и о своих результатах, пожалуйста, пишите в комментариях. Спасибо за внимание!
 Всем Привет! Сегодня расскажу, как быстро из подручных средств соорудить антенну для роутера, точки доступа или wi-fi адаптера. Если вы оказались в ситуации, когда сигнал не стабилен и соединение постоянно рвется, данное приспособление поможет решить эту проблему. Собственно антенной эту конструкцию назвать нельзя, скорее это усилитель для антенны, который поможет усилить wi-fi в пределах не большого радиуса ( до 200 м). Несомненное достоинство такой «приспособы» в том, что ее может изготовить любой в течении нескольких минут, имея под рукой алюминиевую банку из под колы, пива и т. д.
Как всегда весь процесс проиллюстрирован на фото, для изготовления понадобится алюминиевая банка, все равно из под чего, можно даже из под пива, которое для начала нужно выпить (несомненно, это самый приятный момент во всем процессе :-)), объем банки может быть любой, главное ее обрезать по высоте штатной антеннки, которая идет в комплекте с роутером, собственно ее усиливать мы и будем.


У пустой банки нужно отрезать дно, это можно сделать с помощью ножниц, или специального ножа (соблюдайте осторожность при обращении с режущими предметами), после разрезать ее вдоль, и не полностью отрезать верхушку, что бы получилось как на фото. Далее, вставляем антенну в отверстие для питья, укрепив с помощью любого уплотнителя, и все, wi-fi усилитель готов.


Конечно это не супер антенна, но усилить помогает, и в пределах 200 м работает отлично, проверено. И в отличии, например от такой wi-fi антенны ее можно быстро изготовить и пользоваться. Также с помощью такой баночной антенны можно усилить сигнал на 3G модеме.

Не спешите выбрасывать: Банка из-под колы может заменить дорогой прибор
Алюминиевым банкам из-под колы нашли неожиданное применение. Из-них можно собрать экран для антенны WiFi-роутера.
Обычно такой экран для антенны роутера народные умельцы делают, если сигнал WiFi дома слабый, не достаёт до всех уголков дома. Если повезёт и конструкция будет качественно работать, то простая алюминиевая банка, которой место в мусорном ведре, может заменить покупку дорогого прибора — нового роутера. Так что не спешите выбрасывать упаковку от колы, а посмотрите, как сделать экран.
Собрать конструкцию на самом деле совсем не сложно. Отрежьте канцелярским ножом дно банки, а потом аккуратно подрежьте её стенки сверху. Должно получиться так, что отверстие для напитка станет проёмом для антенны, а стенки банки — самим экраном, улучшающим сигнал. Более наглядно принцип создания экрана для WiFi-роутера можно понять, посмотрев вот это видео.
Дзен
Телеграм
Подписывайтесь на наши каналы
и первыми узнавайте о главных новостях и важнейших событиях дня.
![]()
Download Article
![]()
Download Article
This wikiHow teaches you how to use an empty beer or soda can to marginally increase your Wi-Fi range at home. Keep in mind that using a can to boost your Wi-Fi is unlikely to fix substantial Wi-Fi range issues, and it may actually limit your Wi-Fi’s range in one direction.
-

1
Understand how this works. In theory, placing a sheet of aluminum behind your router will help focus your Wi-Fi toward your preferred source with increased power, thus increasing the range. This can help you stay connected to the Internet on items like consoles or desktop computers that are just outside of your Wi-Fi’s range.
- This is unlikely to work if your preferred item is more than a few feet outside of your router’s Wi-Fi range.
-
2
Gather the necessary tools. In order to create your Wi-Fi booster, you will need the following items:
- An empty, clean 500ml (16.9 fl oz) beer, soda, or otherwise aluminium can
- A Stanley knife or similar safety knife
- A pair of scissors strong enough to cut through thin metal, or a hacksaw
- A small piece of poster tack or similar adhesive
Advertisement
-
3
Wash out the can. Fill up the can with warm water, let it sit for a few seconds, then dump it out and repeat a few more times. Doing this ensures that your can’s inside is as clean as possible.
- This is easiest to do when your can is freshly empty rather than several hours (or days) old.
- You may want to leave the can upside-down on a paper towel to allow it to dry before you cut into it.
-
4
Remove the tab from the top of the can. This is most easily accomplished by pulling up on the tab, rotating it 180 degrees, and prying it up until it snaps off.
-
5
Cut the bottom off of the can. Using a hacksaw or your Stanley knife, remove entirely the bottom of the can.
- Be sure to cut as close to the bottom of the can as is possible.
-
6
Create the base of the Wi-Fi booster. Cut almost all the way around what used to be the top of the can, making sure to leave around half an inch of the can attaching the top to the rest of the can. At this point, you can flip over the can; the former top will now serve as the can’s base.
-
7
Make a vertical cut all the way down the can. Using your Stanley knife, cut down the side opposite of the section of the can that’s attaching the base to the rest of the can.
- The cut should be positioned so that when you spread out the can’s sides, the base of the can is centered.
-
8
Peel out the sides of the can. Now that the sides of the can aren’t attached to each other, you should be able to pry them apart to form a radar dish-shaped item.
- Be careful when doing this—the edges of the can are sharp.
- If you notice any remaining residue inside of the can, scrub it out and then dry off the can before proceeding.
-
9
Place adhesive on the bottom of the Wi-Fi booster’s base. Place a small amount of poster tack on what used to be the top of the can. This will help hold the can in place.
- Double-sided tape is another viable option here.
-
10
Place the booster behind the router. The booster’s «dish» should be facing in the direction toward which you want to boost the signal. Depending on how your router is designed, the way that you place the booster may vary:
- If your router has an antenna, you should be able to thread the antenna through the drinking hole in the bottom of the base.
- If your router has no antenna, make sure that the can is behind the router, and that the router’s front (e.g., the part with the lights) is facing in the direction toward which you want to boost the signal.
-
11
Enjoy your boosted Wi-Fi. While the boost to your Wi-Fi will be fairly minimal, you may still notice a change in your Internet speed or consistency where you previously struggled.


Advertisement
Add New Question
-
Question
Does this really work?

It reflects a signal from the reflective side (inside of the can) to the antenna and vice versa, causing the signal from the antenna to go in one side. This almost doubles the signal going to the reflective side, while killing the signal on the other side.
-
Question
How does this work?
The can is acting as a parabolic reflector, just like on the old multi-element television antennas.
-
Question
Can I use a plastic bottle instead of a can?
No, as it is not made of a reflective signal material such as aluminum is.
See more answers
Ask a Question
200 characters left
Include your email address to get a message when this question is answered.
Submit
Advertisement
-
Your Wi-Fi will lose some range in the direction away from which the Wi-Fi booster is facing. You can compensate for this by removing the Wi-Fi booster when not using the item for which you’re attempting to boost the Internet.
-
If your router is large enough, you may want to create more than one Wi-Fi booster in order to ensure that you’re covering the entire back of the router.
Thanks for submitting a tip for review!
Advertisement
-
The edges of the can will be extremely sharp after you cut open the can. Consider wearing gloves or some other protective garb while touching the can to avoid cutting yourself.
-
Non-aluminium cans will not boost your wireless signal, nor will plastics, wood, or other non-metal materials.
Advertisement
About This Article
Article SummaryX
To make a Wi-Fi booster using only a can, start by cutting the bottom off an aluminum can and removing the tab. Then, cut almost all the way around the top of the can, leaving about 1/2 inch so the top is still connected. Next, make a vertical cut all the way down the can except for the lid, and fold the sides of the can down so it’s flat. Finally, place the can behind your Wi-Fi router so the lid is on the bottom. For more tips, like how to boost a particularly large Wi-Fi router, scroll down!
Did this summary help you?
Thanks to all authors for creating a page that has been read 1,496,138 times.
Reader Success Stories
-

Geoff Rodley
Jul 30, 2016
«I loved the simplicity of the article. No plugs and cables or techno-gadgets to contend with or be baffled by. A…» more