Huawei uses machine translation combined with human proofreading to translate this document to different languages in order to help you better understand the content of this document.
Note: Even the most advanced machine translation cannot match the quality of professional translators.
Huawei shall not bear any responsibility for translation accuracy and it is recommended that you refer to the English document (a link for which has been provided).
How to Increase WiFi Speed (WLAN AC)
- About This Document
- Applicable Scenario
- Understanding the Theoretical Wi-Fi Speed
- How to Test the Wi-Fi Speed
- Why Is My Wi-Fi So Slow
- Three Simple Moves to Quickly Improve Your Wi-Fi Speed
- Seven Easy Steps to Maximize Your Wi-Fi Speed
- Low Wi-Fi Speed Due to Poor Wi-Fi Signal Strength
- Low Wi-Fi Speed Due to a Low Negotiated Wireless Speed
- Low Wi-Fi Speed Due to Incorrect WLAN Rate Limiting Configuration
- Low Wi-Fi Speed Due to Improper VLAN Configurations
- Low Wi-Fi Speed Because STAs Are Going Offline
- Web Pages Fail to Be Opened, and the Message «DNS Server Not Responding» Is Displayed
- Web Pages Load Slowly, and Packet Loss Occurs in a Ping Test
- Collecting Information About the Slow WiFi Speed Issue
- References
About This Document
To make your Wi-Fi network faster and easier to use, this document provides a set of common troubleshooting methods for slow Internet access through a WLAN provided by AR routers. If you encounter this issue when connecting to the Internet in wired mode through an AR router, resolve the problem by referring to Slow Internet Access in the Troubleshooting Insights.
Applicable Scenario
An AR router can work in either AC or Fat AP mode to provide WLAN services. These two modes apply to different scenarios.
- The AC mode applies to large-scale venues such as waiting halls and stadiums. In this mode, an AR router functions as an AC and provides access to downstream Fit APs. The AR router and Fit APs together provide WLAN access for STAs.
- The Fat AP mode applies to small-sized enterprises, homes, cafes, SOHO offices, and enterprise branches where WLAN services are deployed independently. In this mode, an AR router functions as a Fat AP and independently provides WLAN access for STAs.
The following describes how to locate and rectify the fault of slow Wi-Fi access in large-scale venues such as waiting halls and stadiums. For details about how to locate and rectify the fault of slow Wi-Fi access in small-scale places, see How to Increase WiFi Speed (WLAN Fat AP).
Typical Networking for Large-Scale Venues
In large-scale venues where a large number of users are scattered, multiple Fit APs are generally deployed and connected to one AR router to ensure pervasive coverage of radio signals. The AR router works in AC mode to manage Fit APs that provide wireless signals for users. Figure 1-1 shows the typical networking for a waiting hall. Only Huawei Fit APs can connect to the AR router. Unless otherwise specified, APs mentioned in this document refer to Fit APs.
Figure 1-1 Typical networking for a large-scale venue (waiting hall)
How to Determine the Working Mode of an AR Router
- Check the model name of an AR router. By default, an AR router with the letter W contained in its model name works in Fat AP mode, and that without the letter W contained in its model name works in AC mode.
- If you are not sure whether the default configuration has been modified, log in to the router and run the display workmode wlan command to check its working mode.
<Huawei> display workmode wlan
 Wlan Current WorkMode = ac
 Wlan Config WorkMode  = ac  //ac indicates the AC mode, and ap indicates the Fat AP mode.
- If the AR router does not work in AC mode, run the set workmode wlan command to set the working mode to AC.
<Huawei> system-view
[Huawei] set workmode wlan ac
Warning: The WorkMode Change will be activated after board reboot. Continue? [y/n]:y
[Huawei] quit
<Huawei> reboot fast
System will reboot! Continue ? [y/n]:y
Info: system is rebooting ,please wait...
For details about how to log in to an AR router through the CLI, see How to Log In to the AR Router Through the Console Port (CLI) and How to Log In to the Router Through the Mini USB Port (CLI) in How to Log In to an AR Router Through the Web and CLI.
Understanding the Theoretical Wi-Fi Speed
In daily life, everyone may have encountered slow web page loading or video freezing when connecting to the Internet through Wi-Fi with wireless terminals (such as mobile phones, PCs, and tablets). For example, many have wondered why their mobile phones become unresponsive during Internet access even with 200 Mbit/s bandwidth. Before answering this question, let’s get familiar with some terms closely related to the Wi-Fi speed.
Figure 1-2 Wi-Fi networking
Table 1-1 List of terms related to the Wi-Fi speed
|
Term |
Description |
Example |
|---|---|---|
|
Downlink speed |
As shown in Figure 1-2, the downlink speed is the speed at which the Internet sends traffic to you for such services as browser opening or file downloading, and is expressed in Mbit/s. In this document, the downlink speed is the bandwidth that a user subscribes to from a broadband carrier. |
When a user subscribes to a 200 Mbit/s broadband package, it means that 200 Mbit/s is the downlink speed. |
|
Wireless link speed negotiated between a STA and an AC |
The speed negotiated between a STA and an AC is also called the negotiated wireless speed, which is expressed in Mbit/s, as shown in Figure 1-2. The negotiated wireless speed is the maximum transmission speed supported by both the STA and Fit AP, and is also related to the AC configuration. For details, see Low Wi-Fi Speed Due to a Low Negotiated Wireless Speed. |
If the Fit AP supports 802.11ac, but the STA supports only 802.11b/g/a, but does not support 802.11n or 802.11ac, the maximum negotiated wireless speed can reach only 54 Mbit/s. |
|
Theoretical Wi-Fi speed |
This speed refers to the maximum data transmission speed when a STA accesses the Internet through a WLAN, in Mbit/s. The theoretical Wi-Fi speed is the smaller value between the downlink speed and the wireless link speed. |
If the downlink speed is 200 Mbit/s and the wireless link speed is 150 Mbit/s, the theoretical Wi-Fi speed is 150 Mbit/s. |
|
Theoretical Wi-Fi download speed |
This speed refers to the speed for downloading a file or video using a STA, in MB/s. As 1 byte equals 8 bits, the theoretical Wi-Fi download speed and the theoretical Wi-Fi speed are in the proportion of 1:8. |
When the theoretical Wi-Fi speed is 200 Mbit/s, the theoretical Wi-Fi download speed is 25 MB/s. |
How to Test the Wi-Fi Speed
A broadband network is an extremely complex end-to-end system, which consists of the client, access network, core network, and content resources. The client refers to the network set up between STAs and wireless routers. Devices on the access and core networks between optical modems and the Internet are provided by carriers and are irrelevant to users. According to user feedback, the slow Internet access issue is mostly caused by clients. If you encounter slow Internet access using Wi-Fi, a Wi-Fi speed test is recommended at first.
Hardware Requirements for Different Wi-Fi Speeds
Slow Internet access issues caused by clients can be classified into three types: hardware, software, and configuration issues. We can rectify software and configuration issues, but not hardware issues. To resolve hardware issues, replacing the hardware is the only choice. Therefore, before a Wi-Fi network speed test, verify that the hardware configuration meets the requirements.
As broadband technologies continuously develop, 100 Mbit/s networks become widespread now. Table 1-2 describes hardware requirements for the 100 Mbit/s Wi-Fi speed.
Table 1-2 Hardware requirements for the 100 Mbit/s Wi-Fi speed
|
Hardware |
Requirements |
Description |
Remarks |
|---|---|---|---|
|
Wired interface on a wireless router |
1000 Mbit/s WAN or LAN interface |
A 100 Mbit/s interface can transmit only traffic at a speed of lower than 100 Mbit/s. To transmit traffic at a speed of higher than 100 Mbit/s, the router must have a 1000 Mbit/s interface. |
For wired interface parameters supported by AR routers, check the router product documentation or official website. Assume that an AR101W-S is used. You can check its wired interface parameters in Interface Description > GE electrical interface in the Huawei ARS Product Documentation. |
|
Fit AP |
|
The maximum transmission speed supported by a Fit AP is subject to the wireless protocol it supports. The maximum transmission speed varies depending on the AP model. For example, you can find out the rates supported by the AP6050DN, see «Radio Specifications» in Hardware Information (AP6050DN). |
For Wi-Fi protocols supported by Fit APs, check the product documentation or official website. For example, you can find out the Wi-Fi protocols supported by the AP6050DN, see AP6050DN Product Description. |
|
Wireless network adapter of a STA |
|
The maximum transmission speed supported by a STA’s wireless network adapter is subject to the wireless protocol it supports. For 802.11n/ac, the maximum speeds supported in different MIMO modes and at different frequency bandwidths are as follows:
The wireless parameters of a STA’s wireless network adapter must match those of the wireless router and Fit APs. Otherwise, the wireless link speed negotiated between the STA and router is low, and the Wi-Fi speed is affected. |
For Wi-Fi parameters supported by a STA, check its product description or official website. For example, you can find Wi-Fi parameters of Huawei’s smartphone Mate 30 Pro 5G from SPECIFICATIONS > NETWORK on Huawei Vmall. |
|
Optical modem |
Gigabit optical modem |
Generally, optical modems are provided by carriers. If optical modems are not available, you can purchase them by yourself. |
None |
|
Ethernet cable |
Category 5 enhanced (Cat 5e) cables or higher |
Category 5 (Cat 5) or higher Ethernet cables apply to 100 Mbit/s networks, but they have been mostly replaced by Cat 5e cables. Therefore, Cat 5e cables be recommended. |
None |
Figure 1-3 Wi-Fi speed chart
Wi-Fi Speed Test Method
Similar to broadband speed tests, Wi-Fi speed tests can be carried out in online (websites) or local (tools) mode. The test result varies with the speed test method. It is recommended that the Wi-Fi speed be tested using different methods for multiple times.
- For PCs, it is recommended that speed tests be carried out on websites, for example, carriers’ or dedicated speed test websites.
- For mobile phones or tablets, it is recommended speed tests be locally tested using tools. Download an app for Wi-Fi speed test from app stores (such as AppGallery or App Store) and install it to test the Wi-Fi speed.
Wi-Fi Speed Evaluation Criteria
Based on live network experiences, we summarize some recommended Wi-Fi speed evaluation criteria, as listed in Table 1-3.
Table 1-3 Wi-Fi speed evaluation criteria
|
Theoretical Wi-Fi Speed (Mbit/s) |
Theoretical Wi-Fi Download Speed (MB/s) |
Slow (< 60% of the Theoretical Wi-Fi Speed) |
Normal (60% to 80% of the Theoretical Wi-Fi Speed) |
Good (> 80% of the Theoretical Wi-Fi Speed) |
|---|---|---|---|---|
|
10 |
1.25 |
< 6 Mbit/s bandwidth |
6–8 Mbit/s bandwidth |
> 8 Mbit/s bandwidth |
|
20 |
2.5 |
< 12 Mbit/s bandwidth |
12–16 Mbit/s bandwidth |
> 16 Mbit/s bandwidth |
|
50 |
6.25 |
< 30 Mbit/s bandwidth |
30–40 Mbit/s bandwidth |
> 40 Mbit/s bandwidth |
|
100 |
12.5 |
< 60 Mbit/s bandwidth |
60–80 Mbit/s bandwidth |
> 80 Mbit/s bandwidth |
|
200 |
25 |
< 120 Mbit/s bandwidth |
120–160 Mbit/s bandwidth |
> 160 Mbit/s bandwidth |
|
300 |
37.5 |
< 180 Mbit/s bandwidth |
180–240 Mbit/s bandwidth |
> 240 Mbit/s bandwidth |
|
500 |
62.5 |
< 300 Mbit/s bandwidth |
300–400 Mbit/s bandwidth |
> 400 Mbit/s bandwidth |
- Some speed test software may measure the Wi-Fi download speed in the unit of MB/s, and will convert the unit into Mbit/s before displaying the test results. If the test results are still displayed in the unit of MB/s, multiply the value by 8 to obtain the actual Wi-Fi speed in the unit of Mbit/s.
- The theoretical Wi-Fi speed is the smaller value between the downlink speed and the wireless link speed. For example, if the downlink speed is 200 Mbit/s and the wireless link speed negotiated between the router and STA is 300 Mbit/s, the theoretical Wi-Fi speed is 200 Mbit/s.
Why Is My Wi-Fi So Slow
After analyzing numerous actual cases on live networks, we have summarized seven typical reasons for the low Wi-Fi speed issue, as shown in Figure 1-4.
Figure 1-4 Seven typical reasons for the low Wi-Fi speed issue
Three Simple Moves to Quickly Improve Your Wi-Fi Speed
Quickly improving the Wi-Fi speed can help customers restore the network services as soon as possible and rectify faults, which, however, will impose impact on running services. For example, restarting a device may interrupt current services. To minimize the impact, perform operations for speeding up your Wi-Fi during off-peak hours. For operations on the web system, see Logging In to an AR Router Through a Web System in How to Configure an AR Router.
Table 1-4 Three moves to quickly improve the Wi-Fi speed
|
No. |
Handling Measure |
Remarks |
|---|---|---|
|
1 |
Remove obstacles or interference sources around APs to keep them away from walls, microwave ovens, and metal objects. If the AP is connected to external Wi-Fi antennas, adjust the antenna angles by referring to Antenna Installation and remove obstacles around the antennas. |
None |
|
2 |
Power off and restart the router. Save the configuration before the restart to prevent configuration loss. In practice, the auto-save function is enabled to prevent configuration loss upon power-off. Web: Manually save the configuration before the restart, as shown in the following figure.
|
Restarting the router interrupts user services for 1 to 2 minutes. |
|
3 |
Reset Wi-Fi parameters of the router. Before resetting the Wi-Fi parameters, delete the existing Wi-Fi parameter settings.
|
|
|
4 |
Contact technical support engineers. For details, see Collecting Information About the Slow WiFi Speed Issue. |
None |
Seven Easy Steps to Maximize Your Wi-Fi Speed
Low Wi-Fi Speed Due to Poor Wi-Fi Signal Strength
Context
As WLANs use radio signals to transmit service data, radio waves in the air are attenuated due to the impact of the surrounding environment. If the Wi-Fi speed is low, check the Wi-Fi signal strength. The strength of Wi-Fi signals received by a STA directly affects the Wi-Fi speed.
After a STA is connected to a WLAN, the number of signal bars displayed on the STA directly shows the strength of the current Wi-Fi signal. Generally, three or four bars indicate that the Wi-Fi signal strength is normal, and zero to two bars indicate that the Wi-Fi signal strength is poor. You can also run the rf-ping command to check the strength of radio signals received by a STA. If the value of RSSI is lower than –65 dBm, the radio signals received by the STA are weak. If the strength of signals received by the STA is poor, perform the following operations for troubleshooting:
- Environment: For example, the AP or antenna is blocked by objects, causing large signal attenuation. Signals attenuate to different degrees when traveling through walls, glass, and doors. Especially, metal obstacles may completely block or reflect radio signals.
- Power: If an AP’s transmit power is low, STAs far away from the AP cannot receive radio signals. The transmit power of an AP determines its radio coverage area. That is, an AP with higher transmit power can cover a larger area.
- Interference: Improper AP channel settings may lead to severe signal interference. On a WLAN, adjacent APs must work on non-overlapping channels to avoid signal interference. The 2.4 GHz frequency band has overlapping channels. When setting channels for APs, you are advised to configure a non-overlapping channel set containing channels 1, 6, and 11 or containing channels 1, 5, 9, and 13.
Troubleshooting Procedure
- Run the rf-ping command to check the strength of radio signals received by a STA. If the value of RSSI is lower than –65 dBm, the radio signals received by the STA are weak. In this case, you need to improve the radio signal strength in terms of environment, power, and interference.
<Huawei> system-view
[Huawei] wlan ac
[Huawei-wlan-view] rf-ping xxxx-xxxx-xxxx
 Tx rate=52.0 Mbps, Reply from xxxx-xxxx-xxxx: RSSI=-58 dBm time < 1 ms
 1 packets transmitted, 1 received, 0% packet loss, time < 1 ms, RSSI -58 dBm
- Check whether the AP is blocked by obstacles. If so, remove the obstacles. If the AP is connected to external Wi-Fi antennas, adjust the antenna angles by referring to Antenna Installation and remove obstacles around the antennas.
- Run the display radio all command to check whether the AP’s transmit power is the maximum value. In the command output, CE/ME indicates the ratio of the actual AP power to the maximum power.
<Huawei> display radio all
CH/BW:Channel/Bandwidth
CE:Current EIRP (dBm)
ME:Max EIRP (dBm)
CU:Channel utilization
ST:Status
------------------------------------------------------------------------
AP ID Name    RfID  Band  Type    ST  CH/BW          CE/ME   STA    CU
------------------------------------------------------------------------
0     L1_003  0     2.4G  bgn     on  6/20M          11/24   0      71%
0     L1_003  1     5G    an      on  149/20M        28/28   0      39%
------------------------------------------------------------------------
Total:2
- If the value of CE is not equal to the value of ME, run the eirp eirp command to set the AP’s transmit power to the maximum value.
<Huawei> system-view
[Huawei] wlan ac
[Huawei-wlan-view] ap-id 0
[Huawei-wlan-ap-0] radio 0
[Huawei-wlan-radio-1/0] eirp 24
- In addition, check whether the STA is far away from the AP. Generally, when the STA is more than 50 m away from the AP, the Wi-Fi speed cannot increase even if the AP works at the maximum transmit power. In this case, deploy more APs to improve the wireless signal coverage, or move the STA to the signal coverage area.
- If the value of CE is not equal to the value of ME, run the eirp eirp command to set the AP’s transmit power to the maximum value.
- Check for interference to 2.4 GHz or 5 GHz radio signals. Run the display radio all command to check the AP’s channel utilization to determine the signal interference level. In the command output, CU indicates the channel utilization.
<Huawei> display radio all
CH/BW:Channel/Bandwidth
CE:Current EIRP (dBm)
ME:Max EIRP (dBm)
CU:Channel utilization
ST:Status
------------------------------------------------------------------------
AP ID Name    RfID  Band  Type    ST  CH/BW          CE/ME   STA    CU
------------------------------------------------------------------------
0     L1_003  0     2.4G  bgn     on  6/20M          11/24   0      71%
0     L1_003  1     5G    an      on  149/20M        28/28   0      39%
------------------------------------------------------------------------
Total:2
- If the value of CU is greater than 50%, the AP’s channel utilization is high, indicating severe radio signal interference. In this case, you are advised to switch the AP to a channel with less interference.
<Huawei> system-view
[Huawei] wlan ac
[Huawei-wlan-view] ap-id 0
[Huawei-wlan-ap-0] radio 0
[Huawei-wlan-radio-0/0] channel 20mhz 6   // Switch the AP's 2.4 GHz channel.
<Huawei> system-view
[Huawei] wlan ac
[Huawei-wlan-view] ap-id 0
[Huawei-wlan-ap-0] radio 1
[Huawei-wlan-radio-0/1] channel 80mhz 149    // Switch the AP's 5 GHz channel.
- Check whether there are interfering devices around the AP, such as microwave ovens, cordless phones, and Bluetooth devices. If so, remove the interference sources to reduce the channel utilization.
- If the value of CU is greater than 50%, the AP’s channel utilization is high, indicating severe radio signal interference. In this case, you are advised to switch the AP to a channel with less interference.
Low Wi-Fi Speed Due to a Low Negotiated Wireless Speed
Context
As described above, the negotiated wireless speed of a STA determines the upper limit of the STA’s Wi-Fi speed. A STA with a lower negotiated wireless speed has a lower link setup rate and a lower Wi-Fi speed. The negotiated wireless speed of a STA is affected by many factors, including the following:
- Radio mode: A STA’s association rate varies according to the radio mode of the associated AP. For example, 802.11g supports a maximum of 54 Mbit/s association rate, while 802.11n supports up to 600 Mbit/s association rate. If the radio mode of an 802.11n AP is set to 802.11g instead of 802.11n, the maximum association rate of STAs can only reach 54 Mbit/s.
- Frequency bandwidth (in Hz): The frequency bandwidth of a STA refers to the amount of data that the STA can transmit within a specific period. This also reflects the STA’s capability of transmitting data through a communication channel. The frequency bandwidth determines the link setup rate. A larger frequency bandwidth indicates a higher link setup rate. The frequency bandwidth is the maximum value supported by both the STAs and APs. If a STA and an AP both support 802.11ac, the 80 MHz frequency bandwidth can be configured. For 80211.b/g/a STAs, modifying the frequency bandwidth does not affect their link setup rates.
- Encryption mode: When TKIP encryption is used, an 802.11n-capable STA can associate with an AP only in 802.11g mode and the maximum link setup rate can reach only 54 Mbit/s. This is because the TKIP encryption mode is not defined in 802.11n.
- WMM function: If WMM is disabled, the STA can associate with an AP only in 802.11b/g/a mode, and the maximum link setup rate can reach only 54 Mbit/s.
- Protocol type supported by the STA’s wireless network adapter: If a STA’s wireless network adapter only supports 802.11b/g/a but does not support 802.11n or 802.11ac, the STA’s association mode can only be set to 802.11b/g/a and the maximum link setup rate of the STA can only reach 54 Mbit/s.
If the Internet access speed of a STA is low, perform the following steps to check whether the STA’s link setup rate is too low.
Troubleshooting Procedure
- Run the display radio all command to check the radio mode of an AP. In the command output, Type indicates the protocol type of an AP radio.
<Huawei> display radio all
CH/BW:Channel/Bandwidth
CE:Current EIRP (dBm)
ME:Max EIRP (dBm)
CU:Channel utilization
ST:Status
------------------------------------------------------------------------
AP ID Name    RfID  Band  Type    ST  CH/BW          CE/ME   STA    CU
------------------------------------------------------------------------
0     L1_003  0     2.4G  bgn     on  6/20M          11/24   0      71%
0     L1_003  1     5G    an      on  149/20M        28/28   0      39%
------------------------------------------------------------------------
Total:2
- If Type is not displayed bgn for the 2.4 GHz radio, run the radio-type dot11n command to set the radio type to dot11n in the 2G radio profile.
<Huawei> system-view
[Huawei] wlan ac
[Huawei-wlan-view] radio-2g-profile name default
[Huawei-wlan-radio-2g-prof-default] radio-type dot11n
- If Type is not displayed ac for the 5 GHz radio, run the radio-type dot11ac command to set the radio type to dot11ac in the 5G radio profile.
<Huawei> system-view
[Huawei] wlan ac
[Huawei-wlan-view] radio-5g-profile name default
[Huawei-wlan-radio-5g-prof-default] radio-type dot11ac
- If Type is not displayed bgn for the 2.4 GHz radio, run the radio-type dot11n command to set the radio type to dot11n in the 2G radio profile.
- For 802.11ac STAs, you are advised to run the channel command to set the channel bandwidth to 80 MHz.
<Huawei> system-view
[Huawei] wlan ac
[Huawei-wlan-view] ap-id 0
[Huawei-wlan-ap-0] radio 1
[Huawei-wlan-radio-0/1] channel 80mhz 149
- Run the display security-profile name command to check the encryption mode. In the command output, Encryption indicates the currently configured encryption mode.
<Huawei> display security-profile name default
------------------------------------------------------------
Security policy               : Open system
Encryption                    : -
------------------------------------------------------------
WEP's configuration
Key 0                         : *****
Key 1                         : *****
Key 2                         : *****
......
If Encryption is displayed TKIP, you are advised to run the following commands to change the encryption mode to AES:
<Huawei> system-view
[Huawei] wlan ac
[Huawei-wlan-view] security-profile name p1
[Huawei-wlan-sec-prof-p1] security wpa psk pass-phrase abcdfffffgF aes   // Set the WPA encryption mode to AES.
<Huawei> system-view
[Huawei] wlan ac
[Huawei-wlan-view] security-profile name p1
[Huawei-wlan-sec-prof-p1] security wpa2 psk pass-phrase abcdfffffgF aes   // Set the WPA2 encryption mode to AES.
- Run the display radio-2g-profile or display radio-5g-profile command to check whether the WMM function is enabled. In the command output, WMM switch indicates whether the WMM function is enabled.
<Huawei> display radio-2g-profile name default
------------------------------------------------------------
Radio type                             : 802.11n
Power auto adjust                      : disable
Beacon interval(ms)                    : 100
Support short preamble                 : support
Channel switch announcement            : enable
Guard interval mode                    : normal
HT A-MPDU switch                       : enable
HT A-MPDU length limit                 : 3
RTS-CTS-mode                           : cts-to-self
RTS-CTS-threshold                      : 2347
802.11bg basic rate                    : 1 2
802.11bg support rate                  : 1 2 5 6 9 11 12 18 24 36 48 54
Multicast rate 2.4G                    : 11
Interference detect switch             : disable
Co-channel frequency interference threshold(%)        : 50
Adjacent-channel frequency interference threshold(%)  : 50
Station interference threshold         : 32
WMM switch                             : enable
Mandatory switch                       : disable
......
If WMM switch is displayed disable, run the following commands to enable the WMM function in the radio profile:
<Huawei> system-view
[Huawei] wlan ac
[Huawei-wlan-view] radio-2g-profile name default
[Huawei-wlan-radio-2g-prof-default] undo wmm disable
- Check the protocol type supported by the STA’s wireless network adapter. For details, see Table 1-2. If the STA does not support 802.11n or 802.11ac, the STA’s maximum link setup rate can only reach 54 Mbit/s. You can replace the STA to increase the Wi-Fi speed.
Low Wi-Fi Speed Due to Incorrect WLAN Rate Limiting Configuration
Context
In Wi-Fi access scenarios, rate limiting may be configured to protect network bandwidth resources, which in turn affects the Wi-Fi speed of STAs. Therefore, upon slow Wi-Fi access, check whether the WLAN rate limiting function is configured on an AR router.
- When a loop occurs on the wired network, the device receives a large number of multicast or broadcast packets. As a result, the device cannot process wireless packets, affecting the Wi-Fi access speed of STAs. In this case, enable Layer 2 port isolation on the AC to isolate broadcast and multicast packets.
- When a STA that performs heavy-traffic services at a low rate is connected to an AP, other STAs connected to the AP may fail to access the Internet. In this case, you can limit the rate of the STA within the normal range, so that other STAs can access the Internet normally.
Troubleshooting Procedure
- Run the display interface brief command to check packet statistics on device interfaces. Check the incoming and outgoing traffic to determine whether an interface receives or sends a large number of packets.
<Huawei> display interface brief
PHY: Physical
*down: administratively down
(l): loopback
(s): spoofing
(b): BFD down
^down: standby
(e): ETHOAM down
(v): VirtualPort
InUti/OutUti: input utility/output utility
Interface                   PHY   Protocol InUti OutUti   inErrors  outErrors
Dialer1                     up    up(s)       0%     0%          0          0
Eth-Trunk18                 down  down        0%     0%          0          0
Ethernet1/0/0               up    up       0.01%  0.01%          0          0
Ethernet1/0/1               down  down        0%     0%          0          0
GigabitEthernet0/0/0        up    up      52.8%  49.9%          0          0
GigabitEthernet0/0/1(v)     *down down        0%     0%          0          0
GigabitEthernet0/0/1.1(v)   down  down        0%     0%          0          0
......
If the incoming and outgoing traffic is large on an interface, a loop may occur on the network. In this case, run the display interface interface-type interface-number command to check detailed packet statistics on the interface. You can run the command several times and check the increase of packet statistics.
<Huawei> display interface gigabitethernet 0/0/0
GigabitEthernet0/0/0 current state : UP
Line protocol current state : UP
Last line protocol up time : 2012-07-30 11:23:29
Description:HUAWEI, AR Series, GigabitEthernet0/0/0 Interface
Route Port,The Maximum Transmit Unit is 1500
Internet Address is 192.168.2.2/24
IP Sending Frames' Format is PKTFMT_ETHNT_2, Hardware address is 00e0-fcce-7d4d
Last physical up time   : 2012-07-30 11:23:29
Last physical down time : 2012-07-30 11:09:17
Current system time: 2012-07-30 14:58:24
Port Mode: COMMON COPPER
Speed : 1000,  Loopback: NONE
Duplex: FULL,  Negotiation: ENABLE
Mdi   : AUTO   Clock   : SLAVE
Last 300 seconds input rate 0 bits/sec, 0 packets/sec
Last 300 seconds output rate 0 bits/sec, 0 packets/sec
Input peak rate 0 bits/sec,Record time: 2012-07-30 13:46:52
Output peak rate 0 bits/sec,Record time: 2012-07-30 13:46:52

Input:  983276 packets, 132479662 bytes
  Unicast:             288163,  Multicast:               25518
  Broadcast:           669595,  Jumbo:                       0
  Discard:                  0,  Total Error:                 0

  CRC:                      0,  Giants:                      0
  Jabbers:                  0,  Throttles:                   0
  Runts:                    0,  Symbols:                     0
  Ignoreds:                 0,  Frames:                      0

Output:  465225 packets, 35625620 bytes
  Unicast:             464361,  Multicast:                   0
  Broadcast:              864,  Jumbo:                       0
  Discard:                  0,  Total Error:                 0

  Collisions:               0,  ExcessiveCollisions:         0
  Late Collisions:          0,  Deferreds:                   0

    Input bandwidth utilization threshold : 100.00%
    Output bandwidth utilization threshold: 100.00%
    Input bandwidth utilization  : 0.01%
    Output bandwidth utilization :    0%
If the increase of broadcast or multicast packets exceeds 500 pps, a loop occurs on the network. If the increase exceeds 100 pps, the interface receives a large number of broadcast or multicast packets. In this case, run the port-isolate enable command on the Layer 2 interface of the AC to configure port isolation to isolate unnecessary broadcast and multicast packets.
<Huawei> system-view
[Huawei] sysname AC
[AC] vlan batch 100 101
[AC] interface gigabitethernet 0/0/0
[AC-GigabitEthernet0/0/0] port link-type trunk
[AC-GigabitEthernet0/0/0] port trunk pvid vlan 100
[AC-GigabitEthernet0/0/0] port trunk allow-pass vlan 100 101
[AC-GigabitEthernet0/0/0] port-isolate enable
[AC-GigabitEthernet0/0/0] quit
- If the interface sends and receives traffic normally, run the display station all command to view STA access information and check for STAs with low link setup rates.
<Huawei> display station all
Rf/WLAN: Radio ID/WLAN ID
Rx/Tx: link receive rate/link transmit rate(Mbps)
-------------------------------------------------------------------------------------------------------------------
STA MAC          AP ID Ap name  Rf/WLAN  Band  Type  Rx/Tx      RSSI  VLAN  IP address                SSID
-------------------------------------------------------------------------------------------------------------------
00e0-fc68-2017   0     area_1   0/1      2.4G  11n   64/64      -50   100   192.168.20.173            wlan-net
00e0-fc02-c617   0     area_1   1/1      5G    11n   97/114     -38   100   192.168.20.31             wlan-net5g
-------------------------------------------------------------------------------------------------------------------
Total: 2 2.4G: 1 5G: 1
If the value of Rx/Tx is lower than 30 Mbit/s for a STA, the STA’s link setup rate is low. In this case, run the display station statistics sta-mac sta-mac-address command to check packet statistics about the STA.
<Huawei> display station statistics sta-mac 00e0-fc68-2017
-----------------------------------------------------------------
Packets sent to the station                            : 7
Packets received from the station                      : 40
Bytes sent to the station                              : 1170
Bytes received from the station                        : 3911
Wireless data rate sent to the station(kbps)           : 0
Wireless data rate received from the station(kbps)     : 0
STA power save percent                                 : 0%
------------------------------------------------------------------
If the traffic of a STA exceeds 10 Mbit/s, the STA is transmitting heavy-traffic services. To ensure other STAs can normally access the Internet, run the rate-limit client command to rate-limit upstream and downstream packets of each STA on the VAP.
<Huawei> system-view
[Huawei] sysname AC
[AC-wlan-view] traffic-profile name p1
[AC-wlan-traffic-prof-p1] rate-limit client up 1024
[AC-wlan-traffic-prof-p1] rate-limit client down 1024
[AC-wlan-traffic-prof-p1] quit
Low Wi-Fi Speed Due to Improper VLAN Configurations
Context
Packets transmitted on a WLAN include management packets and service data packets. Management packets must be transmitted over Control and Provisioning of Wireless Access Points (CAPWAP) tunnels, and service data packets can be transmitted over CAPWAP tunnels or directly. In practice, different VLANs must be configured for management packets and service data packets, that is, the management VLAN and service VLAN.
- Management VLAN: transmits packets that are forwarded through CAPWAP tunnels, including management packets and service data packets forwarded through CAPWAP tunnels.
- Service VLAN: transmits service data packets.
The management and service VLANs must be configured in compliance with certain rules. Otherwise, the network may be congested and the Internet access speed may be affected. Therefore, if the Internet access speed of a STA is low, check whether the service and management VLANs are configured in compliance with the following rules:
- The broadcast domain of VLAN 1 is too large and broadcast packets are flooded. Therefore, do not configure VLAN 1 as the management VLAN or service VLAN.
- To prevent data forwarding exceptions caused by MAC address flapping, do not configure the same VLAN as both the management VLAN and service VLAN.
Troubleshooting Procedure
- Check whether the correct service VLAN and management VLAN are configured on the AC’s interface connected to APs. Run the interface interface-type interface-number command to enter the interface view and check the VLANs configured on the interface.
<Huawei> system-view
[Huawei] sysname AC
[AC] interface gigabitethernet 0/0/0
[AC-GigabitEthernet0/0/0] display this
#
interface GigabitEthernet0/0/0
 port link-type trunk
 port trunk pvid vlan 100
 port trunk allow-pass vlan 100
 port-isolate enable group 1
#
[AC-GigabitEthernet0/0/0] quit
- If the interface is configured to allow packets only from VLAN 100 to pass through, the service VLAN is VLAN 1 or the same as the management VLAN. In this case, run the vap-profile name profile-name command to enter the VAP profile view and check the service VLAN ID configured in the VAP profile. If the command output does not contain the service-vlan vlan-id configuration, the service VLAN is VLAN 1.
[AC] wlan ac
[AC-wlan-view] vap-profile name vap1
[AC-wlan-vap-prof-vap1] display this
#
 service-vlan vlan-id 100
#
[AC-wlan-vap-prof-vap1] quit
- If the service VLAN is VLAN 1 or the same as the management VLAN, run the following commands to configure VLAN 101 as the service VLAN:
[AC] vlan 101
[AC] interface gigabitethernet 0/0/0
[AC-GigabitEthernet0/0/0] port trunk allow-pass vlan 101
[AC-GigabitEthernet0/0/0] quit
[AC] wlan ac
[AC-wlan-view] vap-profile name vap1
[AC-wlan-vap-prof-vap1] service-vlan vlan-id 101
[AC-wlan-vap-prof-vap1] quit
Low Wi-Fi Speed Because STAs Are Going Offline
Context
In wired scenarios, to defend against ARP address spoofing attacks, we usually configure ARP entry fixing on an AR router. Then the router can determine whether to update ARP entries based on whether the MAC addresses in the received ARP packets match those in the ARP table. However, in wireless scenarios, STAs may change flexibly, and their MAC addresses and access locations change frequently. If ARP entry fixing is configured, STAs will go offline due to ARP learning exceptions. If a STA goes offline, web pages may be opened slowly or fail to be opened on the STA.
Troubleshooting Procedure
- Check whether ARP entry fixing is configured on the router.
Run the display arp anti-attack configuration entry-check command to check the ARP entry fixing mode. disabled indicates that ARP entry fixing is disabled on the router.
<Huawei> display arp anti-attack configuration entry-check
 ARP anti-attack entry-check mode: disabled
If the ARP entry fixing mode is not disabled, run the following commands to disable ARP entry fixing:
<Huawei> system-view
[Huawei] undo arp anti-attack entry-check enable
Web Pages Fail to Be Opened, and the Message «DNS Server Not Responding» Is Displayed
Context
Control Plane Committed Access Rate (CPCAR) rate-limits protocol packets sent to the CPU, so that CPU resources are not occupied, preventing impact on other services. Different CPCAR values can be set for different protocol types. Packets whose rate exceeds the CPCAR value are discarded.
On a WLAN, the most likely protocol packets to be discarded are DNS Request and ARP Request packets. The reasons are as follows:
- When accessing the URL of a website through a WLAN, a STA sends a DNS Request packet to the DNS server. The DNS server can be a DNS server on the public network or a gateway. When the DNS server functions as a gateway, a large number of DNS Request packets are generated if a large number of STAs access the network. When the number of DNS Request packets received by an AR router serving as the DNS server and gateway exceeds the CPCAR value, the router randomly discards the DNS Request packets. If the DNS Request packet of a STA is discarded, the DNS server will not respond to the STA. As a result, the requested web page loads slowly or fails to load.
- On a WLAN, some STAs scan LAN segments and send ARP Request packets to all IP addresses on their local LANs. When the number of ARP Request packets received by the router exceeds the CPCAR value, the router randomly discards the ARP Request packets. If the ARP Request packet of a STA is discarded, the router cannot learn its ARP entry. As a result, the requested web page loads slowly. If the router keeps failing to learn ARP entries of the STA, the STA cannot access web pages.
Troubleshooting Procedure
- Check whether DNS or ARP Request packets are discarded on the router.
Run the display cpu-defend statistics command for multiple times to check whether the Drop Packets values corresponding to arp-request and dns-request change.
<Huawei> display cpu-defend statistics
------------------------------------------------------------------
Packet Type               Pass Packets        Drop Packets
-------------------------------------------------------------------
8021X                                0                   0
arp-miss                             5                   0
arp-reply                         8090                   0
arp-request                   1446576              127773
……
dns-request                     12465                1177
fib-hit                              0                   0
fr                                   0                   0
ftp-client                           0                   0
ftp-server                           0                   0
fw-dns                               0                   0
fw-ftp                               0                   0
……
-------------------------------------------------------------------
If the Drop Packets value corresponding to arp-request keeps increasing, ARP Request packets are discarded. In this case, run the following commands to change the CPCAR value to 512 for ARP Request packets.
<Huawei> system-view
[Huawei] cpu-defend policy arp
[Huawei-cpu-defend-policy-arp] packet-type arp-request rate-limit 512
[Huawei-cpu-defend-policy-arp] quit
[Huawei] cpu-defend-policy arp
If the Drop Packets value corresponding to dns-request keeps increasing, DNS Request packets are discarded. In this case, run the following commands to change the CPCAR value to 512 for DNS Request packets.
<Huawei> system-view
[Huawei] cpu-defend policy dns
[Huawei-cpu-defend-policy-dns] packet-type dns-request rate-limit 512
[Huawei-cpu-defend-policy-dns] quit
[Huawei] cpu-defend-policy dns
After the fault is rectified, you are advised to delete cpu-defend policy dns and cpu-defend policy arp commands to restore default CPCAR values for ARP and DNS Request packets in order to protect CPU resources.
By default, the CPU attack defense policy default is applied to the router. The CPCAR values of various protocols have been specified in the CPU attack defense policy default and cannot be modified.
- Check whether the DNS proxy function is configured.
If DNS Request packets are discarded on the router, check whether the DNS proxy function is configured on the router. With this function, the gateway sends DNS Request packets from STAs to the CPU for processing, which aggravates discarding of DNS Request packets. Therefore, if DNS Request packets are discarded, deleting the DNS proxy configuration is recommended. Configure the DHCP function on the router to deliver the IP address of the DNS server on the public network to STAs so that the STAs can send DNS Request packets to the DNS server on the public network.
To check the DNS configuration, run the display current-configuration | include dns command.
<Huawei> display current-configuration  | inc dns
dns resolve
dns server x.x.x.x           //x.x.x.x specifies the IP address of the DNS server on the public network.
dns proxy enable                           //The DNS proxy function is configured.
dns relay enable                           //The DNS relay function is configured.
 dhcp server dns-list y.y.y.y        //DNS server address delivered to STAs. y.y.y.y specifies the IP address of the gateway interface.
If the preceding configuration is displayed, the DNS proxy function is configured on the router. In this case, delete the DNS proxy configuration and deliver the IP address of the DNS server on the public network to STAs through the DHCP function.
<Huawei> system-view
[Huawei] undo dns proxy enable
[Huawei] undo dns resolve
[Huawei] undo dns server x.x.x.x
[Huawei] interface vlanif 100
[Huawei-Vlanif100] undo dhcp server dns-list y.y.y.y
[Huawei-Vlanif100] dhcp server dns-list x.x.x.x  //Deliver the IP address of the DNS server on the public network to STAs in a VLANIF interface address pool.
Web Pages Load Slowly, and Packet Loss Occurs in a Ping Test
Context
If a STA is online on an AR router but cannot access the Internet, ping the IP address of the STA from the AR router to check whether packet loss occurs between the STA and the AR router. If the ping operation fails or some packets are lost, perform the following operations for troubleshooting:
- Check whether strict ARP learning is configured on the router. With strict ARP learning enabled on the router, it learns ARP entries only when receiving ARP Reply packets in response to ARP Request packets sent by itself. The router will not learn the ARP entry of a STA when receiving an ARP Request packet initiated by the STA. As a result, the router cannot ping the STA, and the STA fails to access web pages.
- Check whether an IP address conflict occurs on the network. When an attack occurs on the network, an IP address conflict may occur. The IP address conflict will lead to frequent route flapping on the router and cause packets to be sent to an incorrect STA. As a result, some packets are lost during the ping operation between the STA and the router, and web pages load slowly on the STA.
Troubleshooting Procedure
- Check whether strict ARP learning is configured on the router.
Run the display arp learning strict command to check the configuration of strict ARP learning.
<Huawei> display arp learning strict
The global configuration:arp learning strict              //If no information is displayed following arp learning strict, strict ARP learning is disabled.  Interface                           LearningStrictState
------------------------------------------------------------
 Vlanif100                           force-disable      //force-disable indicates that strict ARP learning is disabled on the interface.
 Vlanif200                           force-enable       //force-enable indicates that strict ARP learning is enabled on the interface.
------------------------------------------------------------
 Total:2
 Force-enable:1
 Force-disable:1
If strict ARP learning is configured on the device, perform the following operations to disable strict ARP learning in the system view and interface view in sequence:
<Huawei> system-view
[Huawei] undo arp learning strict
[Huawei] interface vlanif 200
[Huawei-Vlanif200] undo arp learning strict
- Check whether the STA encounters an IP address conflict.
In most cases, IP addresses of STAs are automatically assigned from an address pool of the VLANIF interface. Run the display ip pool interface interface-pool-name conflict command to check information about conflicting IP addresses in the address pool.
<Huawei> display ip pool interface Vlanif100 conflict
  Pool-name        : Vlanif100
  Pool-No          : 1
  Lease            : 1 Days 0 Hours 0 Minutes
 ……
Client-ID format as follows:
   DHCP  : mac-address                 PPPoE   : mac-address
   IPSec : user-id/portnumber/vrf      PPP     : interface index
   L2TP  : cpu-slot/session-id         SSL-VPN : user-id/session-id
  ----------------------------------------------------------------
  Index              IP             Client-ID    Type       Left   Status
  ----------------------------------------------------------------
   109      192.168.10.20           -        -         -    Conflict
----------------------------------------------------------------
After finding the conflicting IP address, locate the MAC address mapping this IP address so as to locate the STA and manually change its IP address. The following methods are available for you to locate the MAC address of a STA with a conflicting IP address.
- The router records IP-MAC mappings for STAs it has learned in its ARP entries, including the STAs with conflicting IP addresses. Run the display arp command on the router to check ARP entries to find the MAC address mapping the conflicting IP address.
<Huawei> display arp IP ADDRESS MAC ADDRESS EXPIRE(M) TYPE INTERFACE VPN-INSTANCE VLAN/CEVLAN(SIP/DIP) PVC ------------------------------------------------------------------------------ 10.10.10.1 xxxx-xxxx-xxxx I - GE0/0/5 10.10.10.214 yyyy-yyyy-yyyy 4 D-0 GE0/0/5 …… 192.168.10.20 zzzz-zzzz-zzzz I - GE0/0/3 - If the corresponding ARP entry is aged and no related information can be found, check logs about IP address conflicts. Run the display logbuffer command to view log information recorded in the log buffer. Search for AM/4/IPCONFLICTDTC in the log to view the MAC address mapping the conflicting IP address.
<Huawei> display logbuffer
Logging buffer configuration and contents: enabled
Allowed max buffer size: 1024
Actual buffer size: 512
Channel number: 4, Channel name: logbuffer
Dropped messages: 0
Overwritten messages: 3315
Current messages: 512

Apr  3 2020 13:46:15+00:00 Huawei %%01DEFD/4/CPCAR_DROP_MPU(l)[0]:Some packets a
re dropped by cpcar on the MPU. (Packet-type=arp-request, Drop-Count=14428)
Apr  3 2020 13:36:15+00:00 Huawei %%01DEFD/4/CPCAR_DROP_MPU(l)[1]:Some packets a
re dropped by cpcar on the MPU. (Packet-type=arp-request, Drop-Count=16593)
Apr  3 2020 13:26:15+00:00 Huawei %%01DEFD/4/CPCAR_DROP_MPU(l)[2]:Some packets a
re dropped by cpcar on the MPU. (Packet-type=arp-request, Drop-Count=922)
......
- The router records IP-MAC mappings for STAs it has learned in its ARP entries, including the STAs with conflicting IP addresses. Run the display arp command on the router to check ARP entries to find the MAC address mapping the conflicting IP address.
Collecting Information About the Slow WiFi Speed Issue
If the issue persists after the preceding steps, collect relevant information and contact technical support personnel.
- Collect fault information.
- Collect all diagnostic information and export the information to a file.
-
Run the display diagnostic-information file-name command in the user view to collect diagnostic information and save the information to a file.
<Huawei> display diagnostic-information dia-info.txt
  This operation will take several minutes, please wait.........................
..................................................................
Info: The diagnostic information was saved to the device successfully..
- When the diagnostic file is generated, you can export the file from the device using TFTP, FTP, or SFTP. For details, see Local File Management.
-
You can run the dir command in the user view to check whether the file is generated.
-
You can also run the display diagnostic-information command and save STA logs in a diagnostic file on a disk. For details, see Diagnostic File Obtaining Guide.
-
If this command displays a long output, press Ctrl+C to abort this command.
-
The display diagnostic-information command displays diagnostic information, which helps locate faults but may affect system performance. For example, the CPU usage may become high. Therefore, do not use this command when the system is running properly.
-
Do not run the display diagnostic-information command simultaneously on multiple terminals connected to the device. This is because doing so may significantly increase the CPU usage of the device and deteriorate the device performance.
-
-
- Collect the log and trap information on the device and export the information to files.
-
Run the save logfile command in the user view to save the log and trap information in the buffer to files.
<Huawei> save logfile
Info: It may take several seconds,please wait...
Save log file successfully.
- When the diagnostic file is generated, you can export the file from the device using TFTP, FTP, or SFTP. For details, see Local File Management.
You can also run the display logbuffer and display trapbuffer commands to view the log and trap information on the device, and save STA logs in a diagnostic file on a disk. For details, see Diagnostic File Obtaining Guide.
-
- Collect all diagnostic information and export the information to a file.
- Seek technical support.
Click http://e.huawei.com/en/how-to-buy/contact-us to seek technical support.
Technical support personnel will provide instructions for you to submit all the collected information and files, so that they can locate faults.
- About This Document
- Applicable Scenario
- Understanding the Theoretical Wi-Fi Speed
- How to Test the Wi-Fi Speed
- Why Is My Wi-Fi So Slow
- Three Simple Moves to Quickly Improve Your Wi-Fi Speed
- Seven Easy Steps to Maximize Your Wi-Fi Speed
- Low Wi-Fi Speed Due to Poor Wi-Fi Signal Strength
- Low Wi-Fi Speed Due to a Low Negotiated Wireless Speed
- Low Wi-Fi Speed Due to Incorrect WLAN Rate Limiting Configuration
- Low Wi-Fi Speed Due to Improper VLAN Configurations
- Low Wi-Fi Speed Because STAs Are Going Offline
- Web Pages Fail to Be Opened, and the Message «DNS Server Not Responding» Is Displayed
- Web Pages Load Slowly, and Packet Loss Occurs in a Ping Test
- Collecting Information About the Slow WiFi Speed Issue
- References
Wi-Fi сигнал является одним из ключевых аспектов, влияющих на качество интернет-соединения в доме или офисе. Роутер Huawei предоставляет возможности для усиления сигнала, что позволяет существенно улучшить его стабильность и скорость передачи данных.
В данной статье мы рассмотрим семь эффективных способов, которые помогут усилить Wi-Fi сигнал вашего роутера Huawei. Они включают в себя как аппаратные, так и программные решения, которые позволят вам настроить оптимальную работу вашей Wi-Fi сети.
Первый способ — обновление прошивки вашего роутера. Huawei регулярно выпускает обновления для своих устройств, которые исправляют ошибки и улучшают работу Wi-Fi сигнала. Обновление прошивки поможет вам использовать новейшие технологии и функции, что существенно повысит качество сигнала.
Второй способ — правильное размещение роутера в помещении. Для наилучшего распределения сигнала выберите центральное расположение роутера, чтобы исключить преграды и максимально охватить все помещение. Также помните, что близость к электронным устройствам, таким как микроволновые печи или телефоны, может сильно влиять на качество Wi-Fi сигнала, поэтому старайтесь избегать их.
Третий способ — использование усилителя (репитера) Wi-Fi сигнала. Это устройство позволяет увеличить зону охвата вашей Wi-Fi сети и усилить сигнал в тех местах, где роутер не может достичь. Многие модели репитеров Huawei способны работать в режиме усиления сигнала, что делает их идеальным дополнением к вашему роутеру.
Чтобы максимально эффективно использовать роутер Huawei и усилить Wi-Fi сигнал, рекомендуется следовать предложенным способам, комбинировать их и выбирать наиболее подходящие для вашей ситуации. Таким образом, вы сможете создать стабильную и быструю Wi-Fi сеть, которая удовлетворит все ваши потребности в интернете.
Не забывайте, что Wi-Fi сигнал может быть подвержен внешним воздействиям, поэтому, если необходимо, регулярно проверяйте и настраивайте свою сеть. Следуя этим советам, вы сможете максимально усилить Wi-Fi сигнал вашего роутера Huawei и наслаждаться стабильным и быстрым интернет-соединением.
Улучшение Wi-Fi сигнала: проблемы и решения
Проблемы с Wi-Fi сигналом могут быть вызваны различными факторами, включая расстояние от роутера, препятствия на пути сигнала, электромагнитные помехи и другие внешние воздействия. Однако, существует несколько эффективных способов улучшить Wi-Fi сигнал и обеспечить стабильное подключение ко всем устройствам в доме.
1. Позиционирование роутера: разместите роутер на центральном месте в доме и на некотором расстоянии от препятствий, таких как стены и мебель. Это позволит сигналу распространяться более равномерно по всему помещению.
2. Установка антенн: если роутер имеет отдельные антенны, проверьте их положение и угол наклона. Попробуйте установить антенны таким образом, чтобы они были направлены в сторону устройств, которые нуждаются в Wi-Fi сигнале.
3. Избегайте электромагнитных помех: другие электронные устройства, такие как микроволновые печи и беспроводные телефоны, могут влиять на Wi-Fi сигнал. Постарайтесь минимизировать использование таких устройств или размещайте их на значительном расстоянии от роутера.
4. Обновление программного обеспечения роутера: регулярно проверяйте наличие обновлений программного обеспечения для роутера и устанавливайте их. Это поможет исправить возможные ошибки и улучшить работу Wi-Fi сигнала.
5. Использование репитеров или усилителей сигнала: установка репитера или усилителя сигнала может значительно увеличить покрытие Wi-Fi и устранить зоны с плохим сигналом.
6. Использование сетевого кабеля: для устройств, которые находятся рядом с роутером и не могут получить стабильное Wi-Fi соединение, рекомендуется использовать сетевой кабель для подключения к Интернету.
7. Избегайте перегруженности сети: если сеть имеет много подключенных устройств, возможно, она будет работать медленнее. Ограничьте число одновременно подключаемых устройств или увеличьте скорость интернета.
Если проблемы с Wi-Fi сигналом остаются, рекомендуется обратиться к специалистам или провайдеру Интернета для дальнейшей диагностики и настройки оборудования.
Рассмотрим основные сложности, связанные с плохим Wi-Fi сигналом, и предложим эффективные способы их решения.
Стабильная и быстрая Wi-Fi сеть стала необходимостью для многих людей. Однако, часто пользователи сталкиваются с проблемами плохого сигнала, что может привести к медленной скорости интернета, разрывам соединения и низкому качеству связи. Вот некоторые из основных сложностей, связанных с плохим Wi-Fi сигналом:
1. Отдаленность от роутера: Если вы находитесь далеко от роутера, сигнал может быть ослаблен или даже не дотянуться до вас. Это особенно проявляется в больших домах или офисах, где сигнал должен пройти через несколько стен.
2. Помехи от других устройств: Ряд устройств, таких как микроволновые печи, беспроводные телефоны, Bluetooth-устройства и другие роутеры могут создавать помехи и влиять на качество Wi-Fi сигнала.
3. Плохое размещение роутера: Если роутер находится в неподходящем месте, например, в углу комнаты или за мебелью, сигнал может быть затруднен или ослаблен. Также, роутер следует размещать на определенном расстоянии от металлических предметов, которые могут блокировать сигнал.
4. Недостаточное количество роутеров: В больших помещениях или зданиях требуется несколько роутеров для обеспечения полного покрытия Wi-Fi сети. Отсутствие достаточного количества роутеров может привести к слабому сигналу и недостаточной скорости интернета.
5. Интерференция сигнала: Если слишком много устройств используют одну и ту же частоту Wi-Fi, они могут вмешиваться друг с другом и сигнал может стать менее стабильным.
6. Устаревшая технология: Старые модели роутеров могут иметь более слабые антенны и менее продвинутые технологии передачи данных, что влияет на качество сигнала.
7. Провайдер интернет-соединения: Не всегда проблема с Wi-Fi сигналом связана с роутером. Иногда причина может быть в провайдере интернет-соединения, когда скорость интернета не соответствует заявленной или возникают перебои в работе сети.
Для усиления Wi-Fi сигнала роутера Huawei и решения этих сложностей, можно использовать различные методы, такие как:
- Установка роутера в центре помещения и на достаточном расстоянии от препятствий.
- Использование Wi-Fi расширителей или повторителей сигнала для увеличения его покрытия.
- Обновление прошивки роутера и установка последних версий драйверов.
- Изменение настроек роутера, например, частотного диапазона или мощности сигнала.
- Использование антенн с высоким коэффициентом усиления или подключение внешней антенны.
- Изоляция роутера от помех, например, установка его на высоте или в специальном защитном корпусе.
- Обращение к провайдеру интернет-соединения для решения проблем с их стороны.
Применение этих методов поможет существенно улучшить качество Wi-Fi сигнала роутера Huawei и обеспечить стабильное и быстрое подключение к интернету.
Современная жизнь невозможна без быстрого и стабильного Интернета, особенно когда речь идет о WiFi соединении. Если у вас дома установлен роутер Huawei, но сигнал WiFi оказывается слабым или с интервалами пропадает, то возможно вам потребуется усилить его сигнал.
Усиление WiFi сигнала роутера Huawei может быть достигнуто различными способами без необходимости в дорогостоящем оборудовании или услугах специалистов. В этой статье мы рассмотрим 10 простых и доступных способов, которые помогут вам улучшить скорость Интернета в доме или офисе.
Первым шагом к усилению WiFi сигнала является выбор правильного расположения роутера Huawei. Роутер должен быть установлен в центре дома или офиса, чтобы WiFi сигнал равномерно распространялся по всему помещению. Кроме того, роутер должен находиться в высоте, избегайте установки его на полу или в низком месте, чтобы избежать помех от других объектов.
Другим важным способом усиления WiFi сигнала является изменение настроек роутера. Самым простым способом является изменение частотного диапазона роутера на менее засоренный канал. Это можно сделать в настройках роутера Huawei, выбрав подходящий канал.
Для увеличения дальности действия WiFi сигнала роутера Huawei можно использовать усилители сигнала (репитеры WiFi). Репитеры WiFi позволяют увеличить дальность действия сигнала, пересылая его от роутера к приемнику. Установка репитера WiFi находится вне зависимости от вашего провайдера Интернета, что позволяет выбрать лучшую модель для своих нужд.
Следующим способом улучшения WiFi сигнала является использование антенн с более высоким коэффициентом усиления. Для роутеров Huawei доступны сменные антенны, которые можно заменить на антенны с более высоким коэффициентом усиления. Такие антенны позволяют усилить сигнал и улучшить его качество.
Не забывайте также о регулярной очистке антенн и корпуса роутера Huawei от пыли и загрязнений. Пыль и грязь могут затруднять передачу сигнала, поэтому регулярная очистка поможет снизить помехи и улучшить качество WiFi связи.
Содержание
- Усиление WiFi сигнала роутера Huawei: почему это важно
- Используйте правильное место для роутера Huawei для улучшения сигнала
- Обновите программное обеспечение роутера Huawei для повышения скорости Интернета
- Оптимизируйте маршрутизацию WiFi сигнала роутера Huawei
Усиление WiFi сигнала роутера Huawei: почему это важно
Сильный WiFi сигнал обеспечивает не только высокую скорость передачи данных, но и лучшую пропускную способность. Это позволяет пользователем максимально полноценно использовать все возможности сети, включая потоковое видео, онлайн-игры, скачивание файлов и другие активности, требующие быстрого и устойчивого доступа в Интернет.
Кроме того, усиление WiFi сигнала роутера Huawei помогает избежать проблем с подключением в удаленных углах дома или офиса, где сигнал может быть слабым или отсутствовать. Сильный WiFi сигнал позволяет обеспечить связь и доступ к Интернету в любой комнате, не зависимо от ее удаленности от роутера.
Кроме того, хороший WiFi сигнал роутера Huawei важен для использования устройств с поддержкой Wi-Fi, таких как смартфоны, планшеты, ноутбуки и другие гаджеты. Качество сигнала существенно влияет на быстродействие этих устройств и оптимальное использование функций и возможностей, связанных с Интернетом.
Важно отметить, что усиление WiFi сигнала роутера Huawei может существенно повысить общую производительность сети и обеспечить удобство и комфорт при использовании Интернета. Правильное усиление сигнала роутера позволяет насладиться высокой скоростью и качеством сети в любой точке помещения.
Используйте правильное место для роутера Huawei для улучшения сигнала
Правильное размещение роутера Huawei может значительно улучшить сигнал WiFi и обеспечить более стабильное подключение к Интернету. Вот несколько рекомендаций по выбору оптимального места для вашего роутера:
- Разместите роутер в центральной части вашего дома или квартиры. Это поможет сократить расстояние между роутером и устройствами, подключенными к WiFi, и улучшит сигнал во всех помещениях.
- Избегайте размещения роутера в углу комнаты или за мебелью. Постарайтесь расположить его на открытой поверхности и на высоте, чтобы сигнал мог свободно распространяться.
- Постарайтесь избегать мест с большим количеством интерференций, таких как микроволновые печи или беспроводные телефоны. Эти устройства могут снижать скорость и качество WiFi сигнала.
- Убедитесь, что ваш роутер находится на безопасном расстоянии от других электронных устройств, особенно от металлических предметов. Возможное влияние на сигнал от этих предметов следует минимизировать.
- Если вы живете в большом доме или квартире с несколькими этажами, рассмотрите возможность использования усилителя сигнала или расширителя диапазона WiFi, чтобы обеспечить равномерное покрытие всей площади.
- Если у вас есть проблемы с сигналом в отдельных комнатах или зонах, вы можете рассмотреть возможность установки дополнительных точек доступа или мощных антенн для усиления сигнала WiFi в этих областях.
Следуя этим простым рекомендациям, вы сможете значительно улучшить сигнал WiFi вашего роутера Huawei и обеспечить более стабильное и быстрое подключение к Интернету.
Обновите программное обеспечение роутера Huawei для повышения скорости Интернета
Для обновления программного обеспечения роутера Huawei выполните следующие шаги:
- Проверьте текущую версию программного обеспечения вашего роутера. Для этого зайдите в настройки роутера, найдите раздел «О прошивке» или «Системная информация». Запишите текущую версию для сравнения с новой версией.
- Посетите официальный веб-сайт Huawei и найдите раздел поддержки или загрузок.
- В разделе загрузок найдите модель вашего роутера и найдите последнюю доступную версию программного обеспечения.
- Убедитесь, что выбрана версия, соответствующая модели вашего роутера и совместимая с вашим операционной системой.
- Скачайте файл обновления программного обеспечения на компьютер или ноутбук.
- Подключите компьютер к роутеру Huawei с помощью Ethernet-кабеля.
- Зайдите в настройки роутера и найдите раздел «Обновление прошивки» или «Системное обновление».
- Выберите файл обновления программного обеспечения, который вы скачали, и следуйте инструкциям на экране для установки обновления.
- После завершения установки обновления роутер автоматически перезагрузится.
- Проверьте версию программного обеспечения после перезагрузки, чтобы убедиться, что обновление прошло успешно.
Обновление программного обеспечения роутера Huawei может значительно улучшить скорость Интернета и усилить WiFi сигнал. Повышение производительности и исправление ошибок поможет оптимизировать работу вашего роутера, обеспечивая более стабильное и быстрое подключение к Интернету.
Оптимизируйте маршрутизацию WiFi сигнала роутера Huawei
Маршрутизация играет ключевую роль в передаче данных через WiFi сигнал роутера Huawei. Оптимизация этого процесса может значительно улучшить скорость и стабильность вашего Интернет-соединения. Вот некоторые простые шаги, которые вы можете предпринять для оптимизации маршрутизации WiFi сигнала роутера Huawei:
1. Разместите роутер на центральном месте
Идеальным местом для вашего роутера является центральное положение в вашем доме или офисе. Это помогает распространять WiFi сигнал равномерно во всех направлениях.
2. Избегайте перегруженных WiFi каналов
Роутер Huawei может автоматически выбирать наименее перегруженный канал WiFi. Если ваш роутер не делает этого, вы можете вручную настроить наименее занятый канал через административную панель роутера.
3. Проверьте конфигурацию WiFi сети роутера
Убедитесь, что ваш роутер настроен таким образом, чтобы поддерживать наиболее оптимальные параметры WiFi сети, такие как ширина канала и режим передачи. Вы можете найти эти настройки в административной панели роутера.
4. Обновите прошивку роутера
Периодически обновляйте прошивку вашего роутера Huawei, чтобы получить последние улучшения и исправления ошибок. Обновление прошивки может помочь улучшить производительность и стабильность WiFi сигнала.
5. Используйте репитеры или мощные антенны
Репитеры или мощные антенны могут помочь расширить зону покрытия вашего WiFi сигнала и усилить его мощность. Это особенно полезно, если у вас есть большой дом или офис с несколькими этажами.
6. Избегайте радиочастотных помех
Устройства, такие как микроволновые печи и беспроводные телефоны, могут создавать радиочастотные помехи, которые могут затруднить передачу сигнала роутера. Разместите свой роутер подальше от таких устройств, чтобы избежать помех.
7. Защитите свою WiFi сеть паролем
Убедитесь, что ваша WiFi сеть защищена паролем, чтобы предотвратить несанкционированный доступ и использование вашей пропускной способности. Используйте сложный пароль, состоящий из букв, цифр и специальных символов.
8. Выключайте роутер при небольшом использовании
Если у вас есть периоды небольшого или отсутствующего использования WiFi сети, вы можете выключать роутер, чтобы сэкономить электричество и увеличить срок службы роутера.
9. Перезапустите роутер время от времени
Периодически перезапускайте роутер Huawei для освобождения памяти и устранения возможных проблем с программным обеспечением. Это также может помочь улучшить производительность и стабильность WiFi сигнала.
10. Обратитесь к специалисту в случае проблем
Если у вас все еще возникли проблемы с WiFi сигналом, не стесняйтесь обратиться к специалисту или провайдеру услуг Интернета для получения дополнительной помощи и рекомендаций.
Следуя этим простым советам, вы сможете оптимизировать маршрутизацию WiFi сигнала вашего роутера Huawei и обеспечить более быстрый и стабильный Интернет.
Решил подготовить статью с советами по усилению сигнала Wi-Fi сети. В интернете, есть много разных статей на эту тему, но практически в каждой статье, очень много ненужной информации. Точнее, множество рекомендаций по каким-то настройкам, которые не имеют никакого отношен к увеличению радиуса сигнала Wi-Fi и никак не могут влиять на радиус действия самой сети.
Если мы говорим об усилении сигнала Wi-Fi, то конечно же имеем введу именно радиус покрытия самой сети, то есть дальность действия Wi-Fi. Для примера: купили мы роутер, установили, настроили, а в самых дальних комнатах Wi-Fi вообще не ловит, или уровень сигнала слишком слабый. Или же, роутер установлен на первом этаже (где сигнал есть), а на втором этаже сигнал уже очень слабый, или вообще отсутствует. Обычная ситуация, с которой сталкиваются многие, да я с сам с этим сталкивался.
От чего зависит радиус действия Wi-Fi сети? Очень много разных факторов: от самого роутера (количества и силы антенн), от стен в вашем доме, от количества соседних Wi-Fi сетей, от расположения роутера, каких-то других помех и т. д. Многие просят посоветовать роутер, который например обеспечит стабильный сигнал Wi-Fi для трехкомнатной квартиры, частного дома, и т. д. В таких случаях, невозможно посоветовать ничего конкретного. У всех разные условия, разные стены и т. д. Единственно, что я могу посоветовать, это приблизительно ориентироваться на площадь вашего дома. Если у вас например однокомнатная квартира, то даже недорогой роутер, с одной антенной мощностью в 3 dBi без проблем справится со своей задачей. Ну а если у вас дом, или квартира побольше, то берите устройство подороже. Хотя, и цена не всегда аргумент. Есть у меня роутер Asus RT-N18U – дорогой, три антенны, какая-то там фирменная функция Asus, которая увеличивает радиус покрытия сети. Так вот, при одинаковых условиях, на одинаковом расстоянии, он показывает результат не намного лучше, чем у того же D-link DIR-615/A. У которого антенны внутренние, да и дешевле он в несколько раз.
Как в настройках роутера усилить сигнал Wi-Fi?
Если вы уже купили, и установили у себя дома, или в офисе роутер, и Wi-Fi ловит не везде, где вам нужно, то можно попробовать усилить беспроводную сеть. Как это сделать, мы сейчас рассмотрим. Усилить сигнал можно как с помощью настроек в роутере, так и с помощью отдельных устройств, и приспособлений.
1
Поиск и смена канала на роутере. Если у вас устройства видят много доступных для подключения сетей ваших соседей, то все эти сети, могут загружать канал, на котором работает ваша сеть, и тем самым уменьшит радиус действия сети.
Можно попробовать, в настройках роутера задать какой-то статический канал, или же поставить Auto. Здесь нужно экспериментировать. Если вам не лень, то с помощью программы inSSIDer вы можете найти более свободный канал, и задать его в настройках вашего роутера.

Я не буду подробно расписывать, просто даю вам ссылку на статью Как найти свободный Wi-Fi канал, и сменить канал на роутере? В ней я подробно рассказывал о каналах, и о том как найти не загруженный канал. Так же, там есть инструкция по смене канала на роутерах разных производителей.
2
Переводим свою сеть в режим работы 802.11N. Как правило, по умолчанию на всех роутерах беспроводная сеть работает в смешанном режиме b/g/n (11bgn mixed). Если принудительно заставить роутер транслировать Wi-Fi в режиме работы 802.11N, то это может увеличить не только скорость, но и радиус покрытия Wi-Fi (если на вашем роутере более одной антенны).
Единственная проблема в том, что если у вас есть старые устройства, которые не поддерживают режим 802.11N, то они просто не будут видеть вашу сеть. Если у вас нет старых устройств, то без сомнений переключите свою сеть в режим n. Сделать это очень просто. Заходим в настройки роутера, обычно по адресу 192.168.1.1, или 192.168.0.1 (подробную инструкцию по входу в настройки смотрите здесь).
В настройках откройте вкладку, где настраивается беспроводная сеть. Называются они обычно так: Wi-Fi, Беспроводной режим, Беспроводная сеть, Wireless и т. д. Найдите там пункт Режим беспроводной сети (Mode) и установите в нем N only. То есть, работа сети только в режиме N.
Для примера: смена режима беспроводной сети на роутере Asus

Сохраните настройки и перезагрузите роутер. Если появляться проблемы с подключением устройств, то верните обратно смешанный режим.
3
Проверяем мощность передачи в настройках маршрутизатора. На некоторых роутерах, есть возможность выставить уровень мощности беспроводной Wi-Fi сети. Насколько я знаю, по умолчанию стоит максимальная мощность. Но, можно проверить.
В роутерах Asus, эти настройки меняются на вкладке Беспроводная сеть — Профессионально. В самом низу, есть пункт «Управление мощностью передачи Tx power». Там есть шкала, которую можно регулировать в процентах. Выглядит это вот так:

На роутерах Tp-Link открываем вкладку Wireless — Wireless Advanced. Пункт Transmit Power позволяет настроить силу сигнала. Значение High – означает максимальная мощность.

Эти настройки больше пригодятся в том случае, если вы захотите наоборот, уменьшить мощность сигнала вашего Wi-Fi роутера.
Как увеличить радиус действия Wi-Fi сети с помощью дополнительных устройств?
1
Установка репитера, или настройка второго роутера в режиме усилителя. Из всех рекомендаций, которые вы здесь увидите, или вообще найдете в интернете, этот способ самый эффективный и надежный. Правда, придется потратится на репитер.
Репитер (повторитель), это небольшое устройство, которое нужно установить в том месте, где сигнал вашего Wi-Fi еще есть, но он уже не очень сильный. А репитер просто будет расширять вашу главную сеть, т. е. «передавать» ее дальше. Об этих устройствах я подробно писал в статье: что такое Wi-Fi репетир (повторитель), как он работает, и что значит роутер в режиме репитера?
В качестве репитера могут выступать обычные роутеры. Вот инструкции по настройке роутеров ZyXEL и Asus в режиме повторителя:
- Настройка Zyxel Keenetic в режиме репитера (усилитель). Используем роутер Zyxel для расширения Wi-Fi сети
- Настройка роутера Asus в качестве репитера (режим повторителя Wi-Fi сети)
Если у вас Wi-Fi не «добивает» в какие-то комнаты, то установка повторителя решит эту проблему. А если у вас дом в несколько этажей, то на первом этаже можно установить роутер, а на втором репитер. Отличная и рабочая схема.
2
Смена антенн роутера на более мощные. Если на вашем роутере съемные антенны, то можно купить более мощные, и тем самым немного увеличить покрытие вашей сети. Почему немного? Да потому, что замена антенн как правило дает не очень хороший результат. Он есть, но не такой что бы увеличить радиус на несколько комнат. В любом случае, придется тратится на антенны. И мне кажется, что намного лучше потратить эти деньги на репитер. Да, он будет стоить дороже, но пользы от него намного больше.
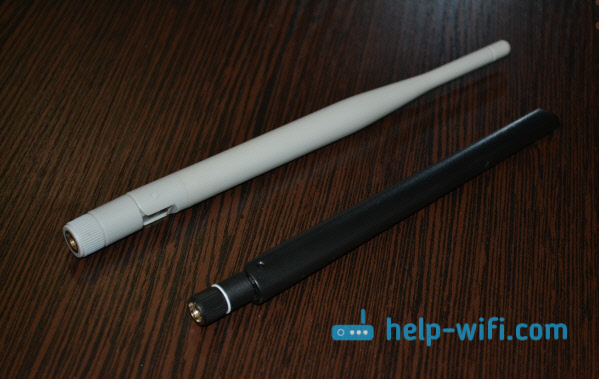
Если решите менять антенны, то берите мощные, с усилением в 8 dBi. Но, стоят они дорого, и несколько таких антенн будут стоить как повторитель.
Я уже писал статью по установке, и тестированию антенн TP-LINK TL-ANT2408CL, можете посмотреть результаты.
3
Покупка нового роутера, переход на 5 GHz. Можно купить более мощный, дорогой роутер. А лучше, роутер с поддержкой диапазона 5 GHz. В чем плюс диапазона 5 GHz? Он практически свободный, сейчас большинство всех сетей и других устройств работают в диапазоне 2.4 GHz. Меньше помех – больше скорости и более стабильная работа сети.
Есть такие места, где Wi-Fi сеть на 2.4 GHz практически не работает. Все время глючит, пропадает соединение, низкая скорость и т. д. А все из-за того, что там очень много разных сетей. Вот в таких случаях, переход на 5 GHz решает все проблемы.
Но покрытие сети в диапазоне 5 GHz будет меньше по сравнению с диапазоном 2.4 GHz. Такая особенность частоты 5 GHz.
Еще несколько советов по увеличению дальности Wi-Fi
1
Выберите правильное расположение вашего роутера. На самом деле, это очень хороший и эффективный совет. Как правило, все устанавливают маршрутизаторы при входе, или в каких-то дальних комнатах. Правильное расположение роутера позволит правильно распределить сигнал, тем самым увеличить дальность Wi-Fi.
Проще говоря, нужно устанавливать роутер как можно ближе к центру дома. Да, это не всегда получается, так как к роутеру нужно прокладывать кабель, а тянуть его на середину дома не очень удобно. Но, даже незначительные передвижения роутера, смогут увеличить уровень сети в нужных вам комнатах. А еще, нужно помнить о том, что стены это враг Wi-Fi сетей.
2
Самодельные усилители для Wi-Fi антенн. Можно найти много инструкций, в которых показано изготовление усилителей для роутера. Как правило, это обычная фольга, и жестяные банки. Получается, что если с одной стороны антенны поставить лист фольги, то сигнал будет от нее отбиваться и направляться в нужном нам направлении.
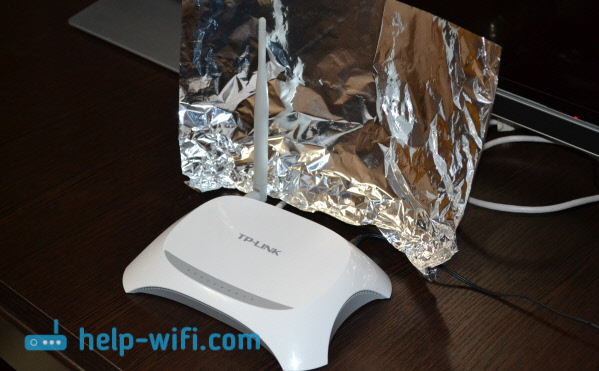
Я считаю, что это все ерунда. Во-первых, разрезанная банка из пива, или кусок фольги сзади роутера выглядит не очень красиво, а во-вторых, от этого нет практически никакого эффекта. Можете проверить.
Вот такие советы. Думаю, вы нашли для себя подходящий способ увеличить дальность Wi-Fi сети. Делитесь своими советами в комментариях!
Довольно распространенная ситуация: роутер есть, Wi-Fi раздается, однако есть пара «белых пятен», где прием неуверенный или отсутствует полностью. В частных домах это проявляется еще ярче и очень часто на половине участка (а порой и в половине дома) сеть «не ловится». Можно ли что-нибудь с этим сделать?
Располагаем роутер правильно
Часто место для роутера выбирают по удобству и эстетике: «Засунем его за шкаф, там и розетка рядом и в глаза не бросается». В расчет не принимается, что так роутер окажется в дальнем углу квартиры, а то и вовсе будет отделен от нее капитальной стеной. Поэтому иногда для исправления ситуации с приемом достаточно просто перенести роутер.
Где должен стоять роутер? Напрашивающийся ответ «в центре помещения» не всегда верен. Если квартира разделена капитальной стеной, роутер лучше поставить вплотную к ней, в большей по площади части квартиры. Не следует располагать роутер близко к источникам электрических помех — холодильникам, микроволновкам, стабилизаторам и т. п. Если в квартире есть зона с большим количеством клиентов беспроводной сети (например, кабинет или гостиная с домашним кинотеатром), имеет смысл расположить роутер ближе к ней.

Меняем и настраиваем антенны роутера
Если у вашего роутера антенны внутренние, то этот пункт можно пропустить — изменить форму зоны приема на нем не получится. А вот роутер с внешними антеннами частенько можно «подстроить» под форму жилища. В этом нам поможет коэффициент усиления антенн (обычно он приводится в характеристиках роутера). Чем коэффициент больше, тем больше радиус сети, однако следует иметь в виду, что увеличение дальности производится антенной за счет перераспределения сигнала в пространстве. Если коэффициент усиления близок к 1, то форма зоны приема вокруг антенны будет шарообразной, и дальность распространения сигнала при этом будет невелика — такой вариант лучше подходит для небольших двухэтажных зданий с площадью этажа в 50-100 м2.
Но у большинства антенн коэффициент усиления больше 1, а форма зоны приема вокруг них больше похожа на диск. То есть, по бокам антенны сигнал сильнее, чем сверху или снизу. Такая антенна лучше подойдет для одноэтажных помещений.
Многие современные роутеры имеют несколько каналов передачи — как правило, по количеству антенн (или пар антенн на более «продвинутых» моделях). Развернув антенны в разных направлениях, можно разнести зоны приема разных каналов по плоскостям — это также может пригодиться в частных домах с несколькими этажами.

Внешние антенны часто бывают съемными, и вы можете заменить их на более подходящие по характеристикам.
Антенны могут быть направленными — у них сигнал распространяется не во все стороны, а только в определенном секторе. Дальность приема в этом секторе значительно увеличится за счет перераспределения мощности радиоизлучения. Заменив антенну роутера на направленную, можно обеспечить уверенный прием в сильно вытянутой зоне, например, не только в основном доме, но и в беседке, расположенной метрах в 30 от дома.

Если же задача стоит в том, чтобы «растянуть» зону приема буквально на пару-тройку метров, можно воспользоваться насадкой на антенну. Эффект насадки не сравнить с использованием полноценной направленной антенны, но иногда именно её вполне достаточно. Да и стоит насадка намного меньше полноценной антенны.

Меняем настройки роутера
Изменение настроек роутера может помочь, если распространению сигнала мешают другие беспроводные сети. Например, если неподалеку расположен еще один роутер, раздающий Wi-Fi на том же канале, радиус покрытия вашей сети может сильно уменьшится. Переход на другой канал может решить эту проблему. Большинство роутеров способны сами определять наименее загруженный канал и использовать именно его — для этого лишь надо выставить «Auto» в списке каналов Wi-Fi.

Если такого варианта в настройках вашего роутера нет, вы можете определить загруженность каналов самостоятельно с помощью сотового телефона и специализированного приложения, например, Wifi Analyzer.
Обратите внимание, что на скриншотах диапазон 5 ГГц намного менее загружен. Так оно и есть в большинстве случаев, и переход на 5 ГГц может решить проблему плохой связи в условиях сильной «зашумленности» эфира.
Увы, далеко не все устройства поддерживают эту частоту. Перед тем, как переходить на нее, убедитесь, что все ваши клиенты (телефоны, компьютеры, телевизоры и т. д.) способны подключаться к сетям Wi-Fi частотой 5 ГГц.
Еще одна настройка, которая может помочь в распространении сигнала — мощность сигнала. Многие роутеры, имеющие эту опцию, лишь позволяют менять мощность в диапазоне от 0 до 100 % — нетрудно понять, что увеличению зоны приема это ничуть не поспособствует. Но есть модели, позволяющие поднять мощность сигнала выше стандартной, и в этом случае имеет смысл попробовать ее увеличить.

Однако имейте в виду, что мощность сигнала роутеров ограничена решением Государственной комиссии по радиочастотам, и максимальное значение параметра может увеличить мощность выше разрешенной. Никто, правда, особо не контролирует соблюдение этого ограничения, но тем не менее…
Добавляем роутеры
Если обстановка настолько сложна, что ничего из вышеперечисленного не помогает «покрыть» сетью нужную площадь, остается только увеличить количество роутеров. Это можно сделать несколькими способами. Эффект в каждом случае будет немного отличаться.
-
Установить еще один обычный роутер. Его можно как подключить к уже установленному как по Wi-Fi, так и с помощью кабеля RJ-45. При первом варианте не забудьте разнести каналы сетей, иначе они будут мешать друг другу. Подключение с RJ-45 надежнее и обычно обеспечивает большую скорость. Минус такой конструкции в том, что раздаваться будут фактически две разные сети, что может приводить к некоторым неудобствам. Некоторые клиенты, например, подключившись к первой сети, будут продолжать «цепляться» за нее, даже когда вы перейдете в зону, где будет уверенный прием второй сети, а сигнал первой принимается слабо.

- Установить повторитель wi-fi или второй роутер в режиме повторителя. Это похоже на предыдущий вариант — различные модели повторителей также можно подключить к основному роутеру по Wi-Fi или витой паре. А вот второй в таком режиме можно подключить только в том случае, если его прошивка позволяет такой вариант использования. Режим повторителя есть, к примеру, на многих моделях Asus и ZyXEL.
 Настройка репитера очень проста: часто для расширения сети достаточно включить повторитель в розетку и нажать кнопку WPS на обеих устройства. Еще один плюс данного решения в том, что сеть будет одна, с одним именем и одним паролем — переключение между роутерами осуществляется почти незаметно. «Почти», потому что некоторые сетевые активности будут прерываться при переходе от роутера к повторителю и обратно — закачки файлов, звонки через мессенджеры и т. п.
 -
Репитер способен ретранслировать только одну сеть. Если роутер раздает две сети (основную и гостевую, например), повторитель будет раздавать только одну.
- Установить Mesh-роутеры. Mesh-система — самый «продвинутый» вариант построения большой сети Wi-Fi. В этом варианте сеть раздается одна. Благодаря специальному расширению протокола 802.11 для многоточечных сетей, переход клиента от передатчика к передатчику происходит совершенно незаметно. Mesh-системы обладают широчайшими возможностями по расширению (могут насчитывать до сотен роутеров и покрывать квадратные километры площади), но стоят такие решения пока что дороже любых других.

Как видите, слабый прием сети — проблема несложная. Нужно только определиться с тем, как и насколько вам нужно расширить сеть и сколько вы готовы на это потратить.